
I got a request from an internal team to get notified when a new post on this blog goes live. It seemed like something one should be able to do without too much effort. So I set aside about an hour to figure something out and now I want to share what I came up with to solve this problem. This same method could be used to integrate almost any services easily, quickly, and without investments in infrastructure.
I don’t want to manage an application or infrastructure, so I’m going to use a couple of third party services here. The data flow is first from an RSS feed into Zapier, then use a web hook to push that data into webscript.io which transforms the data into a message payload that is then pushed into HipChat. Zapier has a HipChat integration – but it requires an admin token for the HipChat account. I’m interested in reducing the scope of access this integration has down to one or a few rooms only. I also want to have the flexibility to transform the data that using webscript.io can offer
First off I know I need to get data into HipChat, thankfully we have build your own integrations with HipChat.
Log into hipchat.com, and go to Rooms > Integrations > Find New. From there, click on "Build Your Own".
I’ll start with naming my integration, in this case RSS Bot works fine. The next page gives me the details I need, most notably a handily named URL I’ll need later, Send messages to this room by posting to this URL.
The external piece I need is a place to transform data and push it into HipChat. A webscript.io endpoint can be made to do just about anything using Lua so I’m going to do that.
-
Sign up for a free account
-
Click Create a new script…
-
Choose a subdomain and path for the endpoint. I’ll select
rss-to-hipchat.webscript.io/new-rss.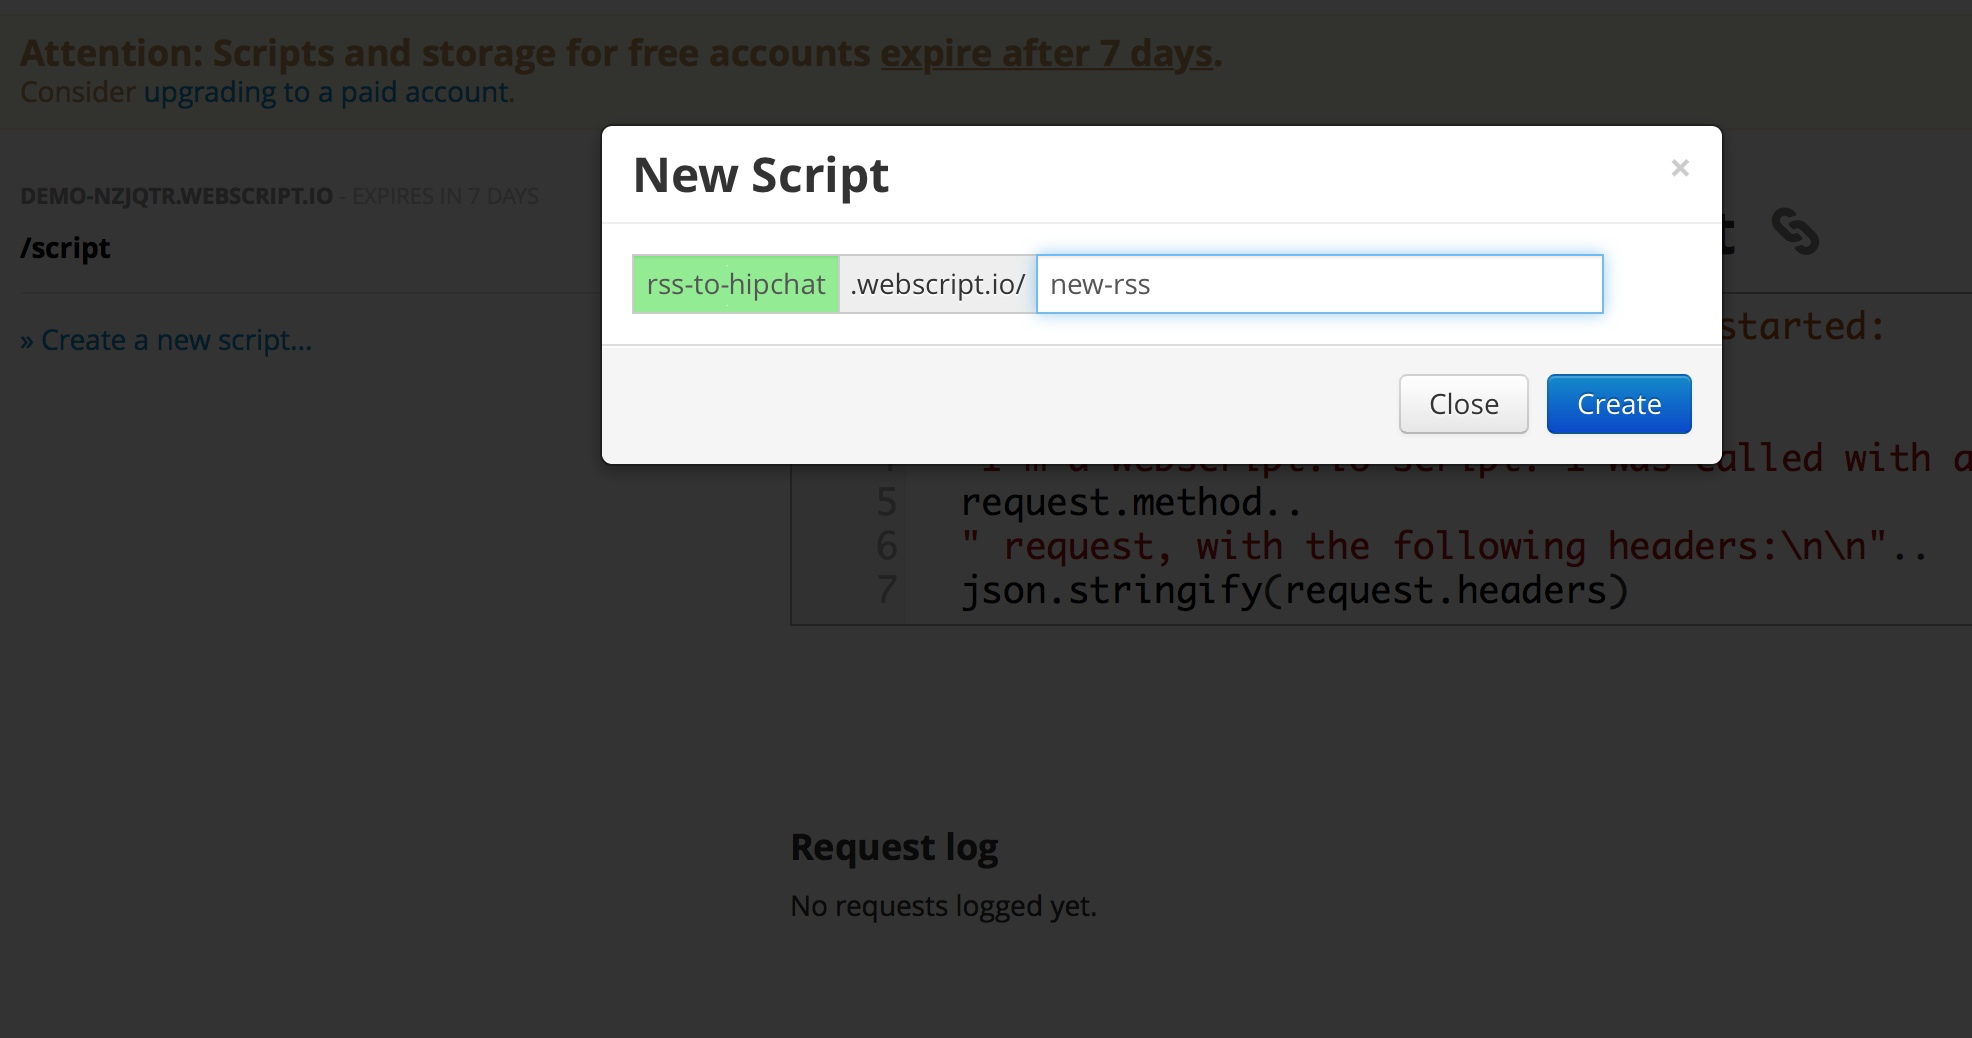
Now that’s for the transformation I want to do. To get each new feed item over to my webscript.io endpoint, Zapier comes into play. Zapier trigger actions based upon RSS updates.
-
Sign up for a free account with Zapier
-
Click Make a New Zap button to start an integration
-
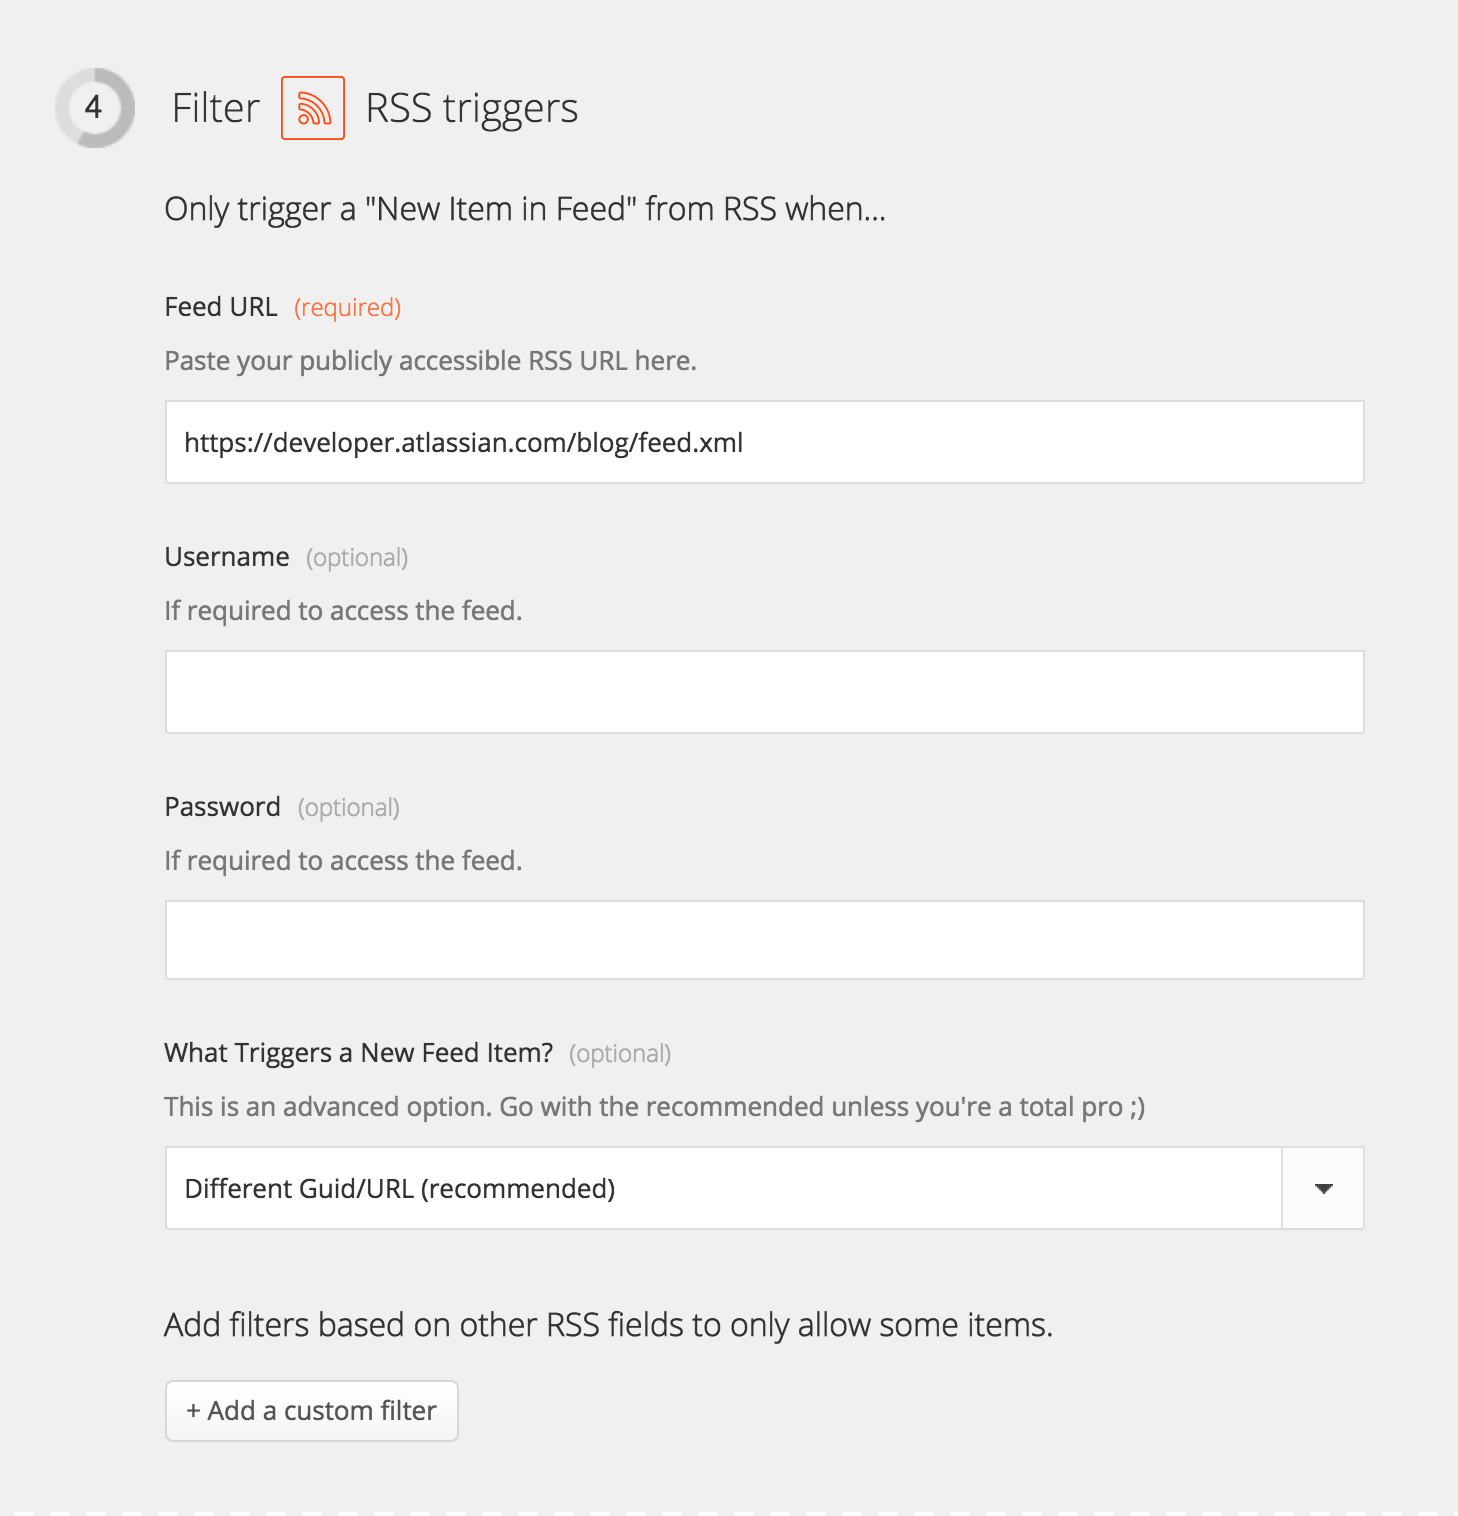
For the trigger, select “RSS” then “New Item in Feed”
-
For the action, select “Web Hook” then “POST” — at this point one could just integrate directly with HipChat but that requires a admin token rather than a room token and we want to scope the access of this integration to just a single room
-
Click Continue to move forward to the configuration screens
-
Put the RSS feed into the URL field
-
For the web hook section, we start by putting in the URL for the webscript endpoint; e.g.
rss-to-hipchat.webscript.io/new-rss -
Select json as the payload type
-
Configure the payload by adding 3 fields
-
urlto Link -
titleto Title -
dateto Pub Date

-
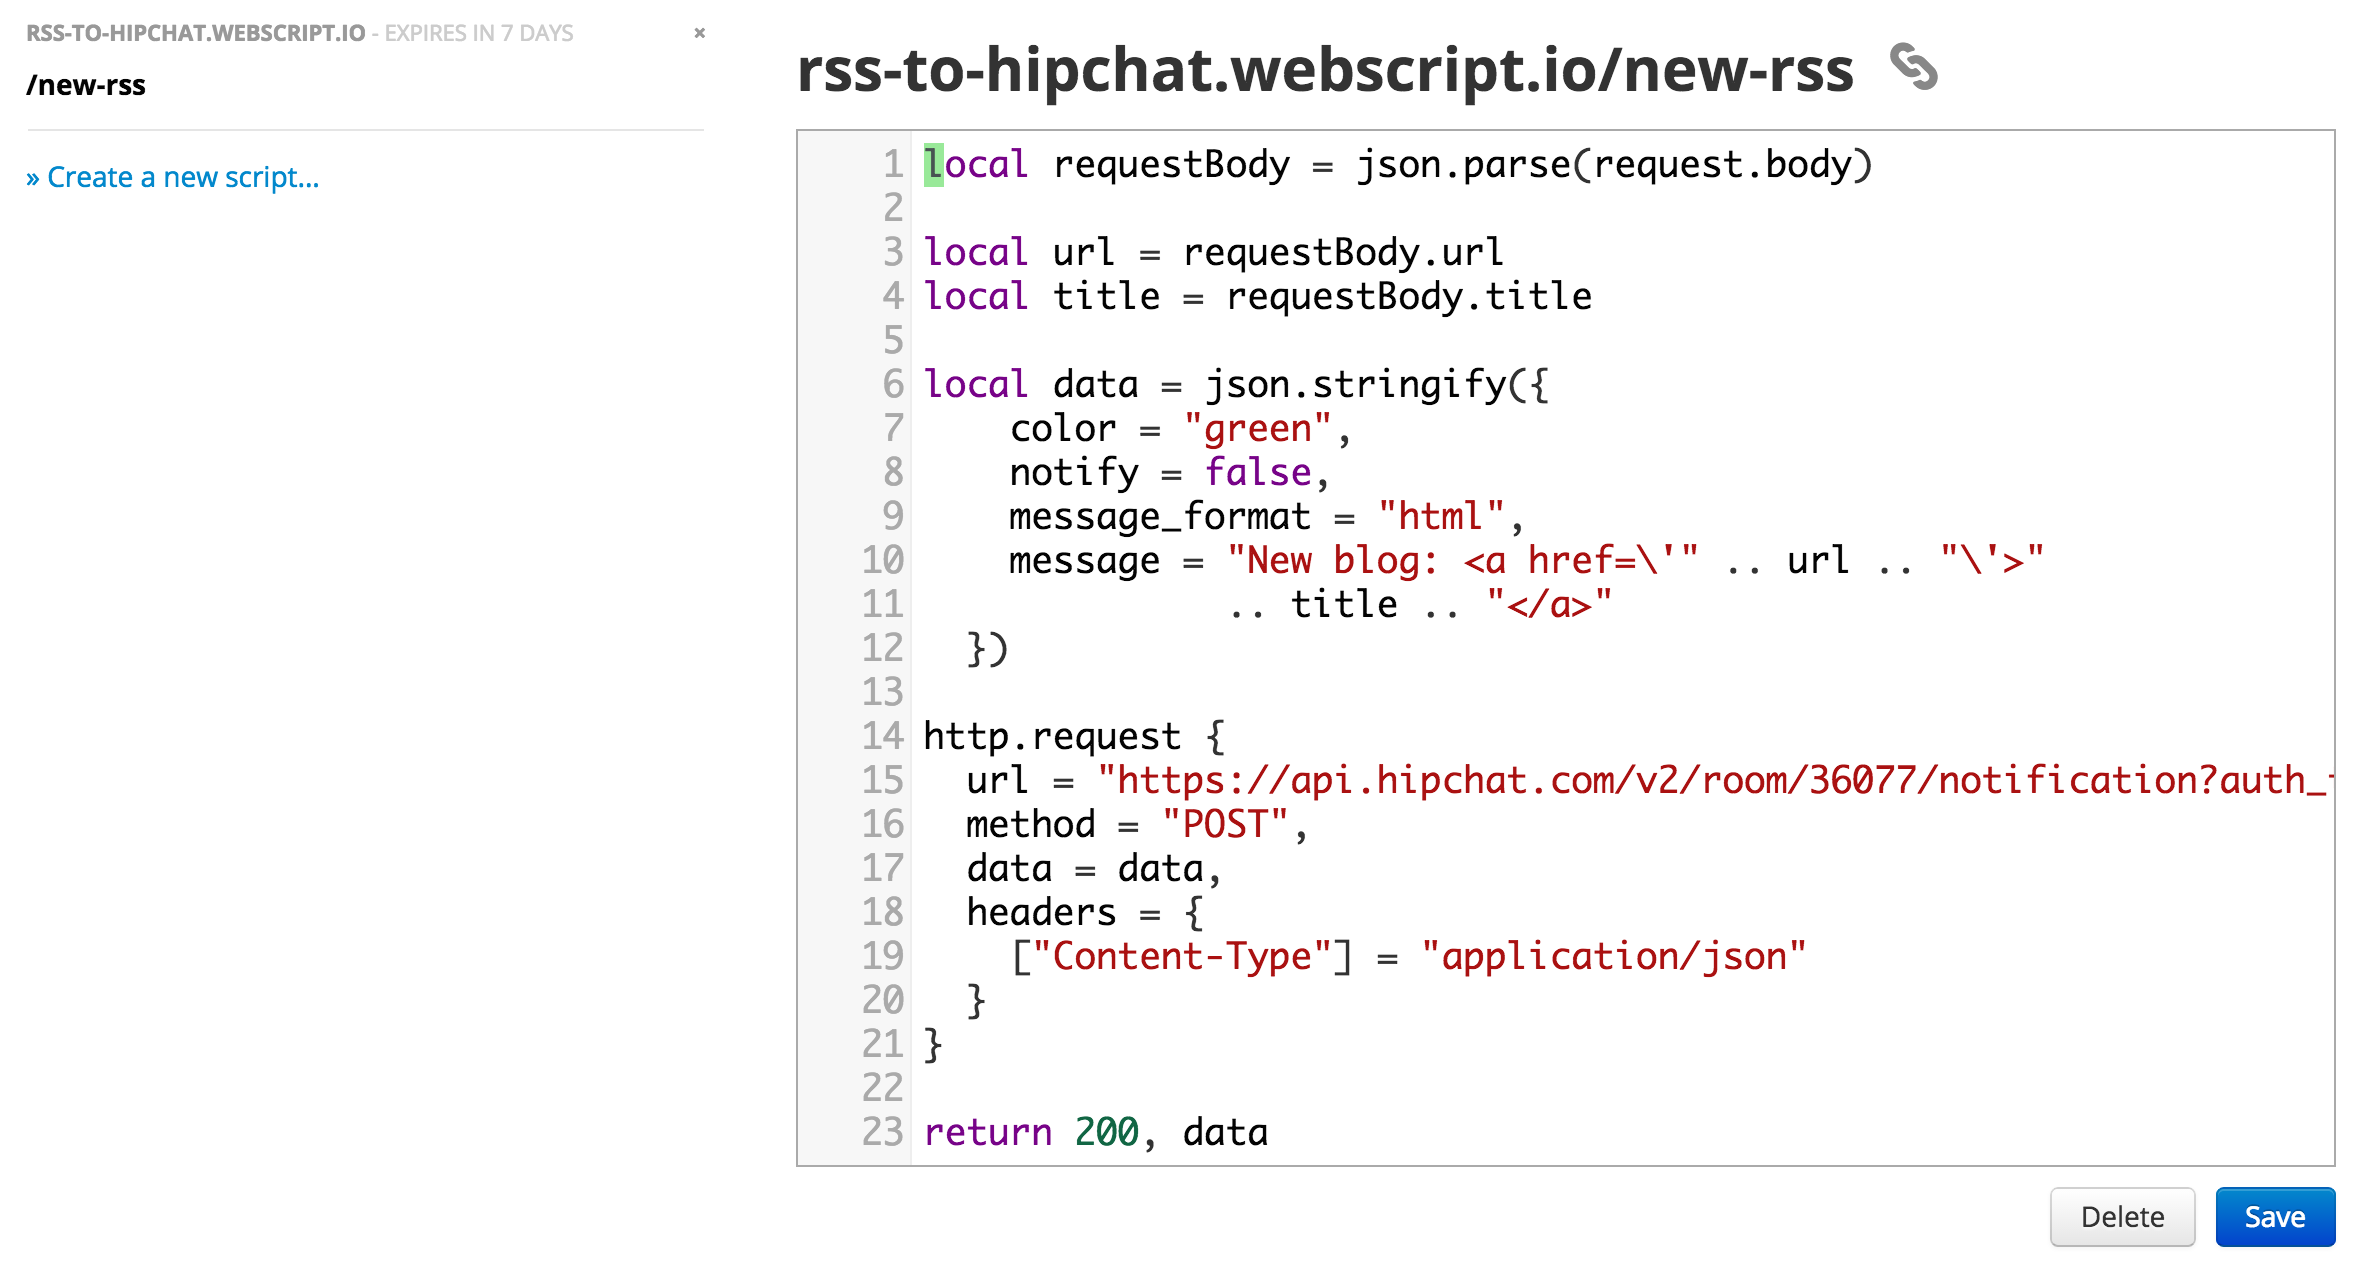
Configuring Zapier is now done, but before testing the webscript endpoint needs to be written. Going back to webscript.io and filling out the endpoint, by putting in the Lua code, converts posted payloads to messages that appear in a given HipChat room.
-- parse the POST body from Zapier

local requestBody = json.parse(request.body)

local url = requestBody.url

local title = requestBody.title

-- generate the data to push to HipChat

local data = json.stringify({

        color = "green",

        notify = false,

        message_format = "html",

        message = "New blog: <a href='" .. url .. "'>" .. title .. "</a>"

    })

-- make the request to HipChat

-- replace the URL with one from the first steps so it includes an auth token and the right room id (not 55555)

-- or see https://www.hipchat.com/docs/apiv2/auth if help is needed with tokens

-- or see https://www.hipchat.com/docs/apiv2/method/send_room_notification for information about this API

http.request {

    url = "https://api.hipchat.com/v2/room/55555/notification?auth_token=...",

    method = "POST",

    data = data,

    headers = {

        ["Content-Type"] = "application/json"

    }

}

-- we return an http status of 200 (OK) and the data we're posting to HipChat

--   just so we can examine the data during testing.

return 200, data
So it will look something like this:
With the endpoint built, httpie makes it easy to test. Executing this command posts a JSON payload to the endpoint on webscript and it should post a message to the configured HipChat room. If you get a 500 error, webscript provides logs below the script entry you can expand to help debug what’s going wrong. Make sure the URL of the http.request is updated, including the correct room id and auth token.
$ http post rss-to-hipchat.webscript.io/new-rss url=https://developer.atlassian.com/blog/2015/01/work-with-git-and-perforce/ "date=Fri, 13 Feb 2015 16:00:00 GMT" "title=Working with Git and Perforce: integration workflow"

  HTTP/1.1 200 OK

  Access-Control-Allow-Origin: *

  Cache-Control: no-store

  Connection: keep-alive

  Content-Length: 224

  Content-Type: text/plain

  Date: Fri, 13 Feb 2015 18:38:52 GMT

  Server: nginx/1.2.1

  X-Frame-Options: SAMEORIGIN

  {"color": "green", "message": "New blog: <a href='https://developer.atlassian.com/blog/2015/01/work-with-git-and-perforce/'>Working with Git and Perforce: integration workflow</a>", "notify": false, "message_format": "html"}
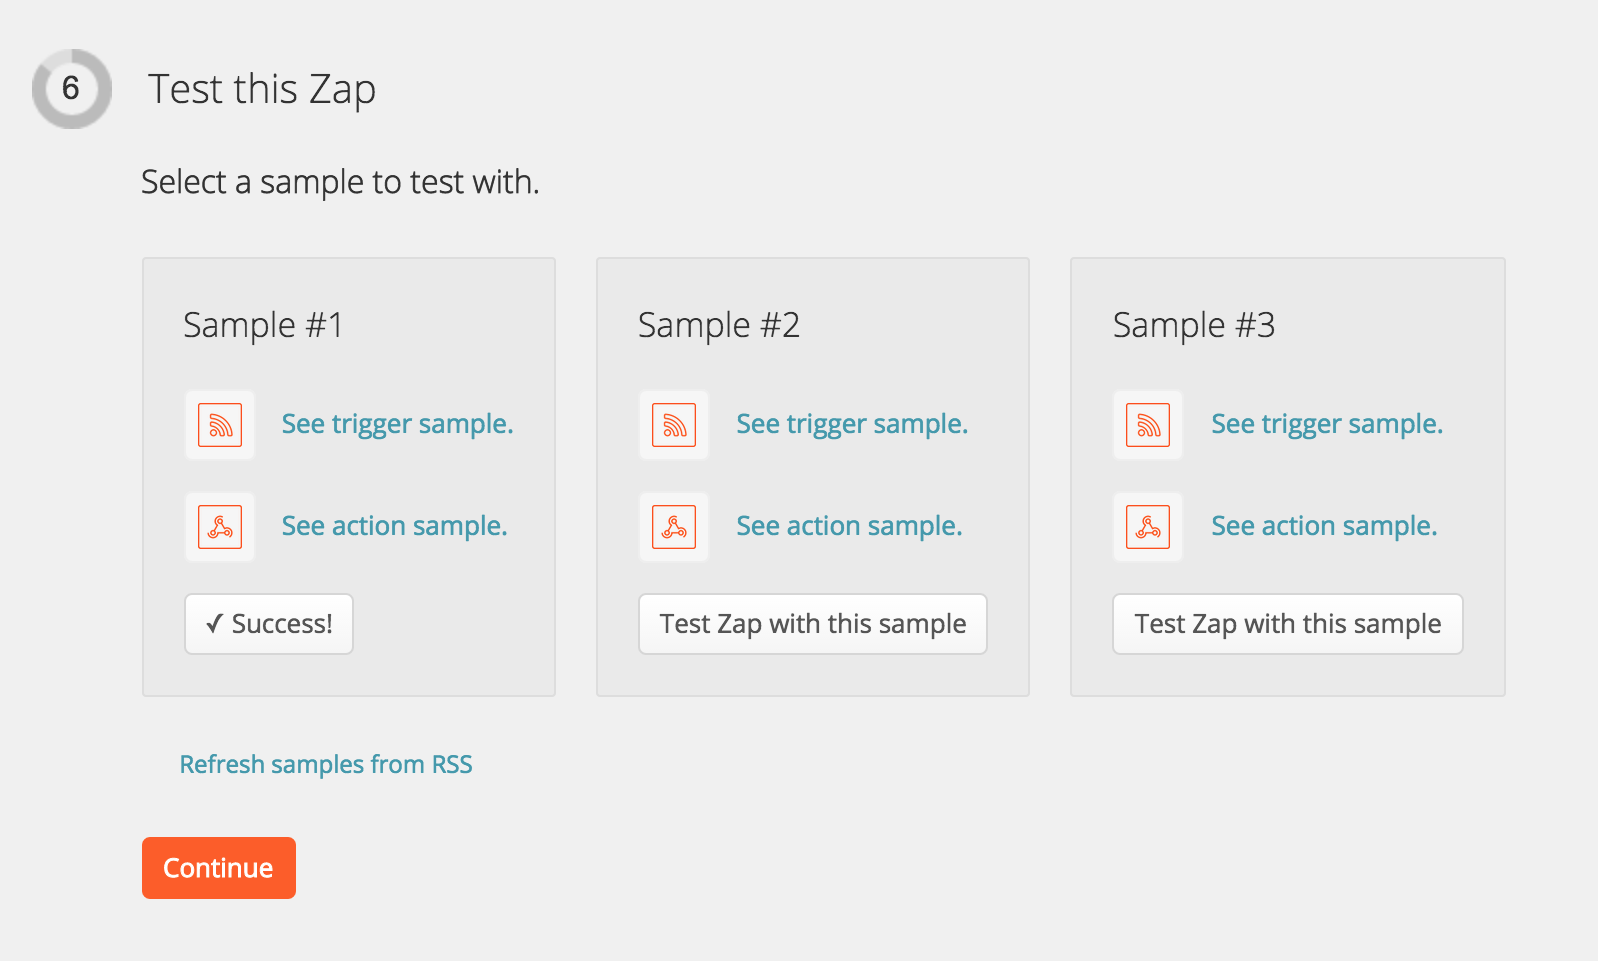
Assuming that works, and the message is visible in the HipChat room, the final step is to use the tester in Zapier to make sure everything is hooked up right front-to-back.
With these tools, I can quite easily take any data source and transform it however I want and send it into HipChat. I can also notify multiple rooms in one go just by adding additional http.request calls to the webscript endpoint. All of this without building or deploying any infrastructure – just using existing services hooked together.