
Bitbucket recently released a new add-on module type: the FileView. FileViews allow you to define how files of a particular type are displayed on the Bitbucket source view page. In this post, I’ll show you how I built Run, Bucket, Run: a fun, if somewhat inefficient, way to view your source.
FileViews are great for building all sorts of things. You can visualize a binary filetype that isn’t natively supported by Bitbucket, like 3D STLs or OBJs, or office documents or Keynote files. Or you can provide an enhanced experience for viewing specialized types of text files, like linking modules from package.json to their source repository.
Or, you can build something almost totally useless but mildly entertaining, like me.
I love video games, and procedurally generated content is a concept that’s fascinated me for a while. So I built a simple platform game that generates levels from your source code. Each platform represents a single line of code (LOC), with the platform length corresponding to the line length, and the platform elevation corresponding to the indent of the line (the deeper the indent, the higher the platform). This means that long line translate to bigger platforms, and code styles that make heavy use of whitespace translate to more interesting levels.
You can play Run, Bucket, Run for any source file you like by installing the add-on on Bitbucket. But since a Bitbucket add-on is really just a standalone web application, you can also play it in “quine mode” right here in this iframe:
“Quine mode” is when the game uses it’s own source code to generate the level. If you’re curious, getting the source of a the current HTML document is pretty simple:
var mySource = document.documentElement.innerHTML;
initGame(mySource);
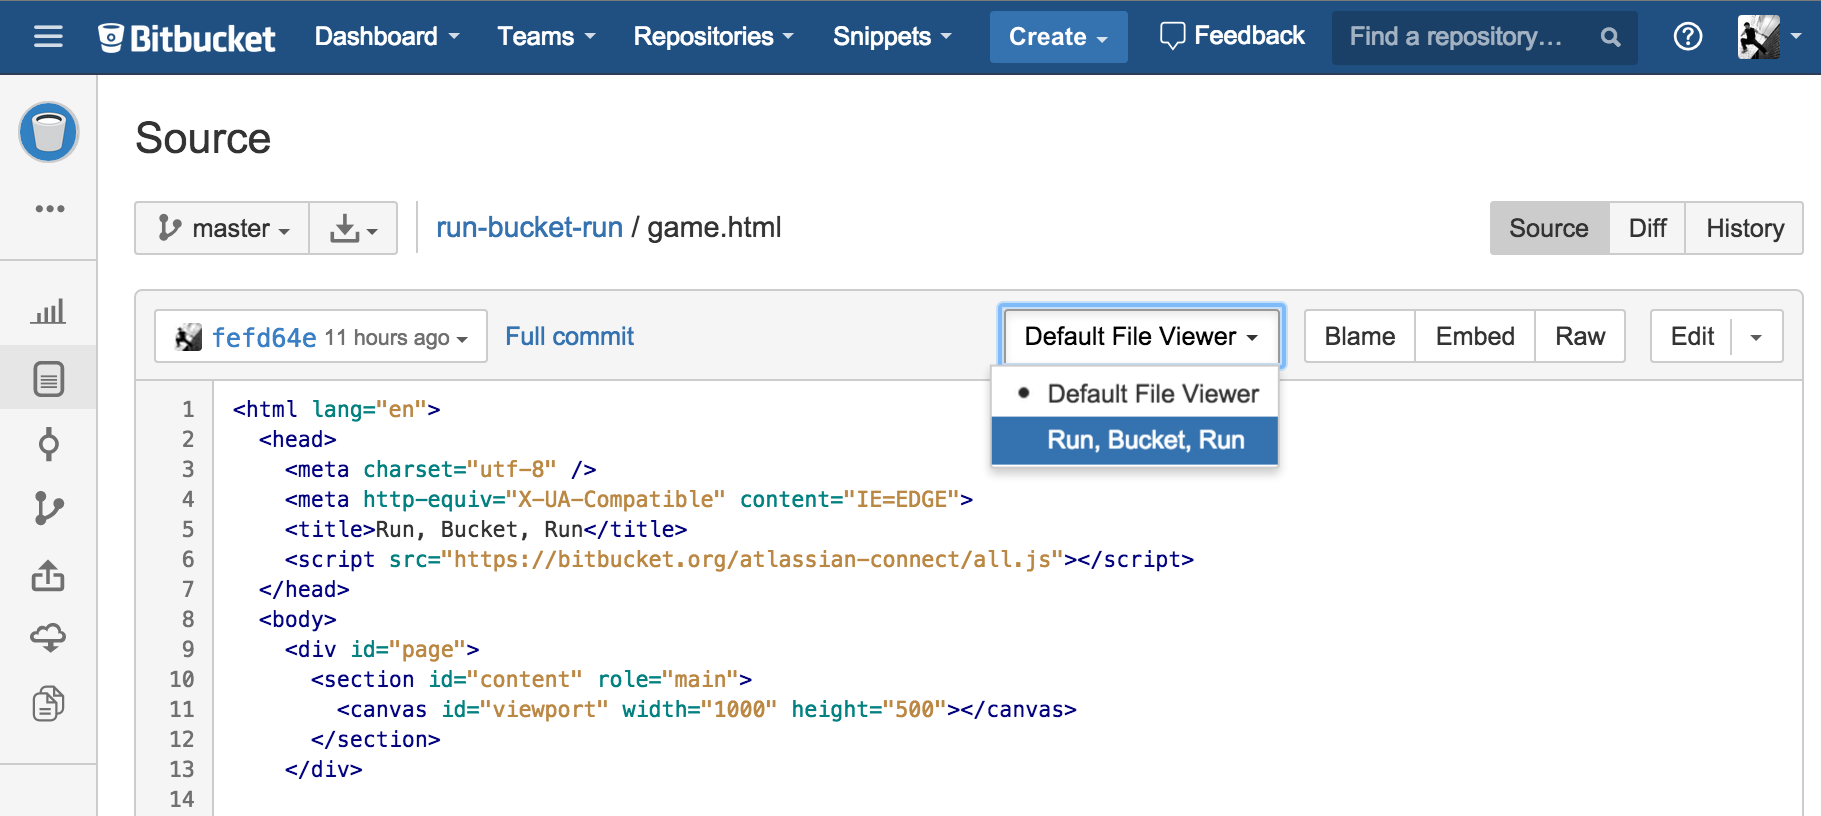
Run, Bucket, Run is a static HTML5 application comprised of two important files: game.html, which contains the game logic, and connect.json, which is a Bitbucket add-on descriptor that contains all the information needed to make it installable in Bitbucket.
game.html
The game is built on the HTML5 Canvas API. One of my goals was to write the game with zero dependencies, so that to finish the game you must navigate the entire source of the game. In order to acheive this I built a simple physics engine and rendering pipeline from scratch. Take a look at the source and you’ll realize pretty quickly that this is both my first time working with Canvas and writing a platform game, but I’m pretty happy with the final experience.
I won’t go into detail about the gameplay mechanics here, but I’ve left fairly verbose comments in the source if you’re curious. The more interesting part is how we wire it into Bitbucket as an Atlassian Connect add-on.
connect.json
As I mentioned earlier, a Bitbucket add-on is a basic web application that exposes a JSON descriptor documenting the various end-points and add-on modules that it supports.
Here’s the descriptor for Run, Bucket, Run:
{

  key: "run-bucket-run",
  name: "Run, Bucket, Run!",
  description: "An incredibly inefficient source viewer.",
  baseUrl: "https://run-bucket-run.aerobatic.io/",
  modules: {
    fileViews: [
      {
        key: "game",
        name: {
          value: "Run, Bucket, Run"
        },
        url: "/game.html?repo={repo_uuid}&cset={file_cset}&path={file_path}&name={file_name}",
        file_matches: { },
        conditions: [
          {
            condition: "is_binary",
            invert: true
          }
        ]
      }
    ],
    oauthConsumer: {
      clientId: "Ss8dQHwm4RaeMqCaak"
    }
  },
  scopes: [
    "repository"
  ],
  contexts: [
    "personal"
  ]
}
If you like, you play the descriptor too (my high score is 0x0000088b). There’s quite a lot going on there, so let’s break it down:
{
  key: "run-bucket-run",
  name: "Run, Bucket, Run!",
  description: "An incredibly inefficient source viewer.",
  ...
This is some meta-data about the add-on, this will end up being used to list it in Bitbucket’s Find new add-ons screen.
...

  baseUrl: "https://run-bucket-run.aerobatic.io/",

...
The baseUrl specifies where the add-on is hosted. I’m actually using another Bitbucket add-on – Aerobatic – to host Run, Bucket, Run. Aerobatic supports a really nice continuous deployment flow for static HTML5 web apps straight from Bitbucket repositories. If you have a Bitbucket repository containing a web site, check them out, their deployment flow is very slick.
...

 modules: {
    fileViews: [
      {
        key: "game",
        name: {
          value: "Run, Bucket, Run"
        },
        url: "/game.html?repo={repo_uuid}&cset={file_cset}&path={file_path}&name={file_name}",
        file_matches: { },
        conditions: [
          {
            condition: "is_binary",
            invert: true
          }
        ]
      }
    ],
...
The modules section is the meat of the add-on. This is where we define the areas of the Bitbucket UI that our add-on will augment. There are a bunch of different supported modules, but in this case we’re just adding a single fileView. Here’s what the various properties mean:
key: "game"- Identifier for the module. Must be unique within this add-on.
name: {value: "Run, Bucket, Run"}- Name for the module. This will be displayed in the FileView drop down in the UI.
url: "/game.html?repo={repo_uuid}&cset={file_cset}&path={file_path}..."- URL of
game.html, relative to thebaseUrlwe specified above. This property is actually a URL template: the{}context parameters are substituted at runtime with the current repository, commit and file that the user is viewing. You can find out the other context parameters Bitbucket support by installing the Location, Location, Location add-on. file_matches: {}- Constrains which file types the viewer supports. Since the game can work with any text file, I chose not to specify any constraints. If you’re curious, the Bitbucket Source Cloud is a good example add-on that limits itself to certain extensions and filenames.
conditions: [{condition: "is_binary", invert: true}]- Although we support any text file, the game won’t work very well with binary files (they don’t contain many newlines). Specifying an inverted
is_binarycondition means that our viewer will only show up for non-binary files (i.e. text).
...

  oauthConsumer: {
    clientId: "Ss8dQHwm4RaeMqCaak"
  }
...
All Bitbucket add-ons must specify an oauthConsumer. In our case, it will be used to allow us to make requests on behalf of the user playing the game to retrieve file contents from their repositories.
...
  scopes: [
    "repository"
  ],
...
Scopes are the permissions that an add-on requires users grant it in order to operate. Run, Bucket, Run requires only the repository scope in order to retrieve source file content, but there are plenty of others available that allow add-ons to take other actions.
...
  contexts: [
    "personal"
  ]
}
Contexts describe how the add-on is installed. There are two possible values: account and personal. The account context means the add-on is enabled for all repositories owned by the user or team that installs the add-on, and is visible to all users that browse the repository. The personal context means the add-on is visible only to the user who installs it, but is enabled on all repositories that they browse to. I’ve made Run, Bucket, Run a personal add-on so you can “play” any source code that you come across, regardless of who owns the repository.
Whew. That’s probably enough about connect.json for now. There’s just one other thing we need to do to make our add-on installable in Bitbucket.
The cross-frame JavaScript bridge
In order to securely sandbox third-party code, Bitbucket embeds add-ons in an iframe. But not any ordinary iframe. The Atlassian Connect framework provides a JavaScript bridge that allows the add-on to breakout of it’s sandbox and communicate with the Bitbucket host page via a cross-frame API. The API allows you to display dialogs and status messages, resize the iframe, access local storage and subscribe to events published by other frames. To set up the bridge, you simply need to include a special script file, all.js served from Bitbucket.
<head>
  <title>Run, Bucket, Run</title>
  <script src="https://bitbucket.org/atlassian-connect/all.js"></script>
</head>
The bridge also exposes a library named request that allows add-ons to send requests to the Bitbucket REST API, authenticated as the current user. The add-on is only able to access REST resources that correspond to the scopes declared in its descriptor and oauthConsumer. Run, Bucket, Run uses this to retrieve the file text content used to generate the level:
AP.require('request', function(request) {

  var srcRawUrl = '/1.0/repositories/{}/' + RBR.queryParam('repo') +
          '/raw/' + RBR.queryParam('cset') +
          '/' + RBR.queryParam('path');

  request({
    url: srcRawUrl,
    responseType: "text/plain",
    success: function (rawSrc) {
      reinitGame(rawSrc);
    },
    error: function(err) {
      document.querySelector("#content").innerHTML =
      "Failed to load source file from Bitbucket. (" + JSON.stringify(err) + ")";
    }
  });

});
In the code above, the srcRawUrl variable is initialized with a URL targeting Bitbucket’s source REST resource, which we have access to thanks to the repository scope declared in connect.json. To construct the URL, we also need to know the context repository, commit and file path that the user is viewing with Run, Bucket, Run. These are taken from the URL of our iframe, as Bitbucket substitutes the {repo}, {cset} and {path} tokens in the url property of our fileView module for the appropriate values from the current context, so:
url: "/game.html?repo={repo_uuid}&cset={file_cset}&path={file_path}&name={file_name}"
becomes:
/game.html?repo={3b49d567-0263...}&cset=babecafe...&path=src/test.py&name=test.py
The ability to make cross-frame requests is especially convenient as it allows our add-on to be completely static and written entirely in simple client-side HTML, CSS & JavaScript. This in turn makes it responsive, scalable and keeps hosting costs negligible.
A note on security
The security conscious among you might be wondering why we would let an add-on make API requests on your behalf, even if they are scopes. In fact, I skipped over a small but important step in the flow. The first time an add-on attempts to make a cross-frame request, Bitbucket will actually prompt the user to see if they’re happy to allow the add-on to act on their behalf.

This prompt is triggered automatically by invoking the request function shown above. Once the user has granted the add-on access, the request automatically proceeds. If they refuse, the add-on’s error handler is called.
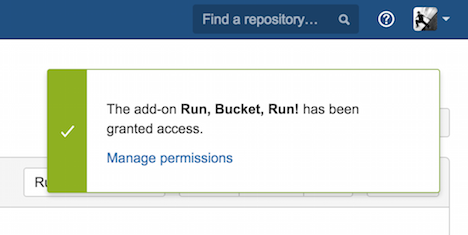
This is pretty neat as Bitbucket does all the heavy lifting of rendering the dialog and prompting the user, all the add-on developer has to do is call request!
Phew!
Thanks for reading this long-ish post! If you’re curious about add-on development, head on over to the Bitbucket developer docs and try out the five minute tutorial. If you liked the music and SFX, you should send some love to my bro, Matt who put together all of the awesome audio used in Run, Bucket, Run. If you have any questions about Bitbucket or add-on development, drop me a line on twitter (I’m @kannonboy).