
Running Atlassian’s Bamboo infrastructure for the last two years has helped to instill in me a huge appreciation for continuous integration and continuous deployment. I guess it was inevitable that I’d end up adopting these techniques in my own projects. But my own projects are mostly embedded code based on the Arduino platform, which has historically been fairly hard to automate. Getting to the point of being able to build and test (and deploy!) Arduino code with Bamboo has been a fun journey.
Moving away from the Arduino IDE
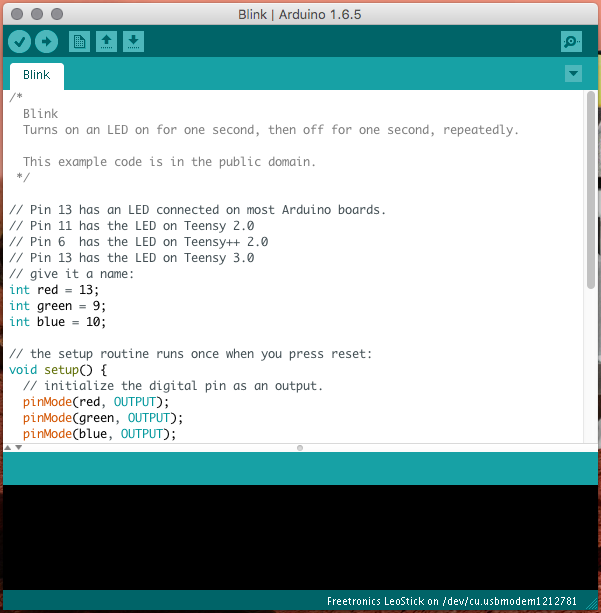
The Arduino environment consists of a Java-based IDE, with an integrated gcc cross compiler and the avrdude utility for uploading code to an Arduino board. For new users it’s a very easy, accessible way to start writing code and get it running. But it’s not the most pleasant editing experience around. The very first thing most people with any development experience will want to do is go in to the preferences and enable the “use external editor” option. This lets you edit sketches in your preferred editor, and use the IDE just as a front-end for compiling and uploading code.
The next step is getting rid of the IDE UI altogether. For a while this has been a fairly difficult thing to accomplish, but recent versions of the Arduino software have included a reasonably full-featured command line interface. Building and uploading Arduino sketches, as well as a few functions related to maintaining 3rd party libraries, are now trivial from a shell prompt without having to fall back on the GUI. And it’s just as easy to integrate these functions with your favourite build automation tool. I like make for my Arduino projects, as it’s simple and ubiquitous.
Here’s the Makefile that I’ve been including in my projects for a while. It invokes the arduino utility as you’d expect, as well as adding a few options that will become important later.
# Arduino makefile
# Uses the Arduino IDE in commandline mode to build/install sketches.
#
# Environment variables:
# ARDUINO_BOARD: Overrides the target board.
#   See https://github.com/arduino/Arduino/blob/ide-1.5.x/build/shared/manpage.adoc
#   for how to specify the board.
# ARDUINO_PORT: Overrides the serial port the Arduino is attached to.
# ARDUINO_PREFS: Optionally sets a custom preferences file for Arduino IDE
# ARDUINO_VERBOSE: If set, passes the debug flag to arduino env.
# ARDUINO_XVFB: If set, run arduino with the xvfb-run wrapper.
#
# This Makefile is in the public domain.

# Hardcoded options:
# This is for an Uno compatible board
BOARD=arduino:avr:uno
PORT=/dev/tty.usbmodem1411
# on my Mac, I symlink ~/bin/arduino to
# /Applications/Arduino.app/Contents/MacOS/Arduino
# to ensure this runs properly on both Linux and OS X.
ARDUINOCMD=arduino

# This emulates the Arduino IDE's requirement for
# putting a project in a folder of the same name
INO=$(notdir $(CURDIR)).ino

# Overrides
ifdef ARDUINO_BOARD
    BOARD=$(ARDUINO_BOARD)
endif

ifdef ARDUINO_PORT
    PORT=$(ARDUINO_PORT)
endif

FLAGS = --board $(BOARD) --port $(PORT)
ifdef ARDUINO_VERBOSE
    FLAGS += -v
endif

ifdef ARDUINO_PREFS
    FLAGS += --preferences-file $(ARDUINO_PREFS)
endif

ifdef ARDUINO_XVFB
    ARDUINOCMD := xvfb-run -a $(ARDUINOCMD)
endif

all:
    $(ARDUINOCMD) $(FLAGS) --verify $(PWD)/$(INO)
install:
    $(ARDUINOCMD) $(FLAGS) --upload $(PWD)/$(INO)
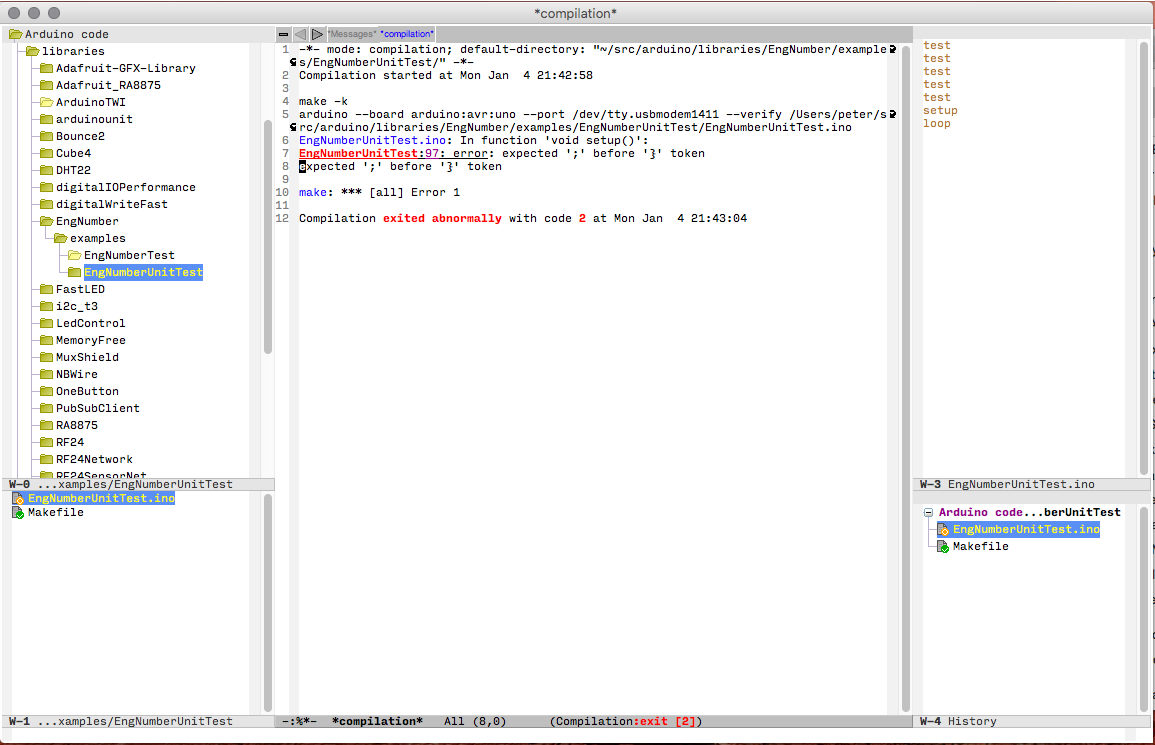
Now as well as using your favourite editor to write code, it should have full control over the build/upload process. For me, this means using the compilation mode in emacs to manage my entire Arduino workflow. And it does so in a sketch folder that’s still completely compatible with Arduino IDE usage.
Arduino continuous integration
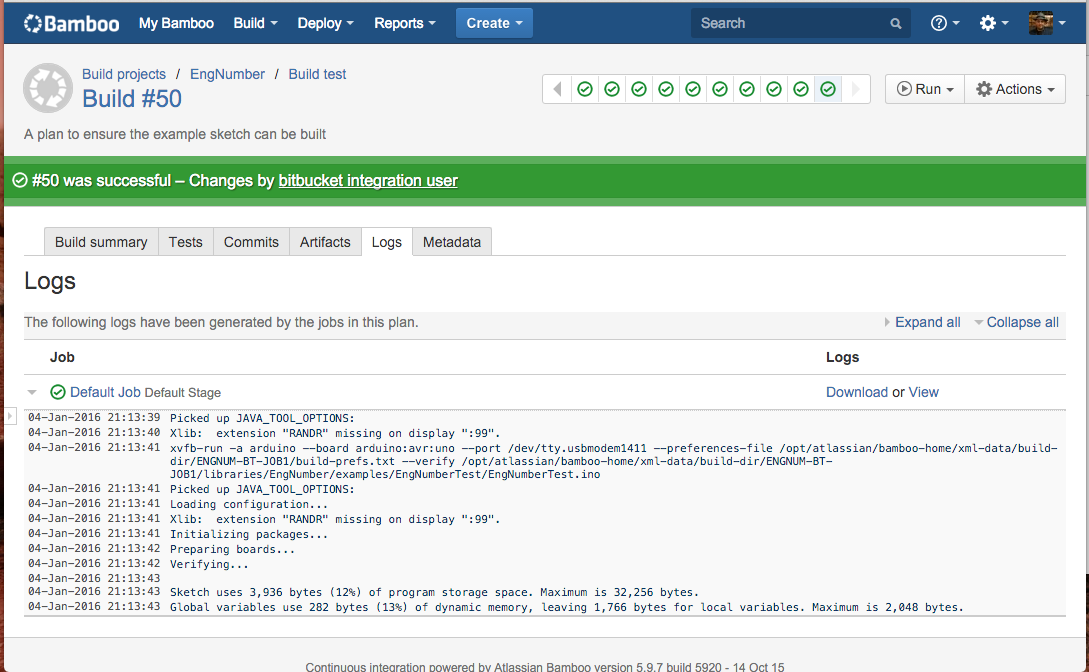
The obvious next step is using Bamboo to verify (Arduino-ese for “make sure it compiles without error”) Arduino sketches. This is fairly straightforward, the only complication being that I wanted to ensure the entire build is sandboxed in the build directory. This is done by creating a custom Arduino IDE configuration and changing the sketchbook.path parameter. So my Arduino build job starts with a Script Task that does this:
# Copy default preferences to build dir
cp ~/.arduino15/preferences.txt $PWD/build-prefs.txt

# Change prefs to use build dir as sketchbook dir
# xvfb-run is required as the Arduino IDE insists on
# popping up a splashscreen even when running in commandline mode.
xvfb-run -a arduino
  --preferences-file $PWD/build-prefs.txt
  --pref sketchbook.path=$PWD
# Install library dependencies
# This is a semi-contrived example...
xvfb-run -a arduino
  --preferences-file $PWD/build-prefs.txt
  --install-library "Adafruit DHT Unified"
(I run Bamboo on a linux server at home, with a single local agent. This is a Debian machine, and apart from the Arduino IDE I’ve also installed the xvfb package so that Bamboo can run a headless X server to keep the Arduino IDE happy.)
A Source Code Checkout Task should then checkout your repository to a subdirectory. The Arduino IDE mandates that a sketch file should reside in a directory with the same name, so if you’re building the Blink example sketch, check it out to a subdirectory named Blink. After that, all you need is a basic Script Task to set some environment variables to configure the Makefile and run make. My task simply runs:
export ARDUINO_PREFS=$PWD/build-prefs.txt
export ARDUINO_XVFB=true
export ARDUINO_BOARD=arduino:avr:uno
cd Blink
make
I added a final Script Task to run killall Xvfb because occasionally xvfb-run hangs around, and that’s really all there is to basic sketch validation.
Arduino unit testing
Code needs to be unit tested. Arduino code is no exception. And the only reliable way I’ve found to unit test Arduino code is to run it on an actual microcontroller. Emulators are difficult to use at best. I’ve adopted the ArduinoUnit framework, which runs tests in a sketch running on the chip, and writes results to a serial connection. It’s super easy to get up and running with it.
Here’s an example ArduinoUnit sketch for EngNumber, a little library for converting floats to engineering notation for display on fixed-width LCDs.
/* EngNumberUnitTest
   Testing the EngNumber library with the arduinounit unit testing framework.
   Requires arduinounit library ( https://github.com/mmurdoch/arduinounit ).

   Peter Hardy
*/
#include <EngNumber.h>
#include <ArduinoUnit.h>

test(basic_conversion)
{
  // Asserting 1234 is converted to 1.234*10^3
  float x = 1234;
  EngNumber basicIntegerNum;
  floatToEng(x, &basicIntegerNum);

  assertEqual(basicIntegerNum.negative, false);
  assertEqual(basicIntegerNum.digits[0], 1);
  assertEqual(basicIntegerNum.digits[1], 2);
  assertEqual(basicIntegerNum.digits[2], 3);
  assertEqual(basicIntegerNum.digits[3], 4);
  assertEqual(basicIntegerNum.dp, 0);
  assertEqual(basicIntegerNum.exponent, 3);
}

void setup() {
  delay(2000); // Let everything settle down before starting
  Serial.begin(9600);
  Serial.println();
  Serial.println("EngNumberUnitTest starting...");
}

void loop() {
  Test::run();
}
Run this code on an Arduino and connect to the serial monitor, and you’ll see:
EngNumberUnitTest starting...
Test basic_conversion passed.
Test summary: 1 passed, 0 failed, and 0 skipped, out of 1 test(s).
Arduino continuous deployment
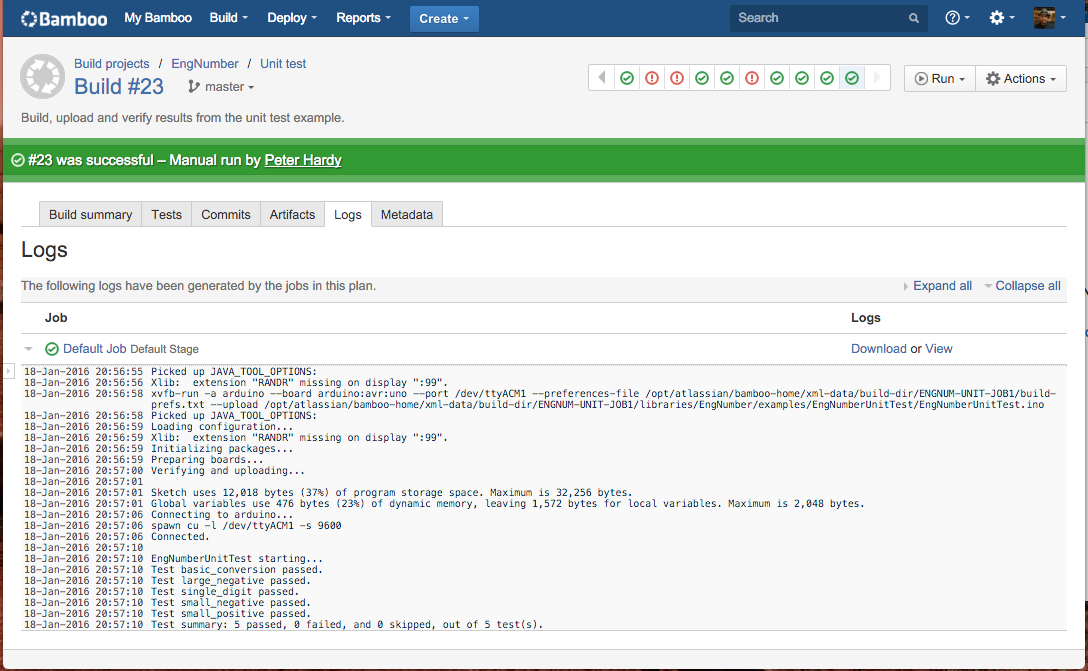
Now that all the hard work is done, having Bamboo deploy unit test sketches to an Arduino board and check results is pretty easy. I plugged a spare Arduino Uno in to my home server running Bamboo. Then added a new Script Task to my build job to install the ArduinoUnit library in the build environment:
# Pull in arduinounit library
# Here's one I prepared earlier:
export ARDUINOUNITSRC=/home/peter/src/arduino/libraries/arduinounit

export LIBDIR=$PWD/libraries
# Should already be created by checkout task, but just in case:
if [ ! -d $LIBDIR ]; then
  mkdir $LIBDIR
fi

cp -r $ARDUINOUNITSRC $LIBDIR/arduinounit
The compile task is mostly identical to the previous verification one, except we run make install instead of make.
export ARDUINO_PREFS=$PWD/build-prefs.txt
export ARDUINO_XVFB=true
export ARDUINO_BOARD=arduino:avr:uno
export ARDUINO_PORT=/dev/ttyACM1
cd libraries/EngNumber/examples/EngNumberUnitTest
make install
And finally we need a Script Task to connect to the Arduino over a serial connection and gather results. I’m probably showing my age here, but I’m using the venerable Expect to do this. It opens a serial connection, reads output from the Arduino, and does a regular expression match on the test summary to see if any of the tests failed.
echo "Connecting to arduino..."
/usr/bin/expect -c '
# The following is an expect script.
# The dream of the 90s is alive.
set port /dev/ttyACM1
set speed 9600

# Setting hup raises DTR, causing the arduino to soft-reset
stty 9600 raw ignbrk hup < $port
spawn cu -l $port -s $speed

expect -re "Test summary: ([0-9]+) passed, ([0-9]+) failed, and ([0-9]+) skipped.*rn"

if { $expect_out(2,string) != "0" } {
  exit 1
}
'
And now we have Bamboo building and testing Arduino code.
Next steps
Deploy real Arduino projects?
It would be fantastic to be able to push updates from Bamboo to the assorted sensors, gadgets and tools that are accumulating around my house. But I don’t know of a way to program AVR-based Arduino boards except through some sort of USB connection, limiting deployments to projects directly connected to the agent machine.
The Arduino toolchain for the ESP8266 wifi chip does allow for OTA updates though. With a little work it would definitely be possible for a deploy plan to flash code to them over a network. I haven’t yet had a chance to play with these devices too much though; please do let me know if you are able to try this out on them!
Use PlatformIO to build and deploy?
I’m pretty excited about the potential of PlatformIO and Bamboo. It’d be great to be able to build an Arduino project, generate a single artefact, and then use a deployment plan to roll that out across a fleet of sensor nodes. I’m looking forward to trialling it for my next project.
Conclusion
I set out to find a better editor for my embedded projects, but wound up with all of the benefits of continuous integration. The shorter feedback and debugging cycles have been invaluable. And my boss has stopped teasing me about untested Arduino code on the morning coffee run.
If you’re using continuous integration techniques in your own small projects I’d love to hear how it’s going.