How to locally run CNS?
Repository link - commerce-notification-hub
Assumptions / Pre-requisites:
Follow this Developer Setup for initial setup of below mentioned tools:
-
Maven - Point #12 in above doc.
-
JDK 17 - Point #16
Note
Currently we use JDK 17 for development. See here to point your system to JDK 17 if multiple versions are installed
-
Docker - Point #15
-
Setup secrets
1 2
atlas packages secrets -
AWS CLI - Point #20
-
Intellij IDE - Point #23
-
Postman - Point #1
Gain access to postman here. To access private workspace for testing, please reach out to Shalomi on Slack.
Steps for running data ingestion
Run the following commands to get your local up and running:
-
In the root directory (commerce-notificaiton-hub)
1 2
mvn install -
In data-ingestion directory (docker app should be open)
1 2
mvn install -
Initialize to spin up local SQS, DynamoDB, etc. - Remember to keep docker app open before running this command.
1 2
docker compose up -
Run this command in commere-notification-hub root directory to generate an environment config file
1 2
atlas micros service assume --service=data-ingestion --env=stg-east > data-ingestion/local.env -
Select the generated file as the envFile while running the application
-
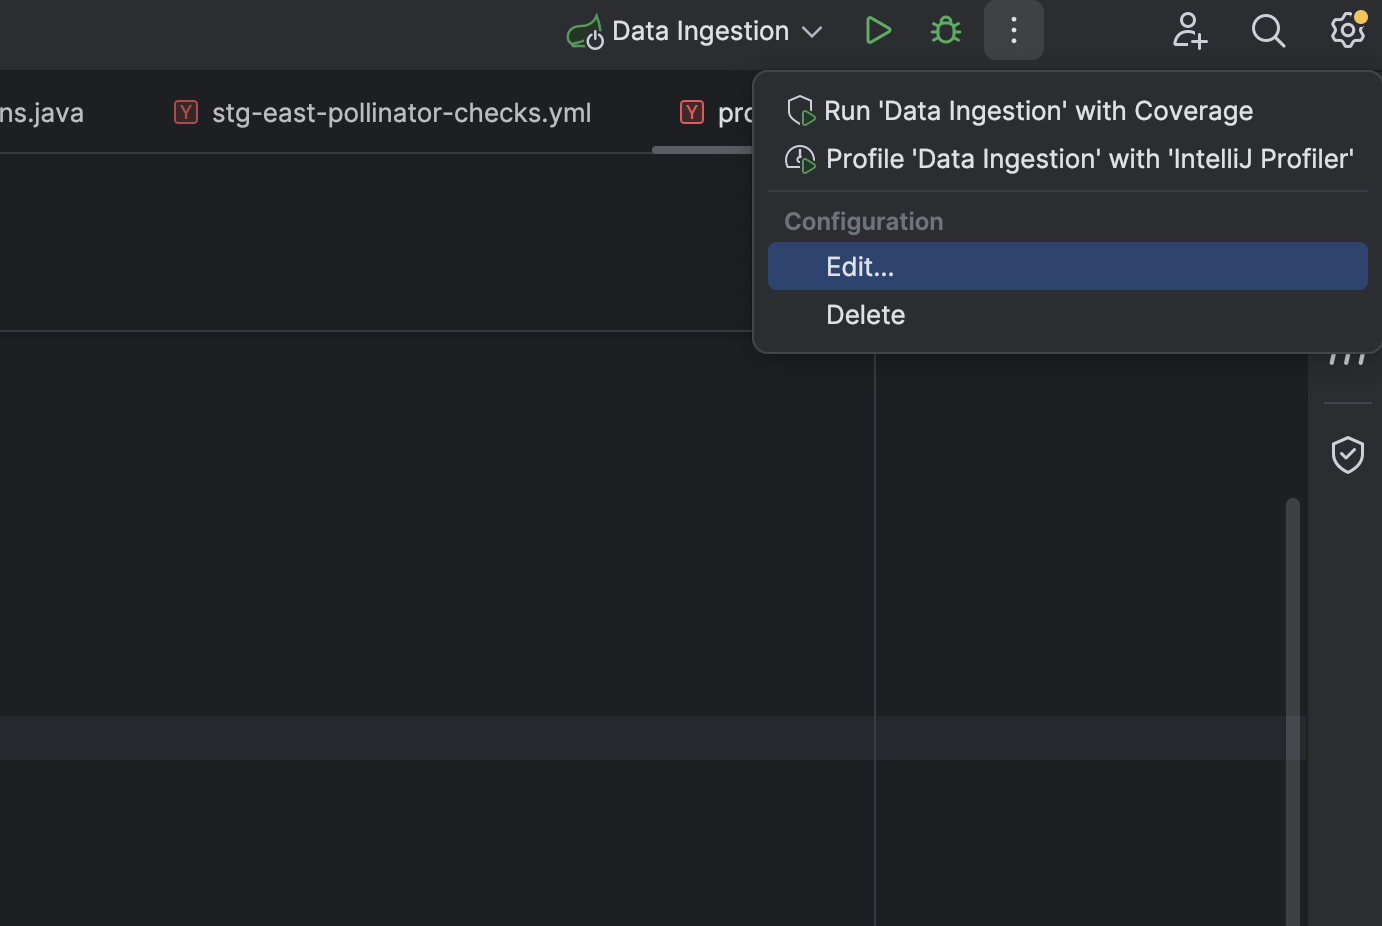
Click on the Edit option in the menu section present on the top-right corner of IntelliJ.
-
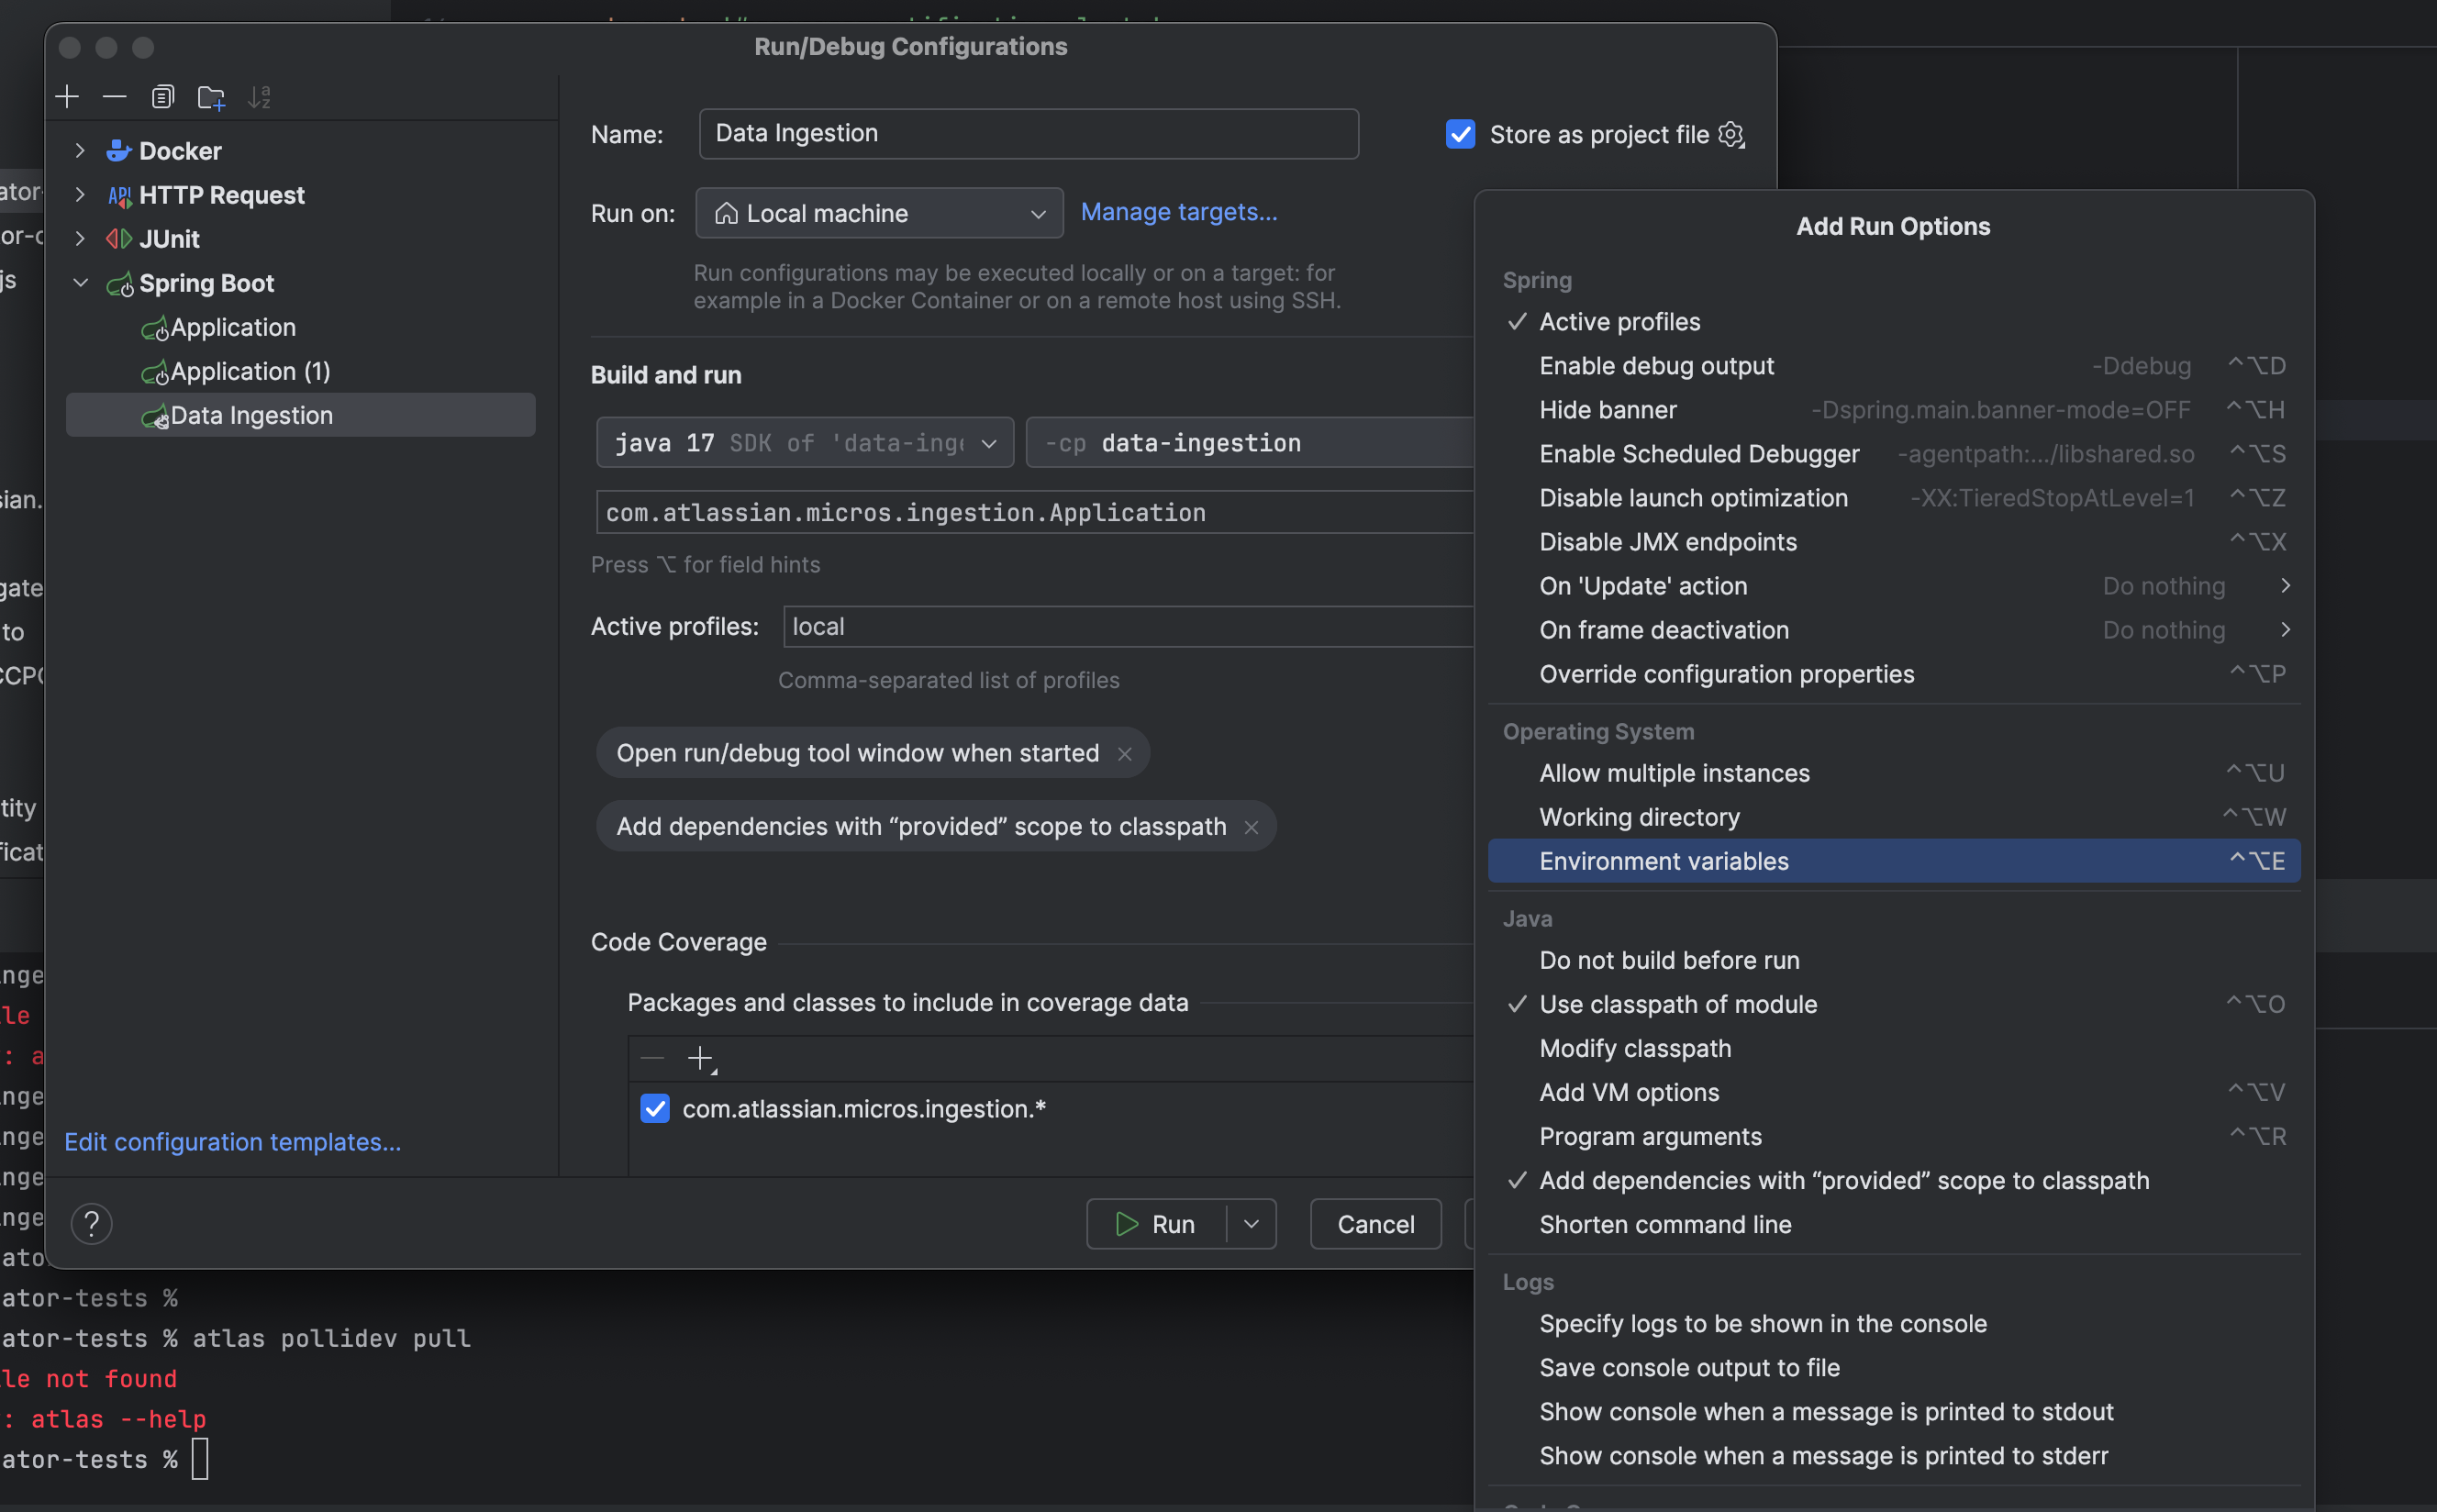
Click on Modify options in the Build and run section and select Environment variables
-
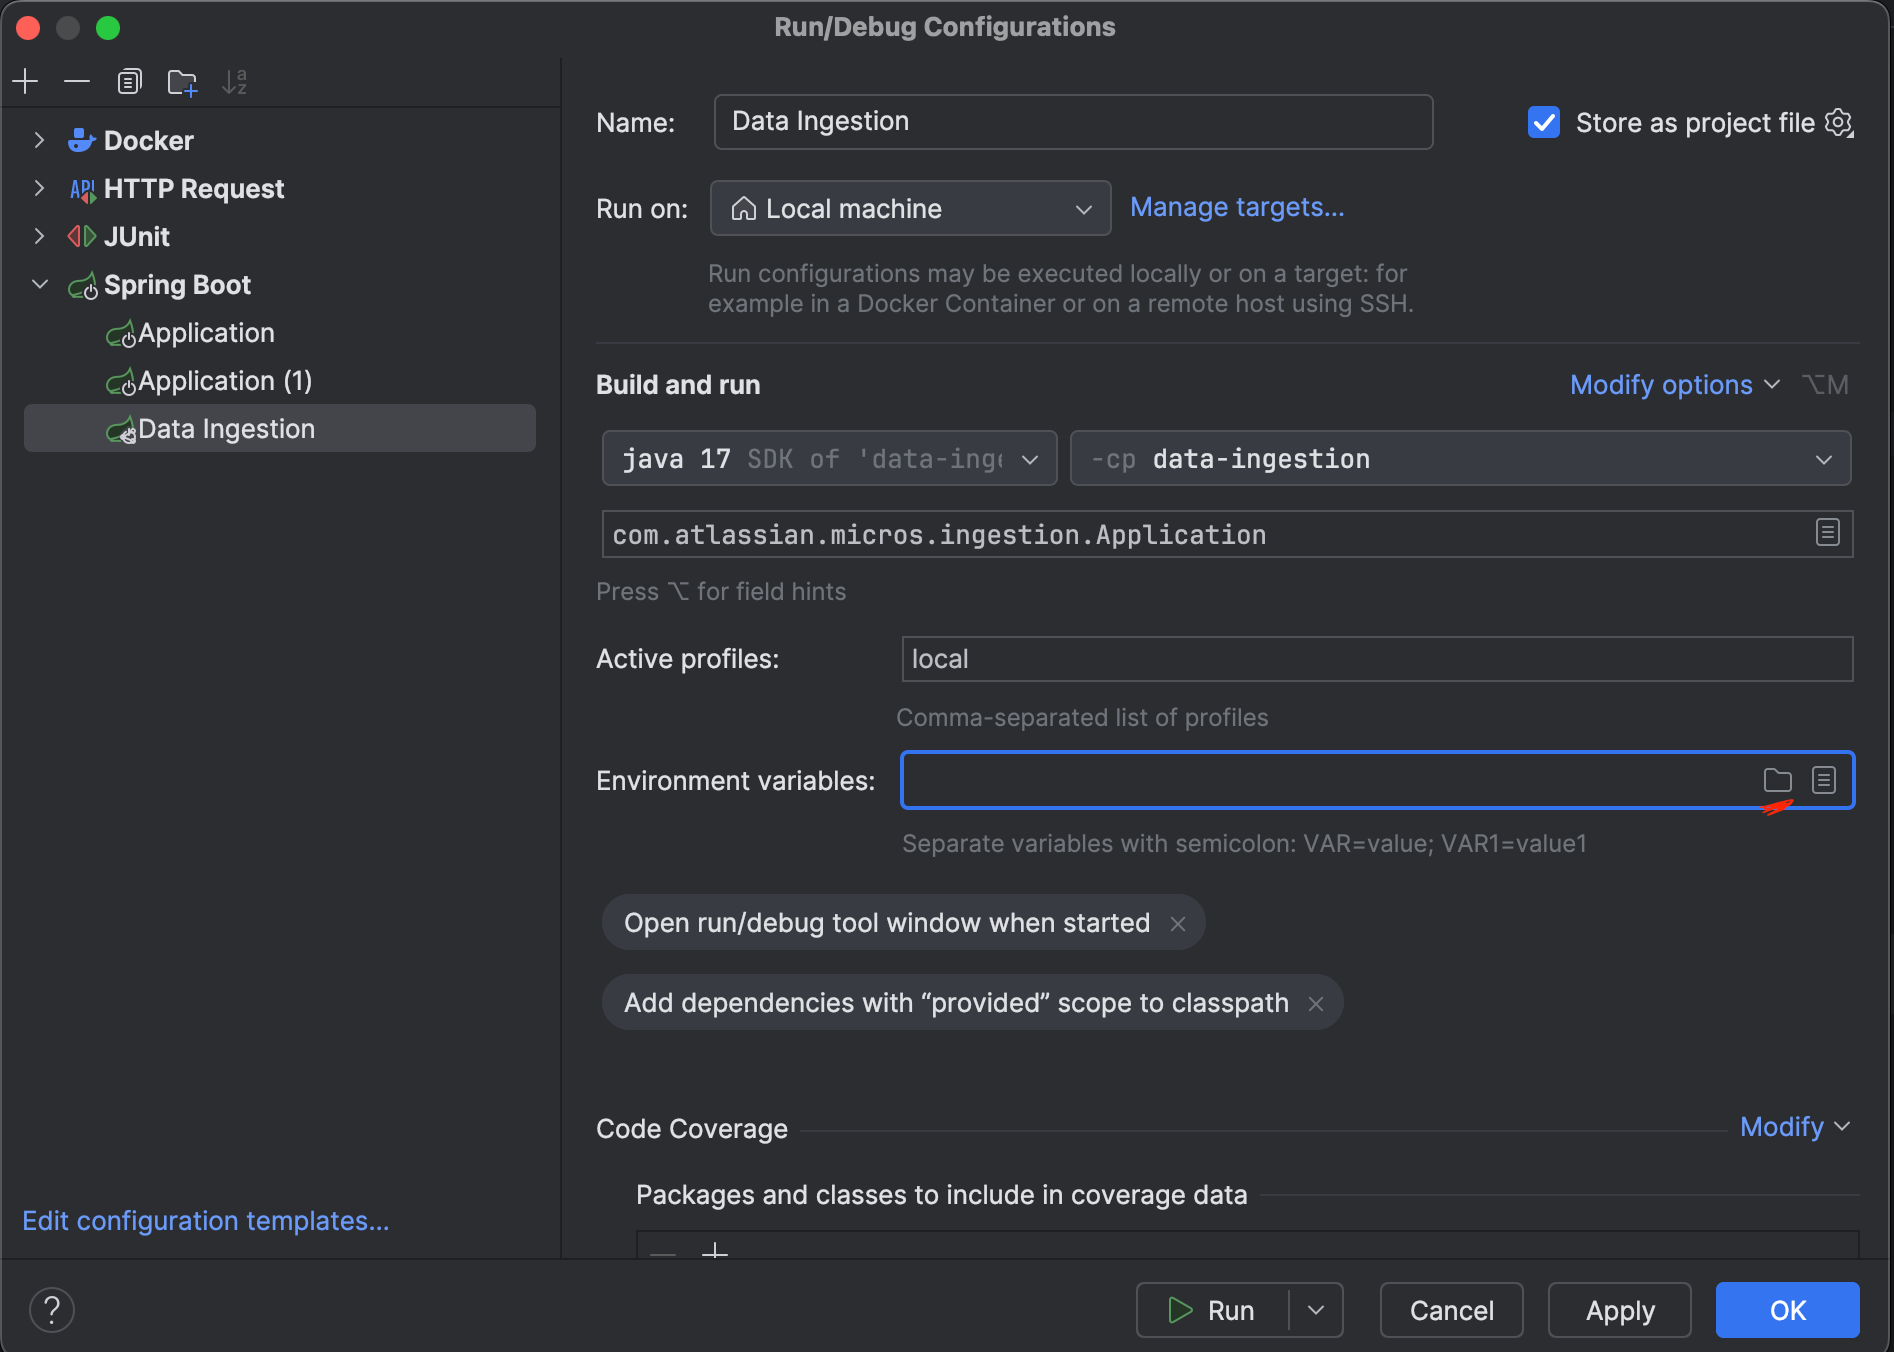
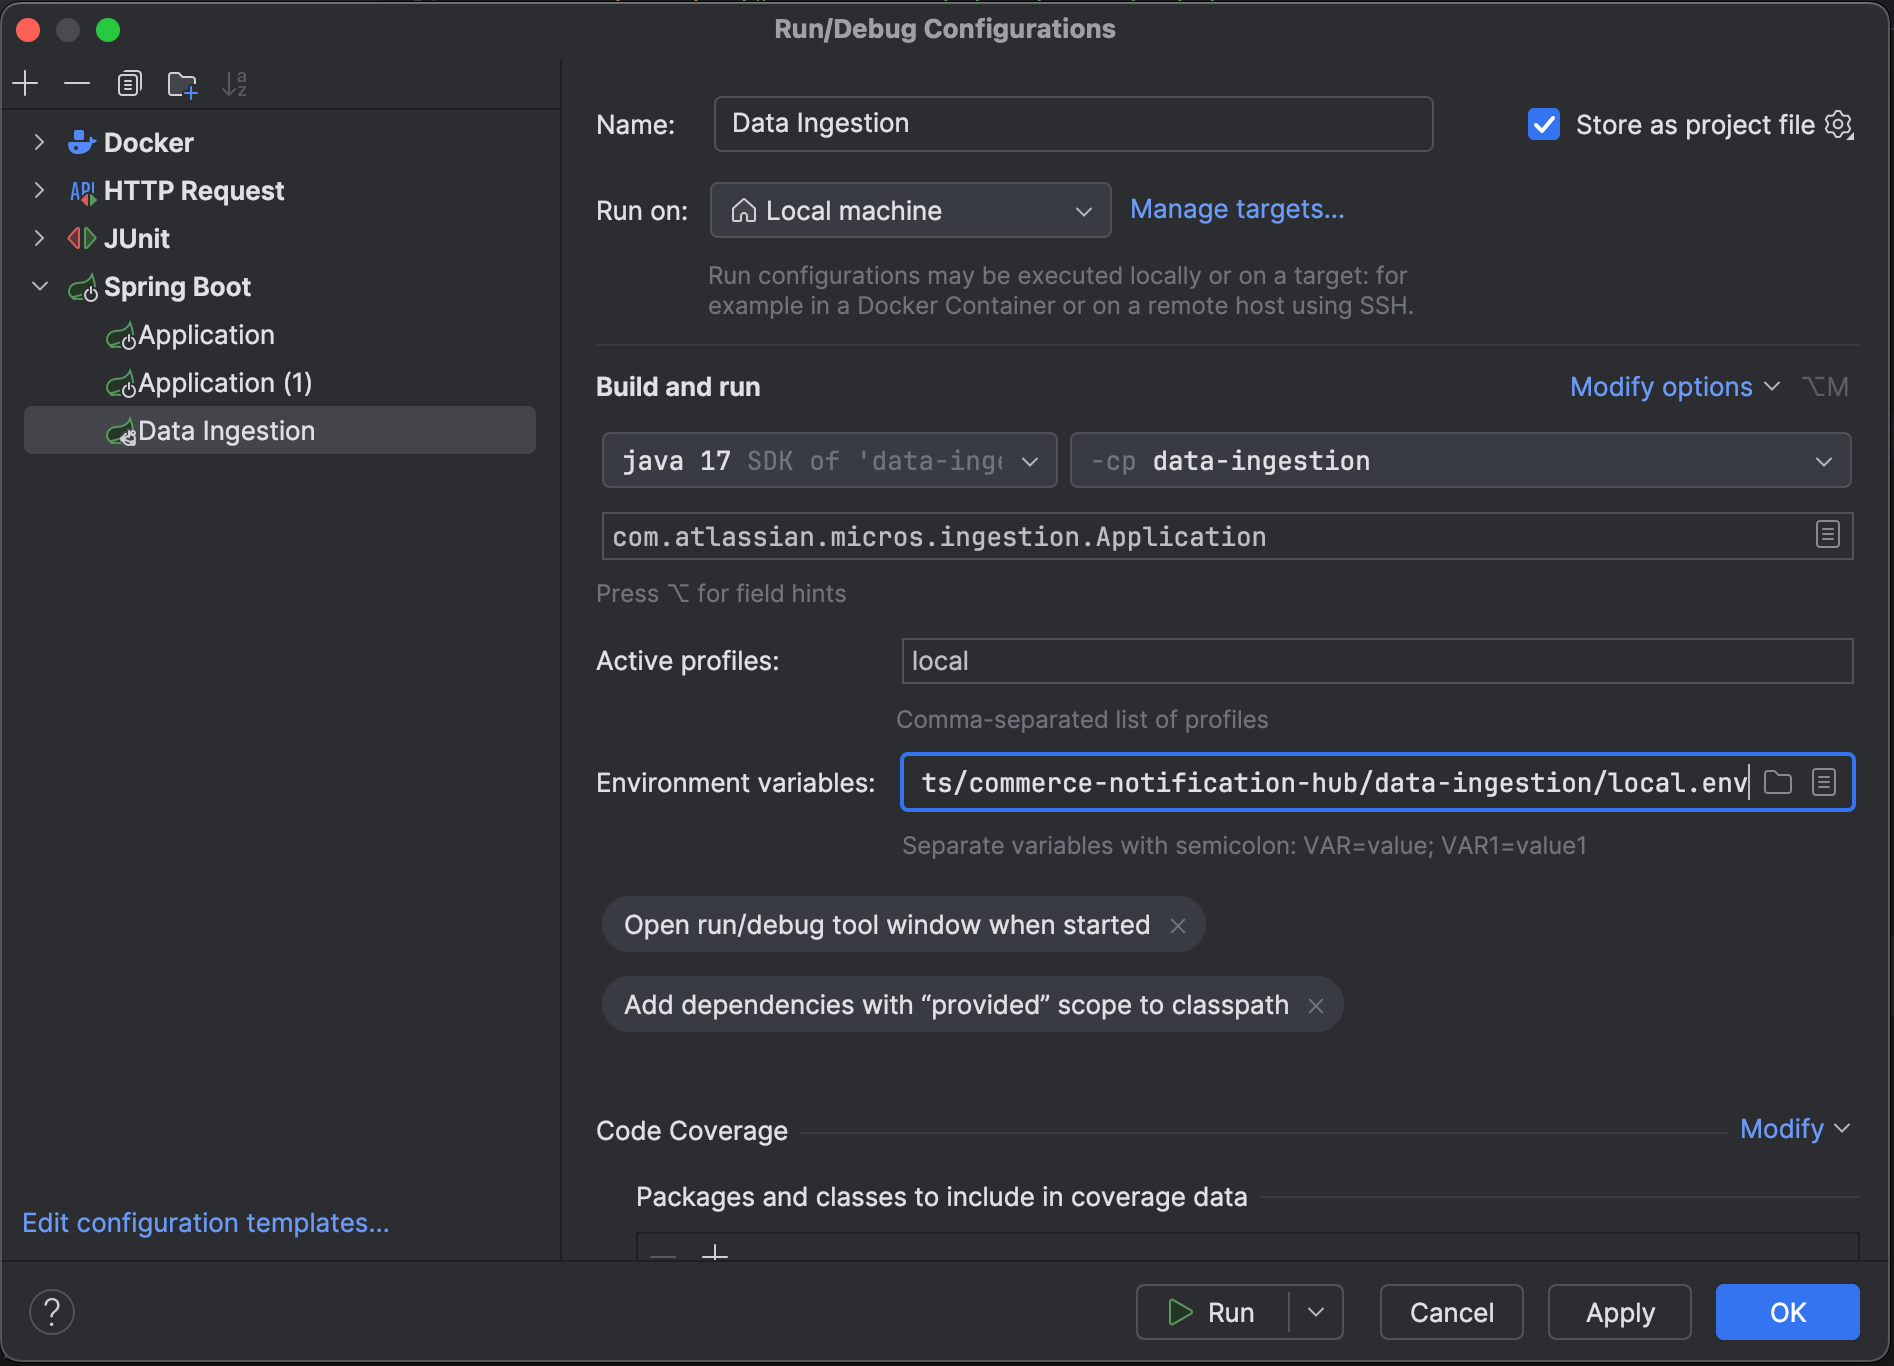
Select the path of your local.env file
-
Click on Apply and then Ok
-
-
Add the following values to the local.env file before starting application
1
2    DATA_INGESTION_STATSIG_KEY='xxxx'
    MICROS_ENV='local'
    MICROS_PLATFORM_STATSD_HOST='localhost'
    MICROS_PLATFORM_STATSD_PORT='1111'
Get the statsig key from Cyberark
-
To start the application click on Play in the top-right corner. Note: Before clicking on play, make sure that Data-Ingestion has been selected in the drop-down.
Steps for running notification-orchestration:
Repeat same steps as above
In Step 4, run this command instead:
1
2atlas micros service assume --service=notification-orchestration --env=stg-east > com-notification-orchestration/local.env
Rate this page: