Restore user access
This tutorial will help you to:
- Restore access of an existing user to products listed in Atlassian Administration.
- Retract the suspend user action.
Before you begin
To complete this tutorial, you need the following:
- A basic understanding of Atlassian Administration.
- Org Admin access to Atlassian Adminstration.
API token ≠ API key:
- This tutorial uses both API token and API key.
- API token is used with Basic authentication.
- API key is used as a Bearer token.
Step 1: Get accountId
AccountId is a required path parameter to restore user access.
1. Get API token
An API token is needed to get the accountId in the next step. Use an API token to authenticate your script.
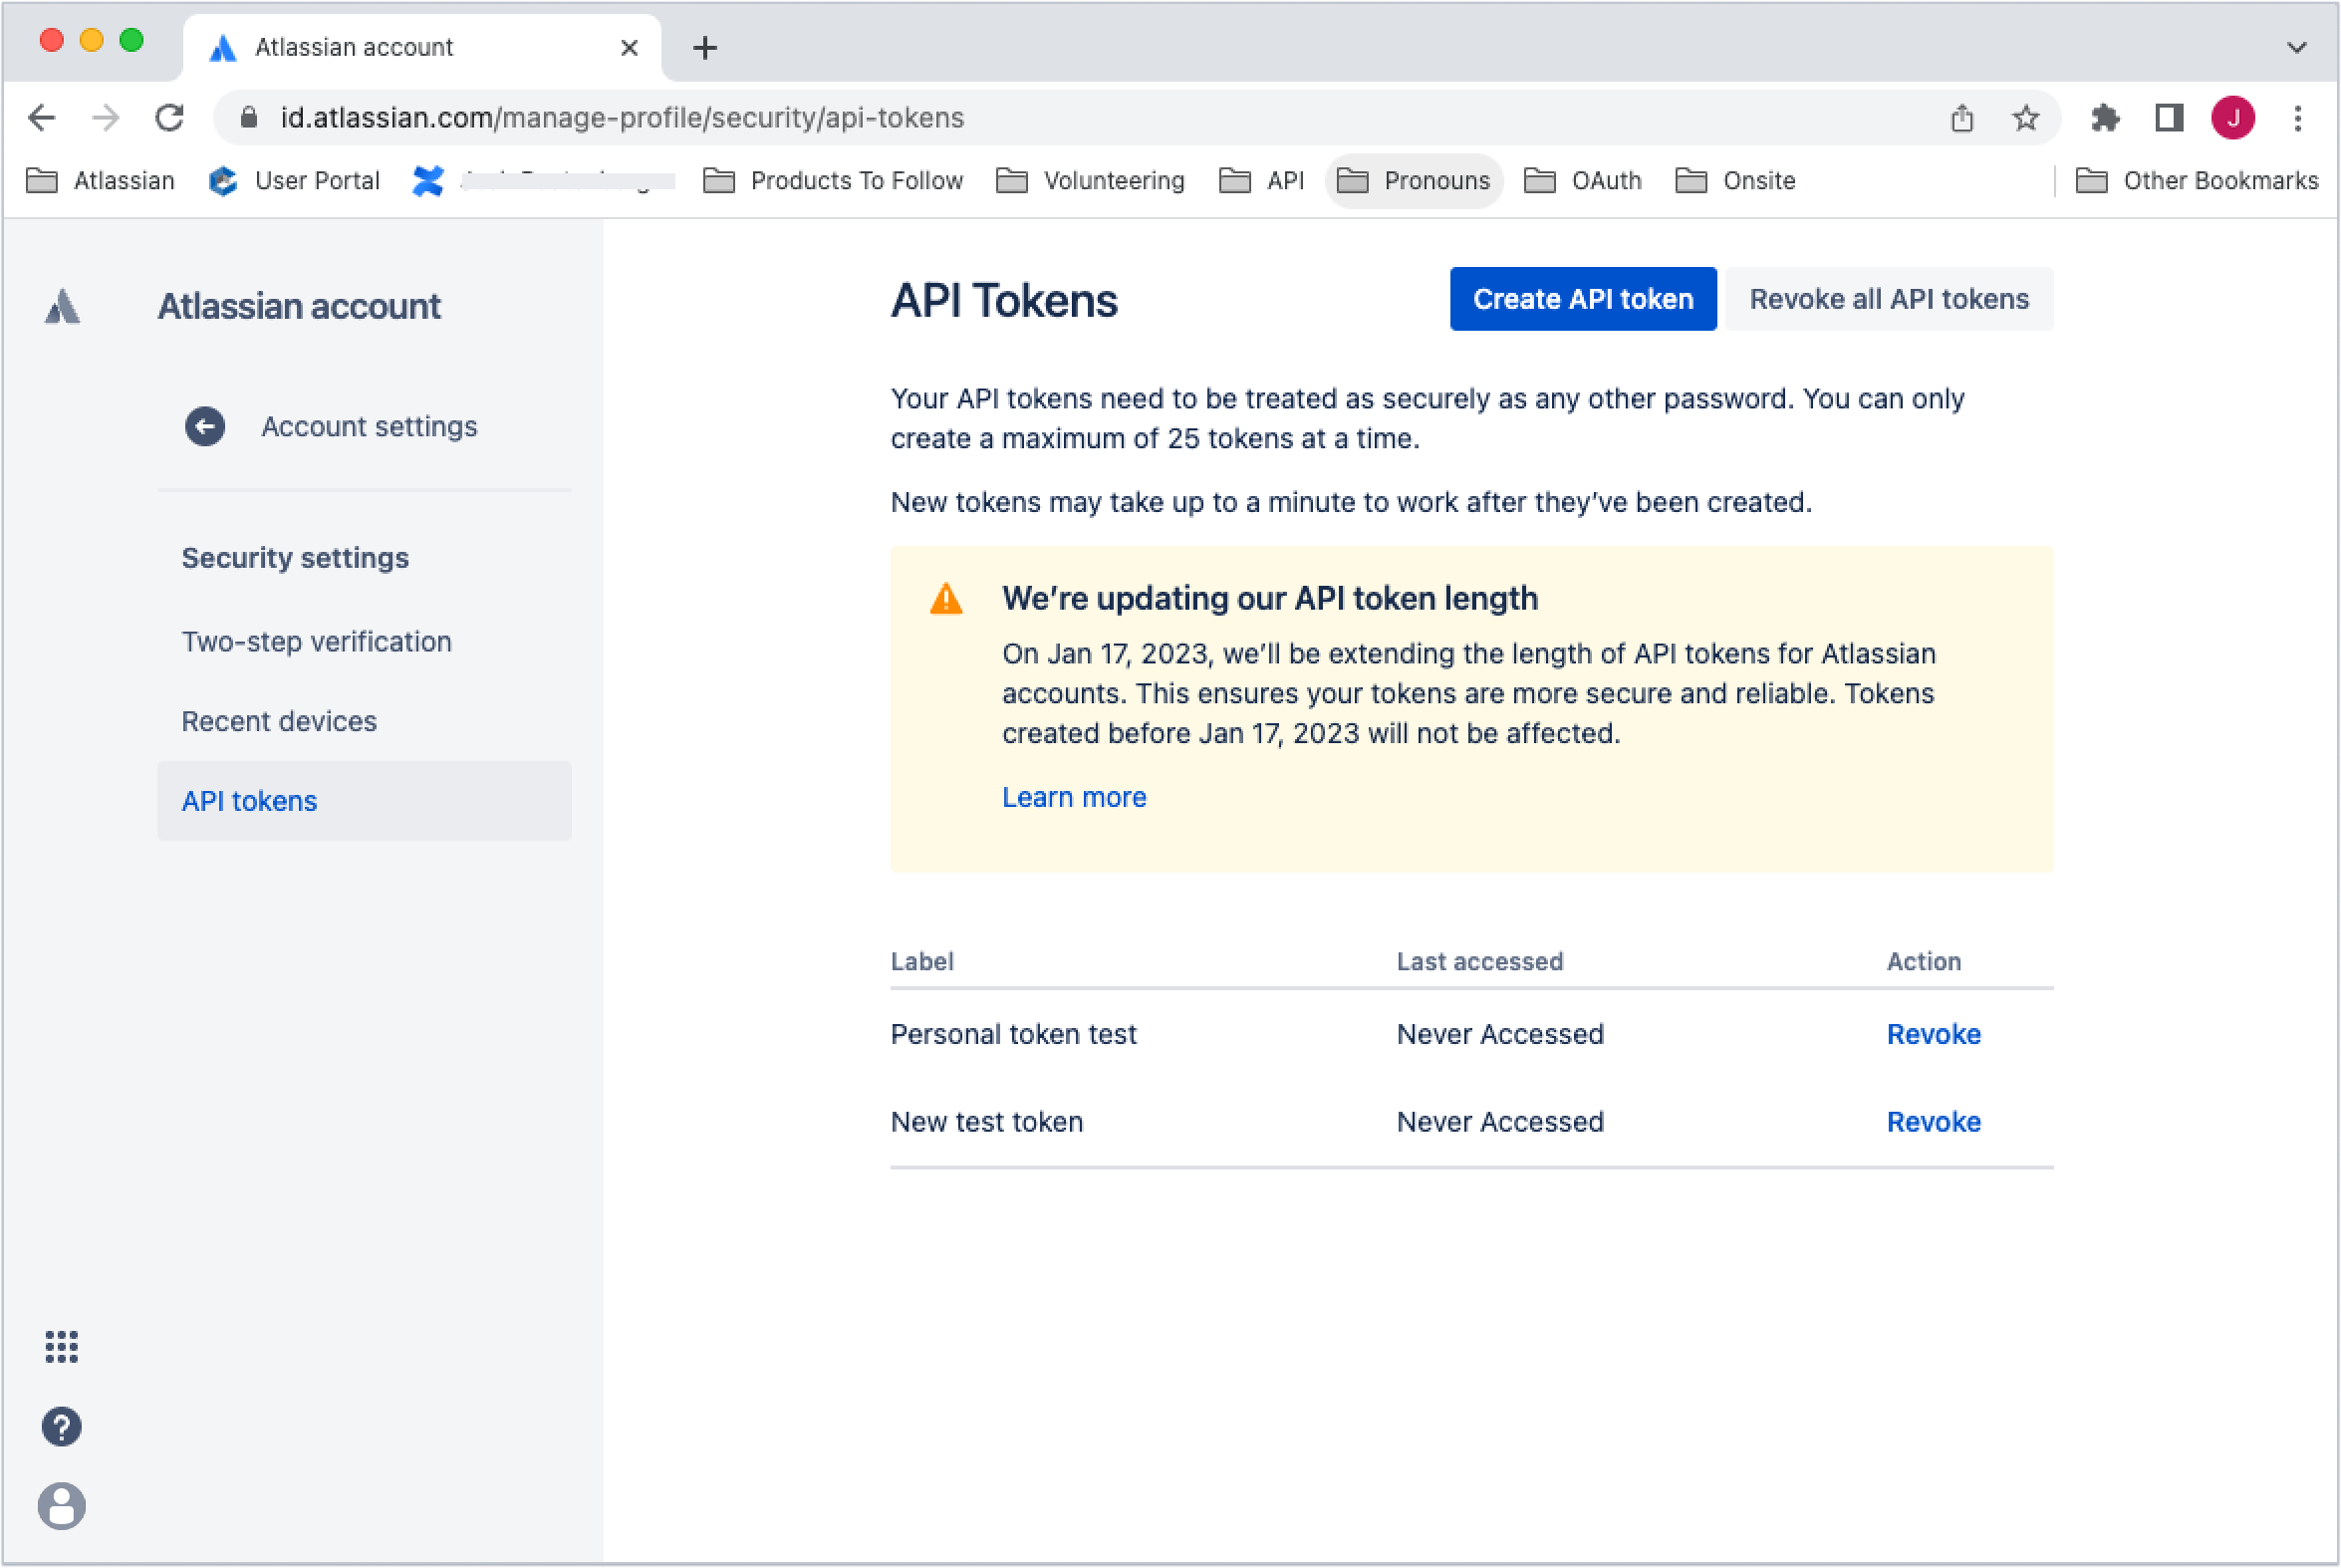
To create an API token:
- Go to your Atlassian account to create an API token.
- Select Create API token at the top of the screen.
- Name the token.
- Copy and securely store the token - you will not be able to see it again.
2. Get accountId
To get the accountId:
-
Use the Jira User Search API with the API token and basic authentication to get the accountId: GET
/rest/api/3/users/search1 2
curl --request GET \ --url 'https://your-domain.atlassian.net/rest/api/3/users/search' \ --user 'email@example.com:<api_token>' \ --header 'Accept: application/json' -
Search the results by email address or name to find the correct accountId.
Learn more about the Jira API.
If you don’t have Jira, export a .csv of the user list. Learn how to export users from a site.
Step 2: Restore user access
1. Get API Key and Organization ID
The Restore user access script uses an API key as a Bearer access token. It also uses the Organization ID field as a path parameter.
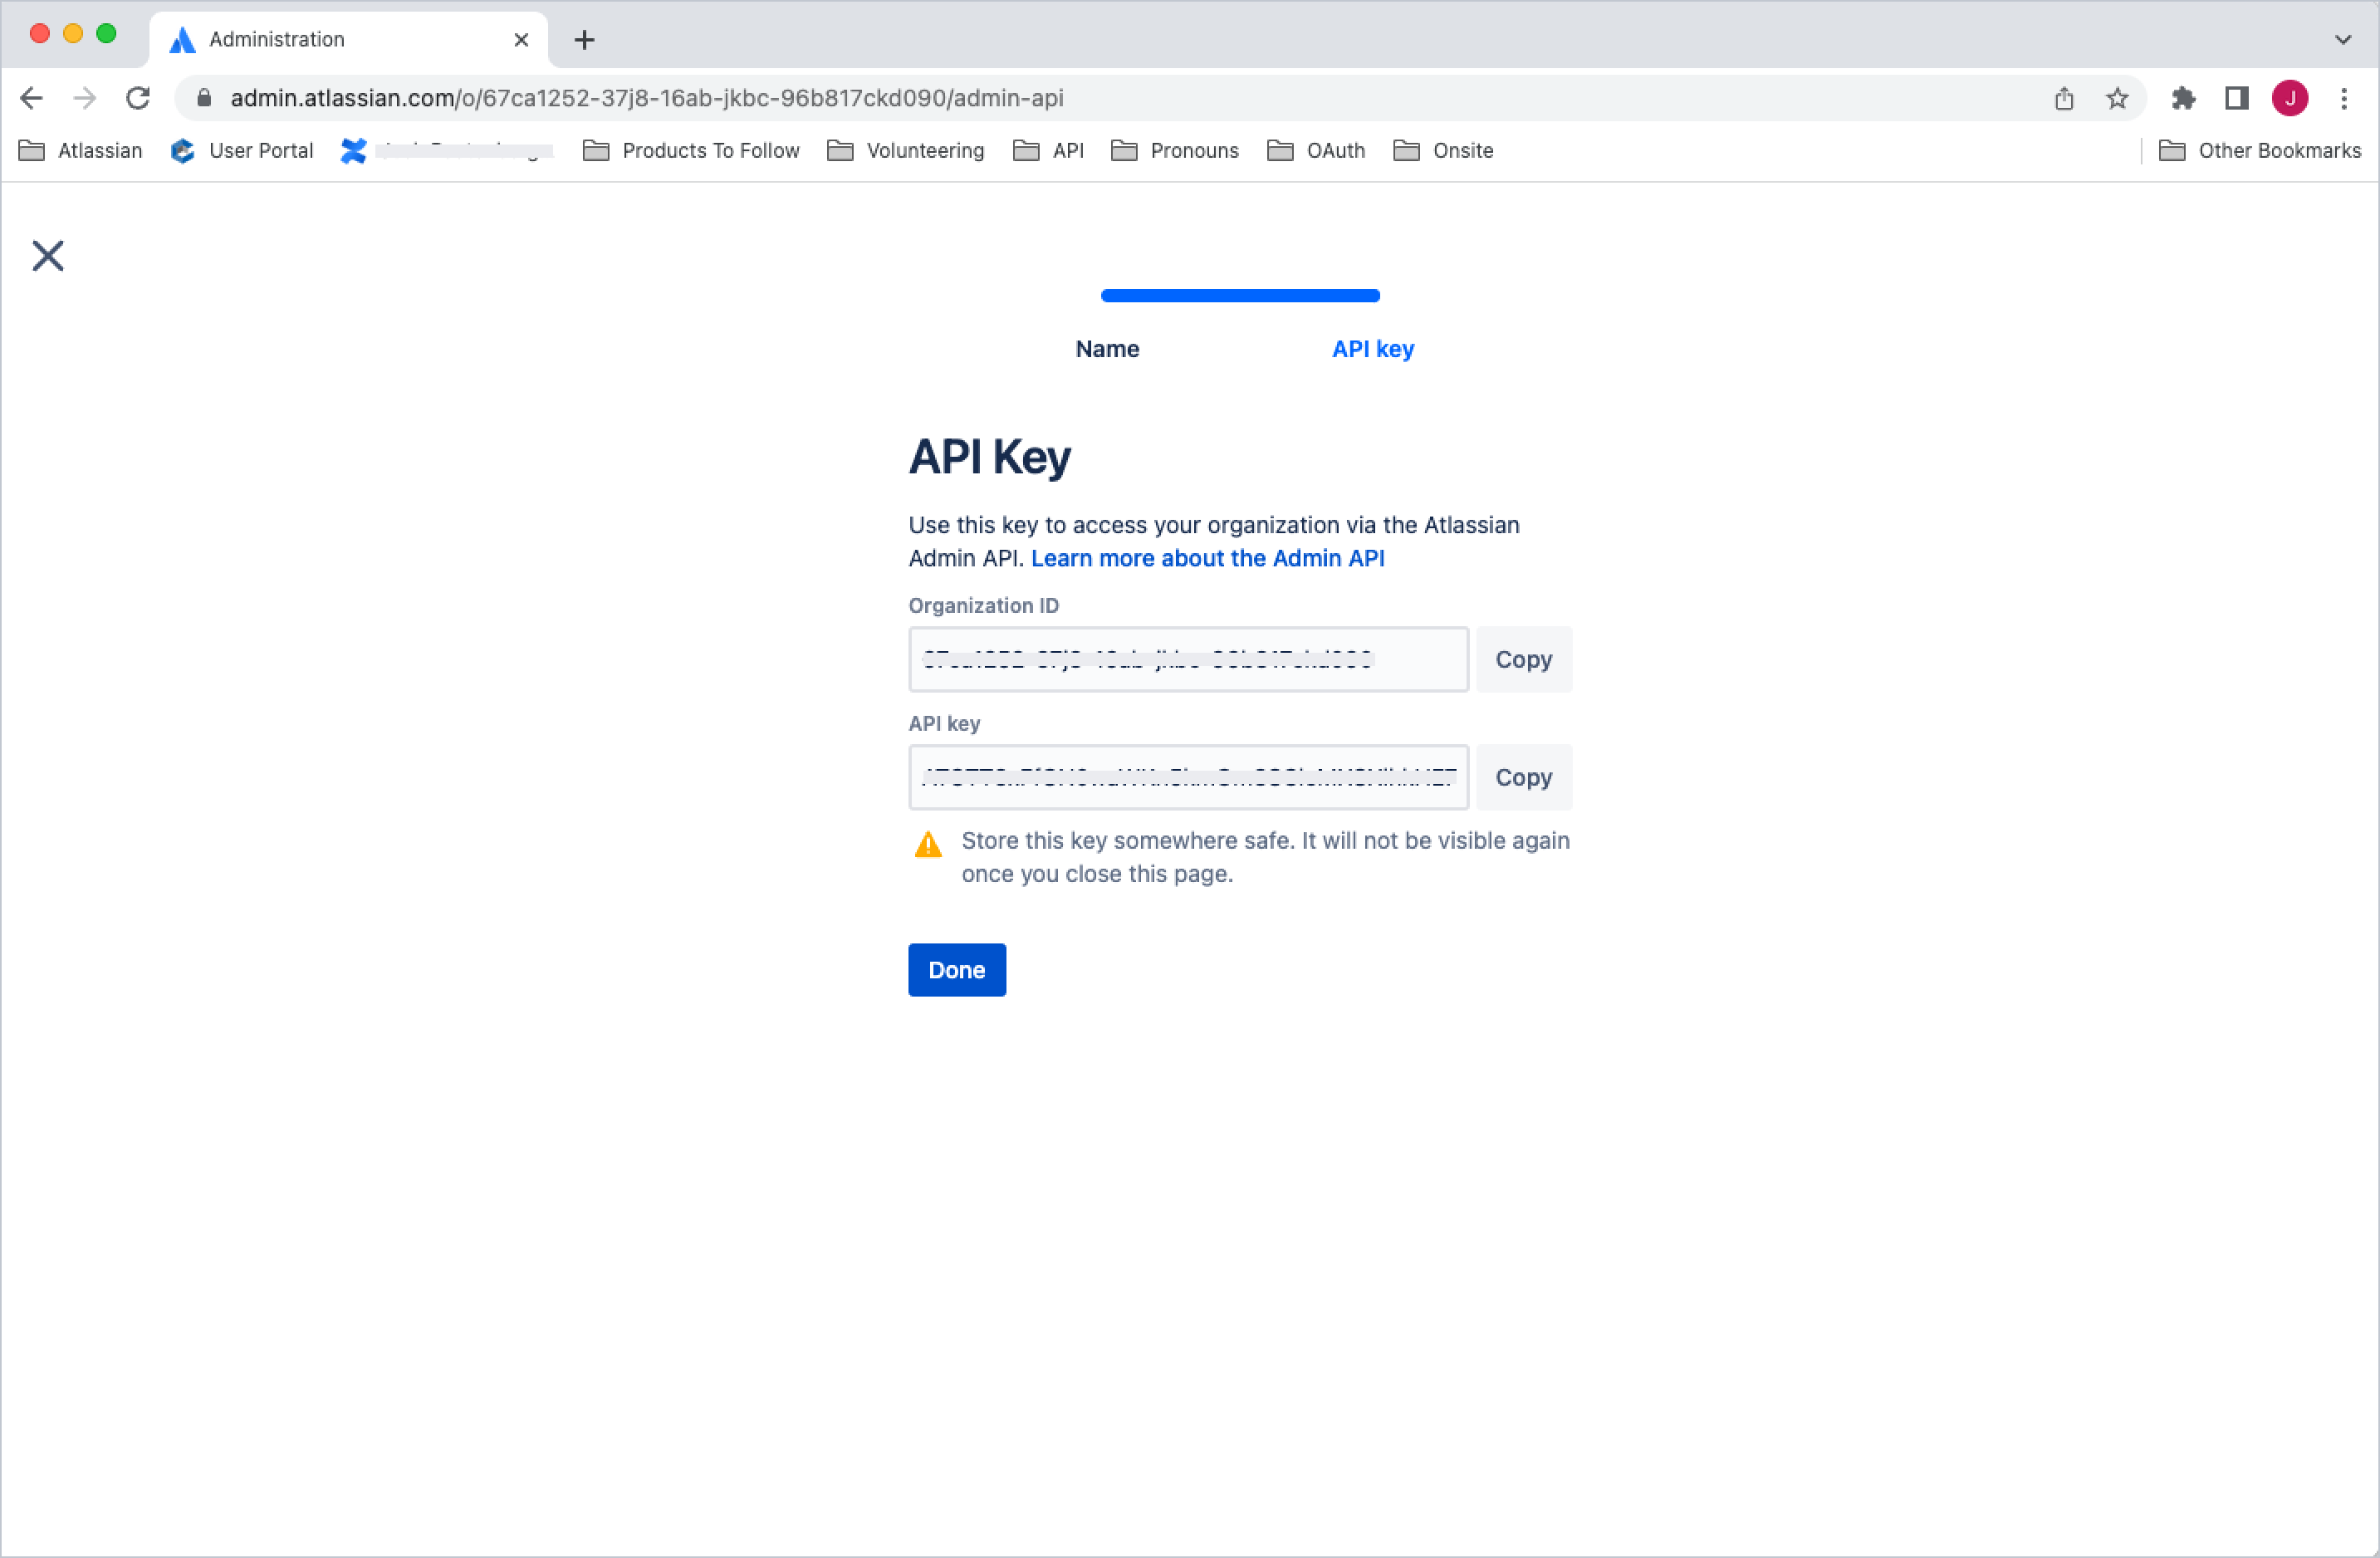
To create an API key and get the Organization ID:
- Go to Atlassian Administration. Select your organization if you have more than one.
- Select Settings > API keys.
- Select Create API key in the top right.
- Enter a name that you’ll remember to identify the API key.
- By default, the key expires one week from today. If you’d like to change the expiration date, pick a new date under Expires on. You’re unable to select a date longer than a year from the date of creation.
- Select Create to save the API key.
- Copy the values for your Organization ID and API key. You'll need those to use the API key. Make sure you store these values in a safe place, as we won't show them to you again.
- Select Done. The key will appear in your list of API keys.
Learn more about the API keys.
2. Get directoryId
The v2 APIs are directory-aware, so you need a directoryId as a path parameter. Use the API key and Organization ID with the Get directories endpoint to get the directoryId: GET /admin/v2/orgs/{orgId}/directories
1
2curl --request GET \
--url 'https://api.atlassian.com/admin/v2/orgs/{orgId}/directories' \
--header 'Authorization: Bearer <api_key>' \
--header 'Accept: application/json'
Search the results to find the correct directoryId.
Learn more about the Get directories API.
3. Restore user access
Use the accountId, directoryId, API key and Organization ID from the previous steps to restore user access: POST /admin/v2/orgs/{orgId}/directories/{directoryId}/users/{accountId}/restore
1
2curl -vv --request POST \
--url 'https://api.atlassian.com/admin/v2/orgs/{orgId}/directories/{directoryId}/users/{accountId}/restore' \
--header 'Authorization: Bearer <api_key>' \
--header 'Accept: application/json'
Make your first request and get started with the Restore user access API and get more information on error codes.
Rate this page: