Ending Connect support
You can no longer publish Connect apps on the Atlassian Marketplace. All new extensibility features will be delivered only on Forge.
Refer to this blog post for our timeline to end Connect support.
Have an existing Connect app? You can incrementally migrate it to Forge.
Getting started with Connect
This tutorial will teach you the basics of developing apps for Confluence Cloud using Connect. The Connect framework handles discovery, installation, authentication, and seamless integration into the Confluence user interface.
By the end of this tutorial, you'll have done everything you need to start developing apps, including:
- setting up a cloud development site
- installing Atlassian Connect Express (ACE), a Node.js toolkit for building Atlassian Connect apps
- validating your setup by deploying a basic hello world app
Before you begin
To complete this tutorial, you'll need a basic understanding of Confluence and the following:
Step 1: Prepare for tunneling
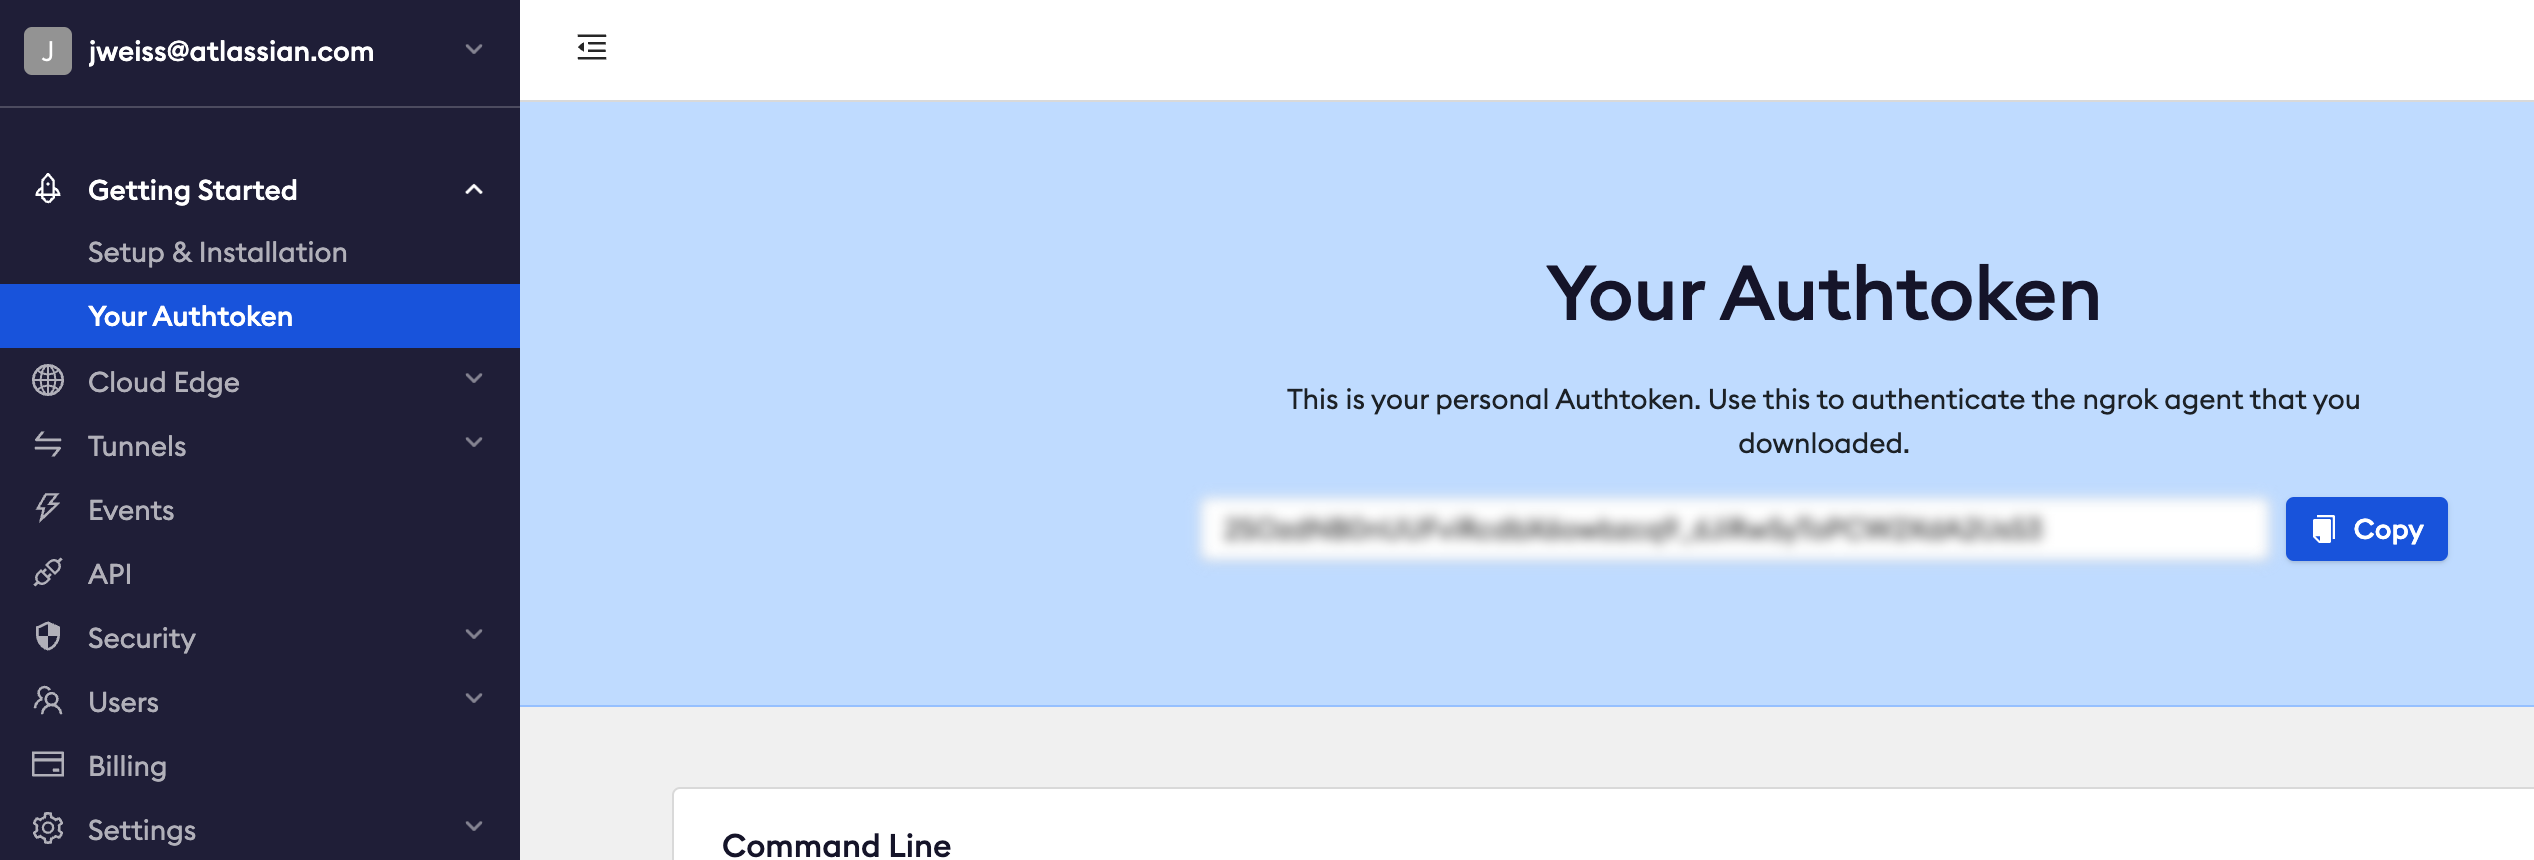
In this tutorial, the app server will run on your local development machine. A tunnel tunnel is necessary to allow Jira or Confluence Cloud to send requests to the server running on your machine and install the app. ACE creates tunnels using the ngrok Node.js module, which can be used free of charge after creating an ngrok account. In order to use ngrok in ACE, an auth token is all that's required. Follow this process to obtain one:
- Create a new ngrok account
- Obtain an authtoken
- Copy your personal token value (you'll need this later)
Step 2: Cloud development site
The Cloud Developer Bundle provides a free Atlassian cloud development site for building and testing apps. To create your site:
- Go to go.atlassian.com/cloud-dev and sign up. It may take several minutes to provision your site.
- Once your site is ready, sign in, and complete the setup wizard.
Your cloud development site has Confluence and all the Jira products installed. Note that Atlassian cloud development sites have limits on the number of users.
Step 3: Enable development mode in your site
With development mode you can install app descriptors in your development site from any public URL. This means you don't need to list an app in the Atlassian Marketplace before installing it.
- In the top navigation bar, click Apps then Manage your apps. If Apps isn't visible,
click More first.

- Under User-installed apps, click Settings.

- Select Enable development mode, and then click Apply.

After the page refreshes, you'll see the Upload app link. This link enables you to install apps while you're developing them.
Step 4: Install ACE
Atlassian Connect Express (ACE) is a Node.js toolkit for building Atlassian Connect apps. It uses the Node.js Express framework, allowing you to leverage routing, middleware, and templating within a Node.js environment.
-
Verify that you have Node.js and npm installed correctly (the version numbers returned may vary):
1 2
$ node -v v12.12.0 $ npm -v 6.11.3 -
Install
atlas-connectby running:1 2
npm install -g atlas-connect -
Verify the installation by running:
1 2
atlas-connect --help
If ACE installed successfully, you'll see the following:
1 2Usage: atlas-connect [options] [command] Commands: new [name] create a new Atlassian app help [cmd] display help for [cmd] Options: -h, --help output usage information -V, --version output the version number
Step 5: Create a basic app
Now, we're ready to create a basic app using ACE. The app is a general page, accessible in the Apps drop-down menu in Confluence's top navigation, that displays a Hello World message.
- Create a new app using ACE. The
generalPagesmodule is added by default:1 2
atlas-connect new confluence-helloworld-addon - Switch to the app directory:
1 2
cd confluence-helloworld-addon - Install dependencies for the app using npm:
1 2
npm install - Add a credentials.json file in your app directory with your information:
- your-confluence-base-url: Use the scheme and domain of your cloud development site (for example, https://your-domain.atlassian.net).
- username: Use the email address of your Atlassian account.
- password: Specify the API token.
1 2
{ "hosts": { "<your-confluence-base-url>": { "product": "confluence", "username": "<user@example.com>", "password": "<api_token>" } }, "ngrok": { "authtoken": "your-ngrok-token" } }
- Start the server:
1 2
npm start
You should see something similar to the following at the bottom of the app logs:
1
2POST /installed 204 186.061 ms - -
Registered with host at <your-confluence-base-url>/wiki
Starting the service causes the app to be installed in the Confluence instance described
in the credentials.json file.
Step 6: Test your app
Important: for any recently created ngrok account there will be a warning page displayed that needs to be confirmed once before the tunnel can be used. To do this, look for the message Local tunnel established at https://<some ID>.ngrok-free.app/ and open that URL in your browser. You'll see a page like this:
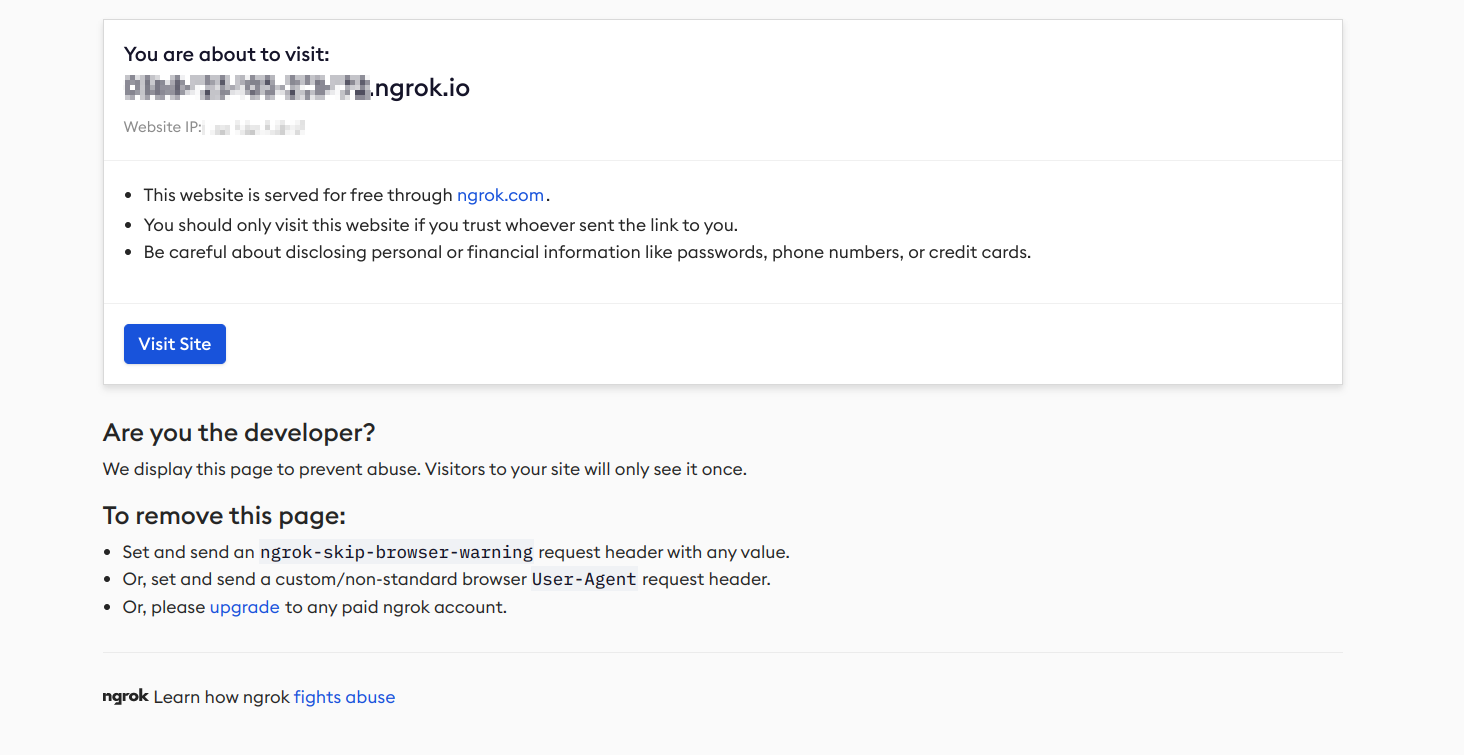
Confirm by clicking on the button labeled "Visit Site". Your tunnel is now fully operational.
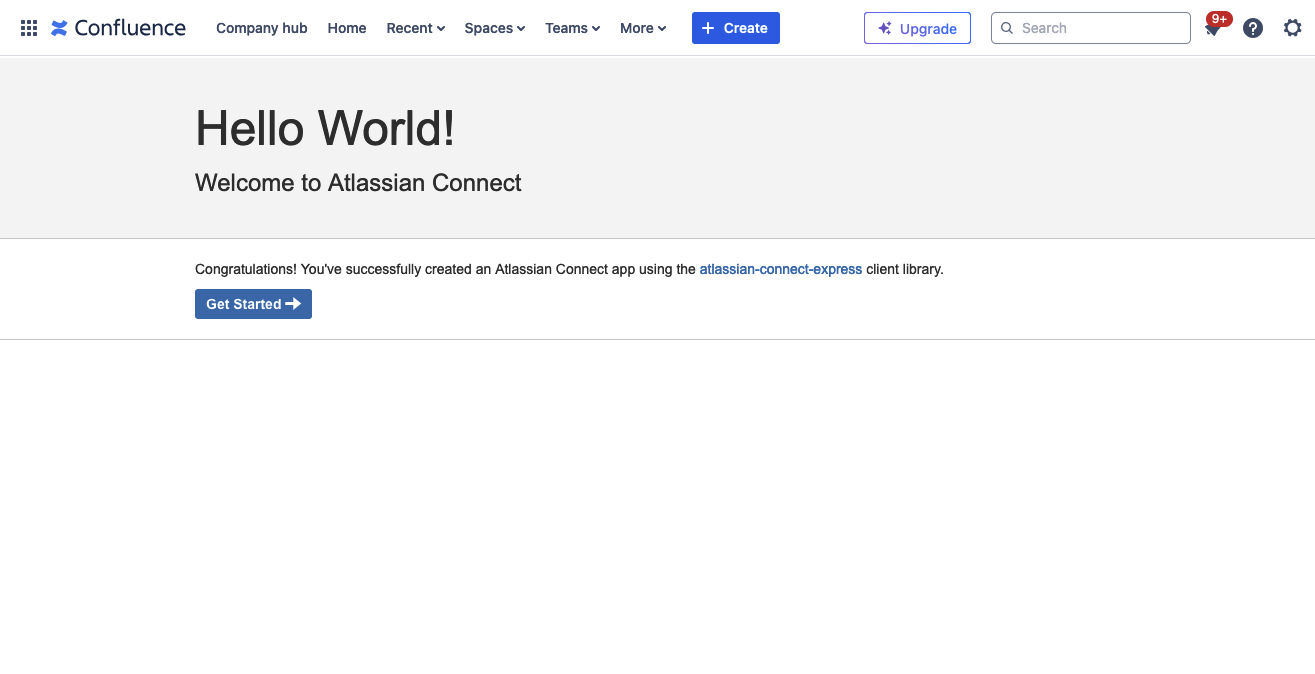
Now that the sample app is installed, let's see the app in action. Navigate to your Confluence instance and click on 'Hello World' under Apps. You should be greeted with the following page:
Next steps
Now that you have set up your cloud development site, you're ready to get started building apps. Check out this guide to learn more about the generalPages module, which was used in this tutorial. To explore all Connect has to offer, check out our other tutorials, or take a look at the REST API docs.
Rate this page: