Creating blueprints with Confluence Connect
Description | A quick guide to building a blueprint. |
Level | 3 - INTERMEDIATE |
Estimated time | 30 minute |
| Example | https://bitbucket.org/atlassianlabs/confluence_blueprint_example |
Prerequisites
Ensure you have installed all the tools you need for Confluence Connect app development, and running Confluence by running through the getting started guide.
Overview of the tutorial
In this tutorial you'll create an Atlassian Connect blueprint, which allows you to create pages, like the one shown below.

Configuring your development environment
Before you begin this tutorial, be sure to configure your development environment.
-
Clone the Confluence Blueprint Example.
1 2
$ git clone https://bitbucket.org/atlassianlabs/confluence-multipage-blueprint-example.git -
Change into the
confluence-multipage-blueprint-exampledirectory.1 2
$ cd confluence-multipage-blueprint-example -
Install the dependencies.
1 2
$ npm install
Once you've logged in to Confluence as an administrator you can continue with this tutorial.
Review the Atlassian Connect descriptor
The atlassian-connect.json descriptor is located at the project root directory. See more about the app descriptor.
The descriptor in the example has only one module in the modules section.
It will look like something like this:
1
2{
  "key": "confluence-blueprint-example",
  "name": "Confluence Blueprint Example",
  "description": "Example of creating a blueprint",
  "vendor": {
    "name": "Atlassian Labs",
    "url": "https://www.atlassian.com"
  },
  "baseUrl": "{{localBaseUrl}}",
  "links": {
    "self": "{{localBaseUrl}}/atlassian-connect.json",
    "homepage": "{{localBaseUrl}}/atlassian-connect.json"
  },
  "authentication": {
    "type": "jwt"
  },
  "lifecycle": {
    "installed": "/installed"
  },
  "scopes": [
    "READ",
    "WRITE"
  ],
  "modules": {
    "blueprints": [
      {
        "template": {
          "key": "remote-blueprint",
          "name": {
            "value": "Simple Remote Blueprint"
          },
          "url": "/blueprint.xml"
        },
        "createResult": "edit"
      }
    ]
  }
}
Let's see what's happening inside the blueprints module:
key- This is an identifier for the module. It's used to generate the URL to your app's module.name- This will be the visible name of the blueprint in the page create dialog.url- Tells our app which route to send the HTTP request to when a user accesses our blueprint.createResult- Defines the screen to go to when creating this type of blueprint.
You can read about more options that are available from the docs.
Blueprint code in route handler
The controllers for serving blueprint.xml are defined in routes/index.js:
1 2// Serve blueprint template app.get('/blueprint.xml', function (req, res) { res.set('Content-Type', 'text/xml'); res.send(fs.readFileSync('./blueprint.xml')); });
This serves a XML file called blueprint.xml which we have kept pretty simple:
1
2<p>A test page created by blueprint</p>
Host and install your app
In order for your app to register with your cloud instance, add a credentials.json to your app directory. It should have the following information:
site-url: Replace with the site URL of your cloud development site, for example, https://your-site.atlassian.net.username: Use the email address of your Atlassian account.password: Specify the API token
1
2{
    "hosts" : {
        "<site-url>": {
            "product" : "confluence",
            "username" : "<email@address.com>",
            "password" : "<api-token>"
        }
    },
    "ngrok": {
        "authtoken": "your-ngrok-token"
    }
}
Now, issue the following command:
1
2$ npm start
Voila, your app has been installed!
Test your app
-
In your browser, navigate to your Confluence instance.
-
Choose the + button on the left-hand.
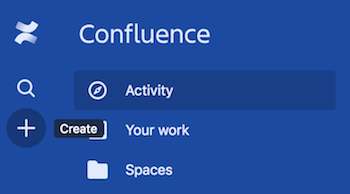
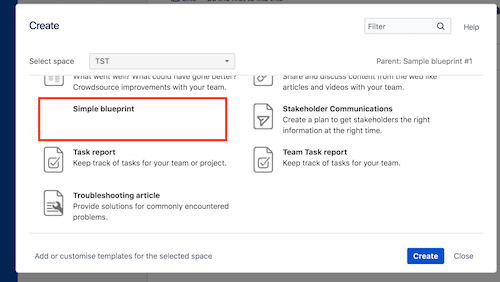
-
Notice that your blueprint is listed in the Create dialog. Select Simple Remote Blueprint, and then click Create..
-
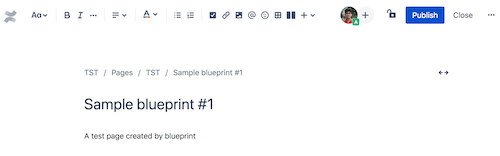
Give your page a title, such as Sample blueprint #1, and then click Publish.
-
After your page is published, you'll see your page is created.
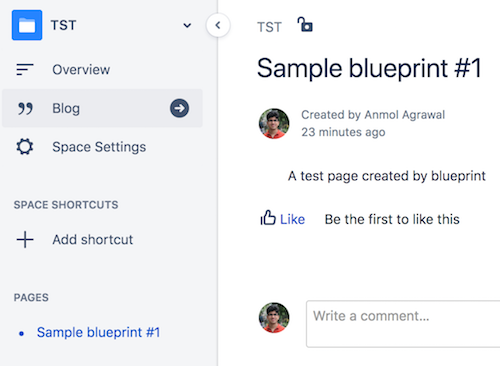
There you have it. You just created a blueprint.
Rate this page: