My requests in Jira Service Desk
This tutorial shows you how to build a static Atlassian Connect app that displays the list of Jira Service Desk requests made by the currently logged-in user on a page accessible from the agent portal.
As part of the tutorial, you'll learn about:
- Configuring your development environment
- Deploying a Connect app to a Jira Service Desk
- Extending the Jira Service Desk UI
- Using the Jira Service Desk REST API
Using Node.js and the Atlassian Connect Express (ACE) toolkit, you will build an app that will interface with Jira Service Desk via the new Service Desk REST API, and will make use of the AUI library for front-end styling.
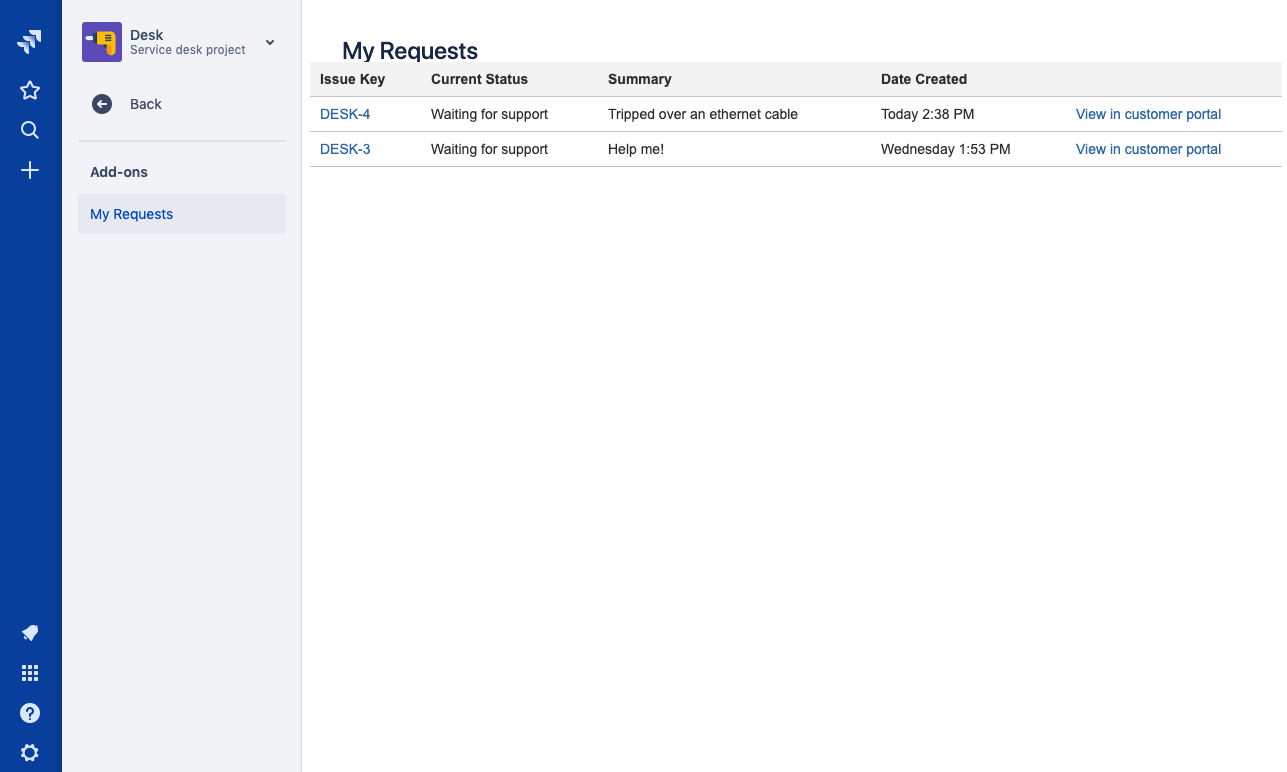
The finished result will look similar to this:
The code for this tutorial is available in the atlassianlabs/jira-servicedesk-my-requests-tutorial repo.
Setting up your development environment
In this section, you'll install Node.js, and the Atlassian Connect Express (ACE) toolkit. Next, you'll use ACE to generate a new Atlassian Connect app project that includes a small "Hello, world!" example page. Finally, you'll deploy the generated app to a running cloud development instance of Jira Service Desk.
Installing the toolchain
- Install Node.js 10.0.0 or later:
- If you use Homebrew, use the following command (you might need to enter sudo):
1
2brew install node
- If you use Windows or don't use Homebrew, just download and install Node.js directly.
- Install ACE using the following npm installation command:
1
2npm install -g atlas-connect
The ACE toolkit helps you create Connect apps using Node.js. ACE handles JSON web tokens (JWT), so that requests between your app and the Jira application are signed and authenticated.
Creating the app project
In this step, you'll install Node.js dependencies for your project. ACE-generated projects are database-agnostic, meaning that there is no database by default. For now, you'll install SQLite 3 to use as the database. Finally, you'll configure ngrok to create a tunnel between your local server and your Jira Service Desk instance:
-
Use ACE to create a new Node.js project called
sd-my-requests:1 2
atlas-connect new -t jira sd-my-requests -
Change to your new
sd-my-requestsdirectory:1 2
cd sd-my-requests -
Install the Node.js dependencies for your
sd-my-requestsproject:1 2
npm install -
Install SQLite 3:
1 2
npm install --save sqlite3 -
Install ngrok:
1 2
npm install --save-dev ngrok -
Sign up for an ngrok account and register the authtoken shown on your dashboard (if you skip this step, your app's iframes will not display)
1 2
ngrok authtoken <token>
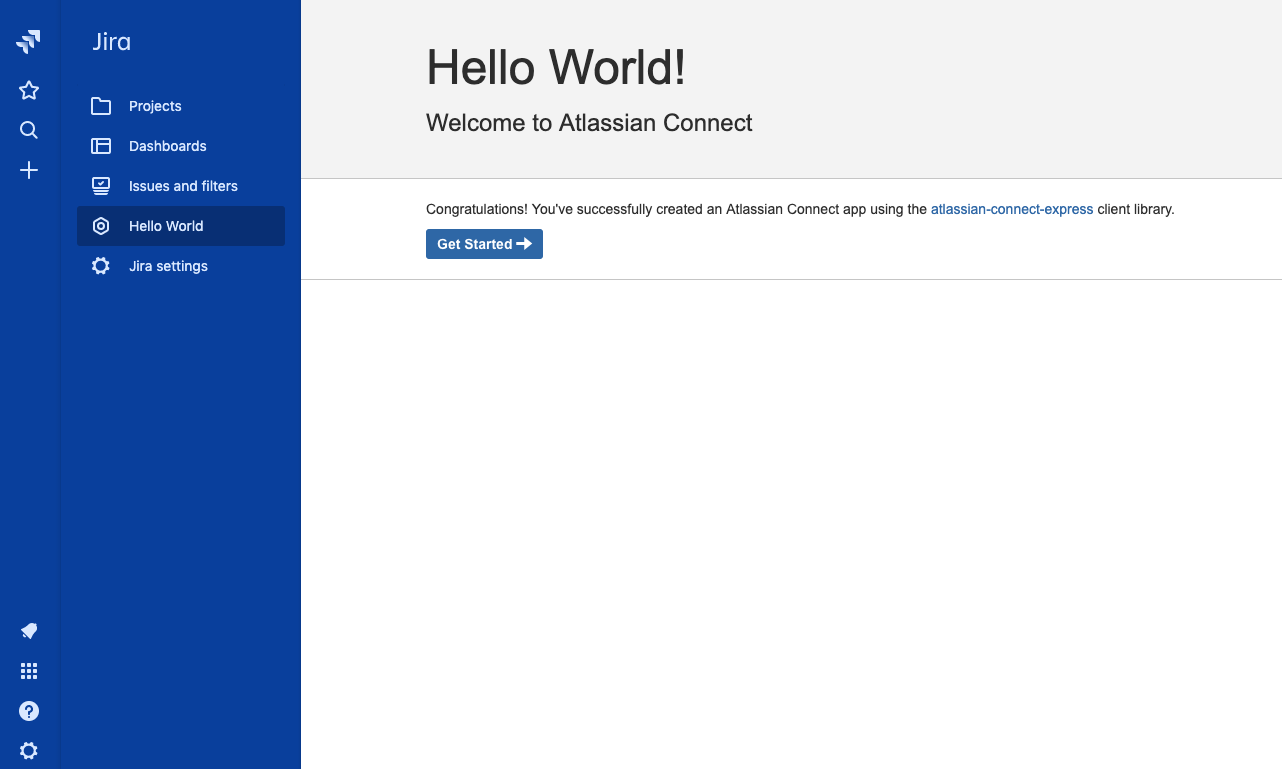
The generated project contains a simple example "Hello, world!" page, which when deployed will be accessible from a button on Jira's main navigation bar.
Feel free to open the atlassian-connect.json descriptor file and edit the name, description, and vendor properties.
Don't change anything else at this stage.
Get a development version of Jira Service Desk
Follow the Getting started guide to get a development version of Jira and Jira Service Desk.
Since we are developing with a local app against a cloud product, we will need to setup our environment to make our app accessible.
You'll also need to create a test Service Desk project along with some sample requests:
- Go to the Jira home page by clicking the Jira logo in the top-left. Then, click Projects, and click the Create project button in the top-right. From the dropdown, select Company-managed project.
- Click Change template and choose Internal service desk. Enter a project name of your choice, then click Create.
- From within your new Service Desk project, click the Channels item on the sidebar, then hover over the Help Center item and click Open to open your Customer Portal.
- Finally, from within the Customer Portal, create a few sample requests that we'll later use to test our finished product!
Getting things running
It's time to see your app in action! In this section, you'll deploy your app to your cloud instance of Jira Service Desk. You'll also extend the Jira Service Desk UI by making use of an extension point inside the agent portal, and call the Jira Service Desk REST API to retrieve your list of requests from the instance.
Adding your credentials
During testing and development, ACE can automatically install and update your app in your development instance of Jira Service Desk. To enable this behavior, you must provide credentials:
-
Go to Manage your account and generate an API token.
-
Rename the
credentials.json.samplefile tocredentials.json. -
Open that file, and fill out the fields like so:
1 2
{ "hosts": { "https://your-domain.atlassian.net": { "product": "jira", "username": "YOUR@EMAIL.NET", "password": "YOUR GENERATED API TOKEN" } } }Note that
usernametakes your account email address, not your login name.
Starting the app
Start your app by using this simple command from the sd-my-requests directory:
1
2npm run start
The ACE framework will start a local HTTP server to host your app.
If your credentials from the previous steps are correct, your app will automatically be installed into Jira Service Desk for testing. You will see a Hello World button in the main Jira navigation sidebar, which will take you to the "Hello, world!" example page!
Extending the Jira Service Desk UI
Atlassian Connect apps can extend the UI of Atlassian products via various extension points, or modules, that are available
throughout the product. This is done by creating routes in your app, then
specifying where and how those routes are rendered in the modules section
of your atlassian-connect.json descriptor. All sorts of modules are available,
from small fragments in existing UI, to entirely new pages accessible from the sidebar.
Documentation on extension point locations is available for Jira here. Additionally, see Common Modules and Jira Modules for more information on Web UI modules.
Let's try it out. In this section, you'll extend the Jira Service Desk UI by adding a new page that displays all the requests made by the currently logged-in user:
-
Go to the
/viewssubdirectory, in yoursd-my-requestsdirectory. -
Create a file named
my-requests.hbsand add the following content using an editor:1 2
{{!< layout}} <section class="aui-page-panel-item"> <div class="aui-group"> <div id="main-content" class="aui-item"></div> </div> </section>This file will serve as the template for your "My Requests" page.
-
Go to the
/routessubdirectory, in yoursd-my-requestsdirectory. -
Edit the
index.jsfile and add the following route handling code, after the/hello-worldroute:1 2
app.get('/my-requests', addon.authenticate(), function (req, res) { res.render('my-requests'); }); -
Check that the file now looks like the following:
1 2
export default function routes(app, addon) { // Redirect root path to /atlassian-connect.json, // which will be served by atlassian-connect-express. app.get('/', (req, res) => { res.redirect('/atlassian-connect.json'); }); // This is an example route used by "generalPages" module (see atlassian-connect.json). // Verify that the incoming request is authenticated with Atlassian Connect. app.get('/hello-world', addon.authenticate(), (req, res) => { // Rendering a template is easy; the render method takes two params: // name of template and a json object to pass the context in. res.render('hello-world', { title: 'Atlassian Connect' //issueId: req.query['issueId'] }); }); // Add additional route handlers here... app.get('/my-requests', addon.authenticate(), function (req, res) { res.render('my-requests'); }); } -
Open your
atlassian-connect.jsondescriptor and remove everything inside themodulesobject. -
Add a
jiraProjectTabPanelssection inside themodulesobject:1 2
"jiraProjectTabPanels": [ { "key": "my-requests-link", "name": { "value": "My Requests" }, "url": "/my-requests", "conditions": [ { "condition": "user_is_logged_in" }, { "condition": "can_use_application", "params": { "applicationKey": "jira-servicedesk" } } ] } ] -
Verify that the file now looks like the following:
1 2{ "key": "sd-my-requests", "name": "My Requests", "description": "My very first app", "vendor": { "name": "Angry Nerds", "url": "https://www.atlassian.com/angrynerds" }, "baseUrl": "{{localBaseUrl}}", "links": { "self": "{{localBaseUrl}}/atlassian-connect.json", "homepage": "{{localBaseUrl}}/atlassian-connect.json" }, "authentication": { "type": "jwt" }, "lifecycle": { "installed": "/installed" }, "scopes": [ "READ" ], "modules": { "jiraProjectTabPanels": [ { "key": "my-requests-link", "name": { "value": "My Requests" }, "url": "/my-requests", "conditions": [ { "condition": "user_is_logged_in" }, { "condition": "can_use_application", "params": { "applicationKey": "jira-servicedesk" } } ] } ] }, "apiMigrations": { "gdpr": true } }
- Restart your Atlassian Connect app and let it redeploy to Jira Service Desk. Normally, code changes are applied without restarting, but since we made changes
to
atlassian-connect.json, we must restart.
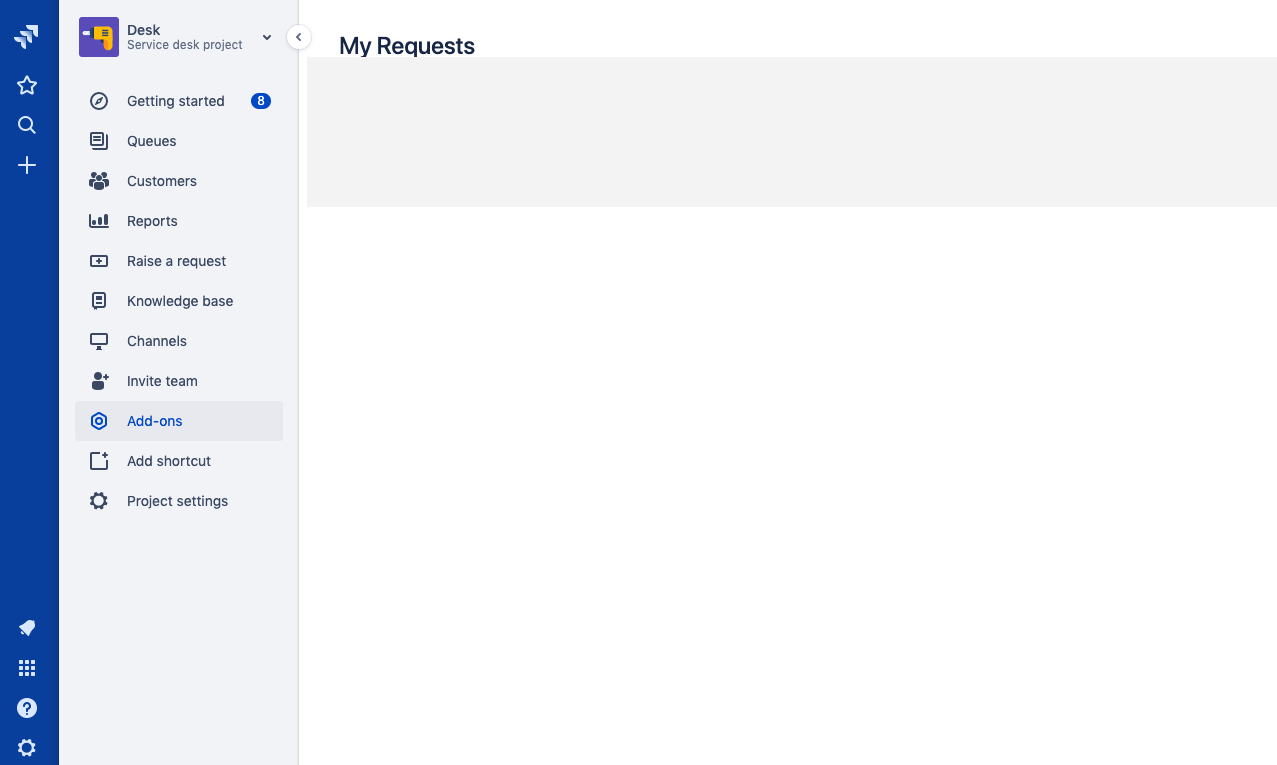
Since you've added the module to jiraProjectTabPanels, a new link will appear
in the sidebar of each Jira project. That link will open the URL specified at
url.
To limit this module to users with Jira Service Desk, we've added two conditions that must be satisfied for the module to appear: the user must be logged in, and they must have access to Jira Service Desk. For more information about module conditions, see Conditions.
You have now extended the Jira Service Desk UI with your app! Check it out by going to the agent portal of your previously created Service Desk project. Then, in the Jira sidebar, click Add-ons, then My Requests. This will take you to the (currently blank) "My Requests" page!
Using the Jira Service Desk REST API
The Jira Service Desk REST API is how Atlassian Connect apps communicate with Jira Service Desk, either for retrieving data or sending it. For more information, see the Jira Service Desk REST API reference (Cloud).
For the purposes of this tutorial, you'll only be using a single REST endpoint: /rest/servicedeskapi/request. This
endpoint is used to retrieve the list of requests made by the currently logged-in user.
The steps below will show you how to call the Jira Service Desk REST API to retrieve the list of requests, then create and populate a table with the results:
-
Go to the
/public/jssubdirectory, in yoursd-my-requestsdirectory. -
Edit the
addon.jsfile, and add the following code:1 2
$(document).ready(function () { // GET our Service Desk requests via the Jira Service Desk REST API AP.request({ url: '/rest/servicedeskapi/request', success: function (response) { // Parse the response JSON var json = JSON.parse(response); // Store the base URL for later var baseUrl = json._links.base; // Did we get any requests back? if (json.values.length > 0) { // Create a table with the resulting requests $('<table>').addClass('aui').append( $('<thead>').append( $('<tr>').append( $('<th>').text('Issue Key'), $('<th>').text('Current Status'), $('<th>').text('Summary'), $('<th>').text('Date Created'), $('<th>') ) ), $('<tbody>').append( $.map(json.values, function (e) { // Map each request to a HTML table row return $('<tr>').append( $('<td>').append( $('<a>').attr('href', baseUrl + '/browse/' + e.issueKey) .attr('target', '_top') .text(e.issueKey) ), $('<td>').text(e.currentStatus.status), $('<td>').text(e.requestFieldValues[0].value), $('<td>').text(e.createdDate.friendly), $('<td>').append( $('<a>').attr('href', baseUrl + '/servicedesk/customer/portal/' + e.serviceDeskId + '/' + e.issueKey) .attr('target', '_blank') .text('View in customer portal') ) ); }) ) ).appendTo('#main-content'); } else { // Show a link to the Customer Portal $('<div>').addClass('aui-message').append( $('<p>').addClass('title').append( $('<span>').addClass('aui-icon').addClass('icon-info'), $('<strong>').text("It looks like you don't have any requests!") ), $('<p>').append( $('<span>').text("Visit the "), $('<a>').attr('href', baseUrl + '/servicedesk/customer/portals') .attr('target', '_blank') .text('Customer Portal'), $('<span>').text(" to create some.") ) ).appendTo('#main-content'); } }, error: function (err) { $('<div>').addClass('aui-message').addClass('aui-message-error').append( $('<p>').addClass('title').append( $('<span>').addClass('aui-icon').addClass('icon-error'), $('<strong>').text('An error occurred!') ), $('<p>').text(err.status + ' ' + err.statusText) ).appendTo('#main-content'); } }); });
Let's investigate this code a little more:
- The
APobject is provided by Atlassian Connect, and contains the JavaScript API. For more information, see About the JavaScript API. - The
AP.requestfunction will authenticate requests for you, so you can make API calls without needing to worry about authentication. For more information, see the documentation for Request. - We make the asynchronous request to
/rest/servicedeskapi/request, and supply both a success and error handler. Inside the success handler, we generate a table using the returned payload.
Your app can now make requests to the Jira Service Desk REST API! Check it by going to your "My Requests" page. You will see a table populated with all your requests!
The finished result
Congratulations! You've successfully built your first Atlassian Connect app for Jira Service Desk!
Additional resources
Rate this page: