Plugin points for the editor in 4.0
Adding to the More format Menu
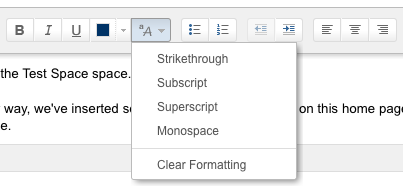
You can add to this More formatting menu by adding a web-item with section system.editor.more.formats to your plugin.xml file. For example:
1
2<web-item key="editor-awesome-format" name="Awesome Format" section="system.editor.more.formats" weight="10">
    <label key="my.plugin.awesome.format"/>
    <link linkId="my-awesome-format"/>
</web-item>
This will add an extra item after the first group of options (after the monospace formatting option). You can then bind to this button in your javascript like so:
1
2$("#my-awesome-button").click(function(){
   tinymce.activeEditor.execCommand("FormatBlock", false, "samp");
});
You can write your own TinyMCE commands or simply execute an existing one. See the TinyMCE documentation for more details.
Adding your macro to the insert menu
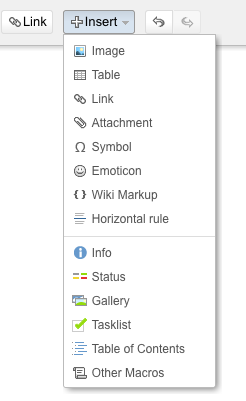
You can add your macro to the Insert menu by adding a web-item with section system.editor.featured.macros.default to your plugin.xml file. For example:
1
2<web-item key="editor-my-macro" name="Insert Menu Link - My Macro" section="system.editor.featured.macros.default" weight="100">
    <label key="my.plugin.macro"/>
    <link linkId="mymacro"/>
</web-item>
This will add an extra item to the second group of options in the menu, depending on the weight of the web item. The linkId must be the name of the macro you have defined in your plugin.xml file. When your new menu option is clicked, it will automatically open the Macro Browser with the Insert Macro page of your macro.
Rate this page: