Starting a Confluence cluster on a single machine
As part of the work to ensure your plugin is cluster compatible you will need to functionally test it on a running Confluence cluster. One way to do this is to configure a 2 node cluster on your development machine.
1. Download and install the clustered artifact
- Follow the instructions in Installing Confluence Data Center up to the point you're about to add a second node. Configuring Synchrony is optional, but recommended if your add-on interacts with the editor.
- At this point you will have a single instance running and should have three relevant directories:
- an installation directory, which we will refer to as 'confluence-1'
- a local home directory which we will refer to as 'home-1'.
- A shared home directory which we will refer to as 'shared-1'.
- Stop Confluence.
When setting up Confluence you can use the following evaluation license.
This license is provided for the sole purposes of testing your plugin with a Confluence Data Center cluster.
1
2AAABCQ0ODAoPeNpdUNFOg0AQfO9XkPhMc2Bs0yaXSMsl2iAQqa2v67noJbA0dwexf+/Joal9nZmd2
ZmbI74HO6AgZgFbrdntOl4GiUj3DogWM9lRPd92ZEFa8QSq4R3hAA0oQroH24AxCmguu9ZrnU4Ny
K3u0QMlaEuoc2iReyQFC1ski/pClimJZHB/PuEoTcVBZEUpnj1d6A8gZcCqjnjyG+s54f7pPVNDY
yZD96yLICCJ4uuk9NnFIi+X8cOsQj2gfkz5plrchYd8JcJqc0zC12qX+eO8b99QF/WLQW14xBiby
vRafoLB0etnoJBFYcz+VbhOu5xwrFY0jQryvxUngcaxwrXzN27wjQkwLQIUe9x9vLLNd9fUle/0U
O/G3mT4j6UCFQCDPOxJITv6OhbghOtduVBMsvVfGg==X02dl
This license is a 1000 user developer license and will expire 72 hours after its initial activation.
2. Set up Synchrony
Managed Synchrony won't work with the workarounds required to run two Confluence nodes on the same machine, as described in this tutorial.
If you need collaborative editing to be available, you'll need to set up Synchrony standalone, and pass the Synchrony URL to each node.
See Set up a Synchrony cluster for Confluence Data Center for a step by step guide. You'll only need one Synchrony node.
3. Create the second node
-
Copy 'confluence-1' and 'home-1', and name them 'confluence-2' and 'home-2'.
-
Set the home directory for the second node to 'home-2':
- Edit
confluence-2/confluence/WEB-INF/classes/confluence-init.properties - Alter the
confluence.homesetting to point to the 'home-2' directory.
- Edit
-
Alter the Tomcat server for 'confluence-2' to use different ports from 'confluence-1':
-
Edit
confluence-2/conf/server.xml -
The file starts:
1 2
<Server port="8000" shutdown="SHUTDOWN" debug="0"> <Service name="Tomcat-Standalone"> <Connector className="org.apache.coyote.tomcat4.CoyoteConnector" port="8090" minProcessors="5" maxProcessors="75" enableLookups="false" redirectPort="8443" acceptCount="10" debug="0" connectionTimeout="20000" useURIValidationHack="false" URIEncoding="UTF-8"/>alter the ports and redirectPort attributes so it reads:
1 2
<Server port="9000" shutdown="SHUTDOWN" debug="0"> <Service name="Tomcat-Standalone"> <Connector className="org.apache.coyote.tomcat4.CoyoteConnector" port="9090" minProcessors="5" maxProcessors="75" enableLookups="false" redirectPort="9443" acceptCount="10" debug="0" connectionTimeout="20000" useURIValidationHack="false" URIEncoding="UTF-8"/>(in this example the 8's have been changed to 9's).
-
-
The second server also needs to be configured with a different Hazelcast port from the first. This is done via a system property:
1
2-Dconfluence.cluster.hazelcast.listenPort=5851
Start the cluster
IPv6 support was added in Confluence 6.9. For earlier versions you need to start each server with the system property: -Djava.net.preferIPv4Stack=true
From 6.9 and later, you can start Confluence with -Djava.net.preferIPv4Stack=false if you need to test in an IPv6 environment.
To start the cluster:
- Start the first server and wait for start up to complete. This is signified by the message in the log
in it Confluence is ready to serve. - Start the second server.
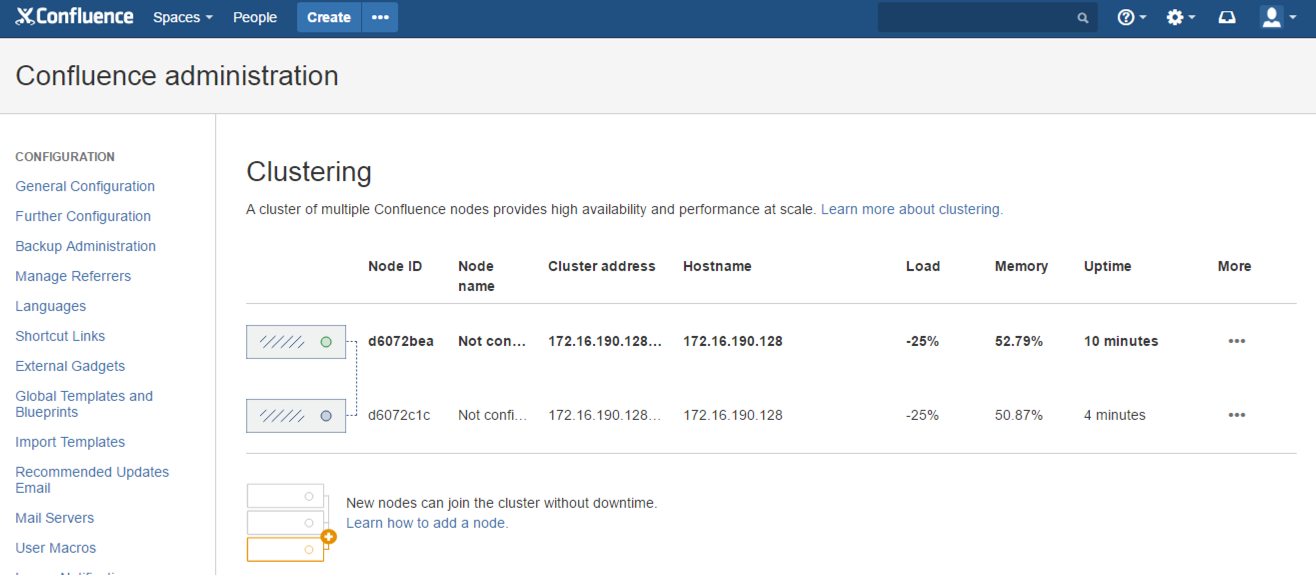
- On either node, go to General Configuration > Clustering to check your cluster is running. You should see both nodes reported, similar to this:
Rate this page: