Using REST API to write a gadget to monitor recent changes
Level of experience: Beginner
Our tutorials are classified as 'beginner', 'intermediate' and 'advanced'. This one is at 'beginner' level, so you can follow it even if you have never developed a plugin or gadget before.
Overview
This tutorial shows you how to write a gadget that lists the most recent changes which have been committed to the repositories monitored by a Fisheye instance.
What You Will Learn
After completing this tutorial you will know how to:
- Create a gadget to be hosted by Fisheye and displayed on the JIRA dashboard.
- Use Fisheye and Crucible's built in REST services from a Gadget.
Assumed Knowledge
- Understanding of what a gadget is and the relationship between the dashboard a gadget is displayed on and the host the gadget is served from.
- Familiarity with writing Javascript.
- Familiarity with the jQuery library.
Your gadget will be a 'plugin' gadget. That means that it will be embedded within an Atlassian plugin. The plugin will consist of the following parts:
- An Atlassian plugin descriptor, that is an XML file enabling the plugin in Fisheye.
- A gadget specification, that is an XML file containing the gadget's HTML, CSS and Javascript.
All these components will be contained within a single JAR file. We will discuss each component in the examples below.
If you are interested, you can compare standalone gadgets and gadgets embedded in plugins.
Step 1. Create the Plugin Project
Use the appropriate atlas-create-application-plugin command to create your plugin. For example, atlas-create-jira-plugin or atlas-create-confluence-plugin.
When you run atlas-create-fecru-plugin you'll be asked to supply a groupId and an artifactId - use com.atlassian.tutorial.fisheye and recentchangesgadget respectively. When you create a plugin of your own, you should use a groupId based on your company's domain.
You need to make sure that your project is using Fisheye 2.2.0 or later. Edit your pom.xml and set the fecru.version property to the build number of the version of Fisheye you want to use, e.g.:
1
2<properties>
        <fecru.version>2.2.0-465</fecru.version>
        ...
</properties>
Step 2. Customise the plugin Vendor and Description in your pom.xml
Here are the parts of pom.xml which you may wish to change:
1
2...
<organization>
    <name>Example Company</name>
    <url>http://www.example.com/</url>
</organization>
...
<description>This is the com.atlassian.tutorial.fisheye:recentchangesgadget plugin for Atlassian Fisheye/Crucible.</description>
...
You should change the organization name and url attributes to those of your company, and the description to a description of your plugin.
These values are copied to your atlassian-plugin.xml plugin descriptor file, and are displayed on the plugin administration page of Fisheye when your plugin is loaded.
Step 3. Create the Gadget Specification
Here is a basic gadget specification using the Atlassian Gadgets JavaScript Framework:
1
2<?xml version="1.0" encoding="UTF-8" ?>
<Module>
<ModulePrefs title="Recent Changes" directory_title="Recent Changes" description="Recent Changes in Fisheye repositories">
<Require feature="dynamic-height" />
<Optional feature="auth-refresh"/>
<Require feature="setprefs" />
<Require feature="settitle" />
<Require feature="views" />
<Optional feature="atlassian.util" />
<Optional feature="gadget-directory">
    <Param name="categories">FishEye</Param>
</Optional>
</ModulePrefs>
<Content type="html">
<![CDATA[
<!-- The #-directive below will include all required JavaScript and CSS resources needed to use the Atlassian Gadgets JavaScript Framework. -->
#requireResource("com.atlassian.gadgets.publisher:ajs-gadgets")
#includeResources()

<script type="text/javascript">
(function () {
/* (2) Construct and initialise the gadget */
var gadget = AJS.Gadget({
  baseUrl: "__ATLASSIAN_BASE_URL__", /* (3) Used to make the application's base URL available to the gadget */
  view: { /* (4) Defines the view logic and initialises the view */
    enableReload: true,
    onResizeReload: false,
    onResizeAdjustHeight: true,
    template: function (args) {
        this.getView().html("<div>Hello World</div>");
        },
    args: []
    }
  });
})();
</script>
]]>
</Content>
</Module>
Copy the XML code from the above gadget specification and put it in a new file named gadget.xml in the src/main/resources directory.
Step 4. Register the Plugin Module in the Plugin Descriptor
-
Add the
<gadget>the plugin module to your plugin descriptor,atlassian-plugin.xml.1 2
<atlassian-plugin key="${project.groupId}.${project.artifactId}" name="${project.artifactId}" plugins-version="2"> <plugin-info> <description>${project.description}</description> <version>${project.version}</version> <vendor name="${project.organization.name}" url="${project.organization.url}" /> </plugin-info> <gadget key="gadget" location="gadget.xml"/> </atlassian-plugin> -
Follow these steps to build and install your plugin, so that you can test your code. If you have not already started the application, start it now:
- Open a command window and go to the plugin root folder (where the
pom.xmlis located). - Run
atlas-run(oratlas-debugif you might want to launch the debugger in your IDE).
From this point onwards, you can use QuickReload to reinstall your plugin behind the scenes as you work, simply by rebuilding your plugin.
- Open a command window and go to the plugin root folder (where the
FastDev and atlas-cli have been deprecated. Please use Automatic Plugin Reinstallation with QuickReload instead.
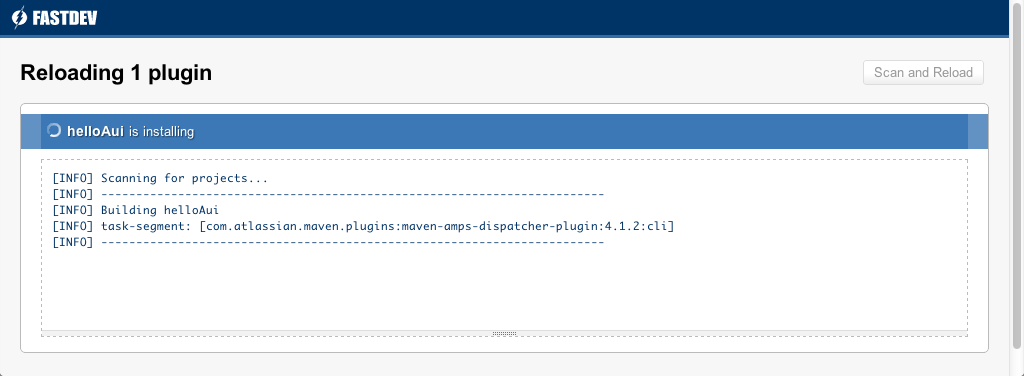
1
2To trigger the reinstallation of your plugin:

1.  Make the changes to your plugin module.
2.  Open the Developer Toolbar.
    <img src="/server/fisheye-crucible/images/fastdev1.png" width="600" />
3.  Press the FastDev icon.
    <img src="/server/fisheye-crucible/images/fastdev2.png" width="600" />
    The system rebuilds and reloads your plugin:
    <img src="/server/fisheye-crucible/images/fastdev3.png" width="600" />

Use live reload to view real-time updates to templates and other resources:

1.  Open the Developer Toolbar.
2.  Press the live reload icon.
    The  icon starts to revolve indicating it is on.
3.  Edit your project resources.
4.  Save your changes:
    Back in the host application, your plugin displays any user visible changes you make.

Go back to the browser. The updated plugin has been installed into the application, and you can test your changes.

The full instructions are in the [SDK guide](https://developer.atlassian.com/display/DOCS/Working+with+the+SDK).
Step 5. Add the Gadget to a Dashboard for Testing
The gadget you are creating in this tutorial will be 'served' by a Fisheye instance, but 'hosted' on a JIRA dashboard. That is, the HTTP requests which serve the plugin descriptor you created above, and the plugin's data and resources will go to a Fisheye instance in which the plugin is installed, but the gadget will be displayed on a JIRA dashboard.
You will need an instance of JIRA on which you have administrative privileges. This JIRA instance must also be able to 'see' the Fisheye instance serving the plugin. A JIRA instance outside your firewall will not be able to see a Fisheye instance running on your desktop development machine without special network configuration, for instance.
To add the plugin you will need to:
-
Start up your Fisheye instance with the plugin SDK command
atlas-run. This builds your plugin and starts a Fisheye instance with the plugin installed in it. -
Go to localhost:3990/fecru/admin/viewplugins.do and check that your plugin has loaded successfully. You should see this:

-
Add the plugin to your JIRA dashboard:
-
Log in as an administrator.
-
Select Tools, Create Dashboard... and create a new, blank dashboard.
-
When your new dashboard displays, click 'add a new gadget'
-
Click the 'Add Gadget to Directory' button and type gadget.xml and click 'Add Gadget'.
-
Your gadget will appear highlighted in yellow. Clock the 'Add it Now' button, and then the 'Finished' button.
-
-
You should see a new gadget containing the text 'Hello World' appear on your dashboard.
If you see the error message Error loading gadget: org.apache.shindig.gadgets.GadgetException: Unable to retrieve gadget xml. HTTP error 504 try stopping and starting JIRA.
JIRA sometimes caches your gadget, so you'll need to restart JIRA when you change your gadget.xml file, otherwise you won't see your changes.
Step 6. Make the Gadget Do Something Useful
Now you will write the JavaScript and HTML code to retrieve recent changes data from Fisheye and display the information in the gadget. As you can see below, using the built-in REST interfaces of Fisheye to retrieve the information we want for this gadget involves many REST calls. If this did not perform satisfactorily you would need to consider writing your own REST endpoint to retrieve exactly the data you need in a single call. See this REST Service Plugin Module tutorial for an example of creating your own REST endpoint.
Because your gadget is embedded in a plugin, you can use the Atlassian Gadgets JavaScript Framework in addition to the OpenSocial JavaScript API.
Clear the Current Contents of the Gadget
We are going to build up the HTML displayed in the gadget as we go, so first we will remove its contents:
1
2var gadget = this;
gadget.getView().html("<div class='main'><h1>Recent Changesets</h1></div>");
gadget.getView() returns a jQuery object representing the body of the Gadget. We replace any existing contents with a div which will contain all our content, and a h1 containing our heading.
Get the list of repositories
First the gadget retrieves a list of all the repositories in the Fisheye instance.
1
2...
        var reportError = function(request, textStatus, errorThrown) {
                    console.log("Request:");
                    console.log(request);
                    console.log("TextStatus:");
                    console.log(textStatus);
                    console.log("ErrorThrown:");
                    console.log(errorThrown);
                };
...
        AJS.$.ajax({
                url: "/rest-service-fe/repositories-v1",
                type: "GET",
                dataType: "xml",
                success: function(msg){
                    AJS.$(msg).find('repository').each(function() {
                        var name = AJS.$(this).attr('name');
                        loadChangesetsForRepo(name);
                    });
                },
                error: reportError // this function just dumps the error to the FireBug console

        });
...
Some things to notice in the code above:
- We are retrieving data from the REST endpoint as XML, and using jQuery to parse it. The Atlassian Gadgets Javascript framework prefixes jQuery with
AJS, so the jQuery$function name becomesAJS.$. - The
reportErrorfunction uses the Firebugconsoleto report errors. - Each repository name is passed to the
loadChangesetsForRepofunction, which we will write in the next step.
Find the Recent Changesets for Each Repository
Now we make another REST call for each repository, getting the recent changesets from the repository:
1
2...
var loadChangesetsForRepo = function(repoName, repoDiv) {
            var repoDiv = AJS.$("<div class='repo'><h2>" + repoName + "</h2></div>");
            gadget.getView().find("div.main").append(repoDiv);
            AJS.$.ajax({
                url: "/rest-service-fe/revisionData-v1/changesetList/" + repoName + "?maxReturn=10",
                type: "GET",
                dataType: "xml",
                success: function(msg){
                    AJS.$(msg).find('csid').each(function() {
                        var csid = AJS.$(this).text();
                        addChangesetData(repoName, csid, repoDiv)
                    });
                },
                error: reportError

            });
        };
...
- The first thing this function does is to use
jQueryto create adivto hold the changesets from this repository. The div is added as a child element to thedivwith theclassmainwhich was created at the start. - The function uses
jQueryto find eachcsidelement in the XML response. Eachcsidvalue is passed to theaddChangesetDatafunction to load the details for that changeset.
Add the HTML for a Changeset
For each changeset, we make a REST call to get its details - in this tutorial we only display the id and the comment.
1
2...
var addChangesetData = function(repoName, csid, repoDiv) {
            AJS.$.ajax({
                url: "/rest-service-fe/revisionData-v1/changeset/" + repoName + "/" + csid,
                type: "GET",
                dataType: "xml",
                success: function(msg){
                    console.log(AJS.$(msg).find("comment"));
                    var comment = AJS.$(msg).find("comment").text();
                    repoDiv.append("<div class='changeset'>" + csid + ": " +  comment + "</div>");
                },
                error: reportError

            });
        };
...
Step 7. Build, Install and Run the Plugin
Follow these steps to build and install your plugin, so that you can test your code. If you have not already started the application, start it now:
- Open a command window and go to the plugin root folder (where the
pom.xmlis located). - Run
atlas-run(oratlas-debugif you might want to launch the debugger in your IDE).
From this point onwards, you can use QuickReload to reinstall your plugin behind the scenes as you work, simply by rebuilding your plugin.
FastDev and atlas-cli have been deprecated. Please use Automatic Plugin Reinstallation with QuickReload instead.
To trigger the reinstallation of your plugin:
- Make the changes to your plugin module.
- Open the Developer Toolbar.

- Press the FastDev icon.
 The system rebuilds and reloads your plugin:
Use live reload to view real-time updates to templates and other resources:
-
Open the Developer Toolbar.
-
Press the live reload icon. The icon starts to revolve indicating it is on.
-
Edit your project resources.
-
Save your changes:
Back in the host application, your plugin displays any user visible changes you make.
Go back to the browser. The updated plugin has been installed into the application, and you can test your changes.
The full instructions are in the SDK guide.
Congratulations, that's it
Your gadget is complete. Have a chocolate!
Rate this page: