Extension point documentation
This is a continuation of the work done in 3. Providing context.
In this section you will learn how to:
- Add documentation to your extension points using schemas
You'll continue working on the tutorial page: http://localhost:7990/bitbucket/plugins/servlet/extension-points
Adding documentation to schemas
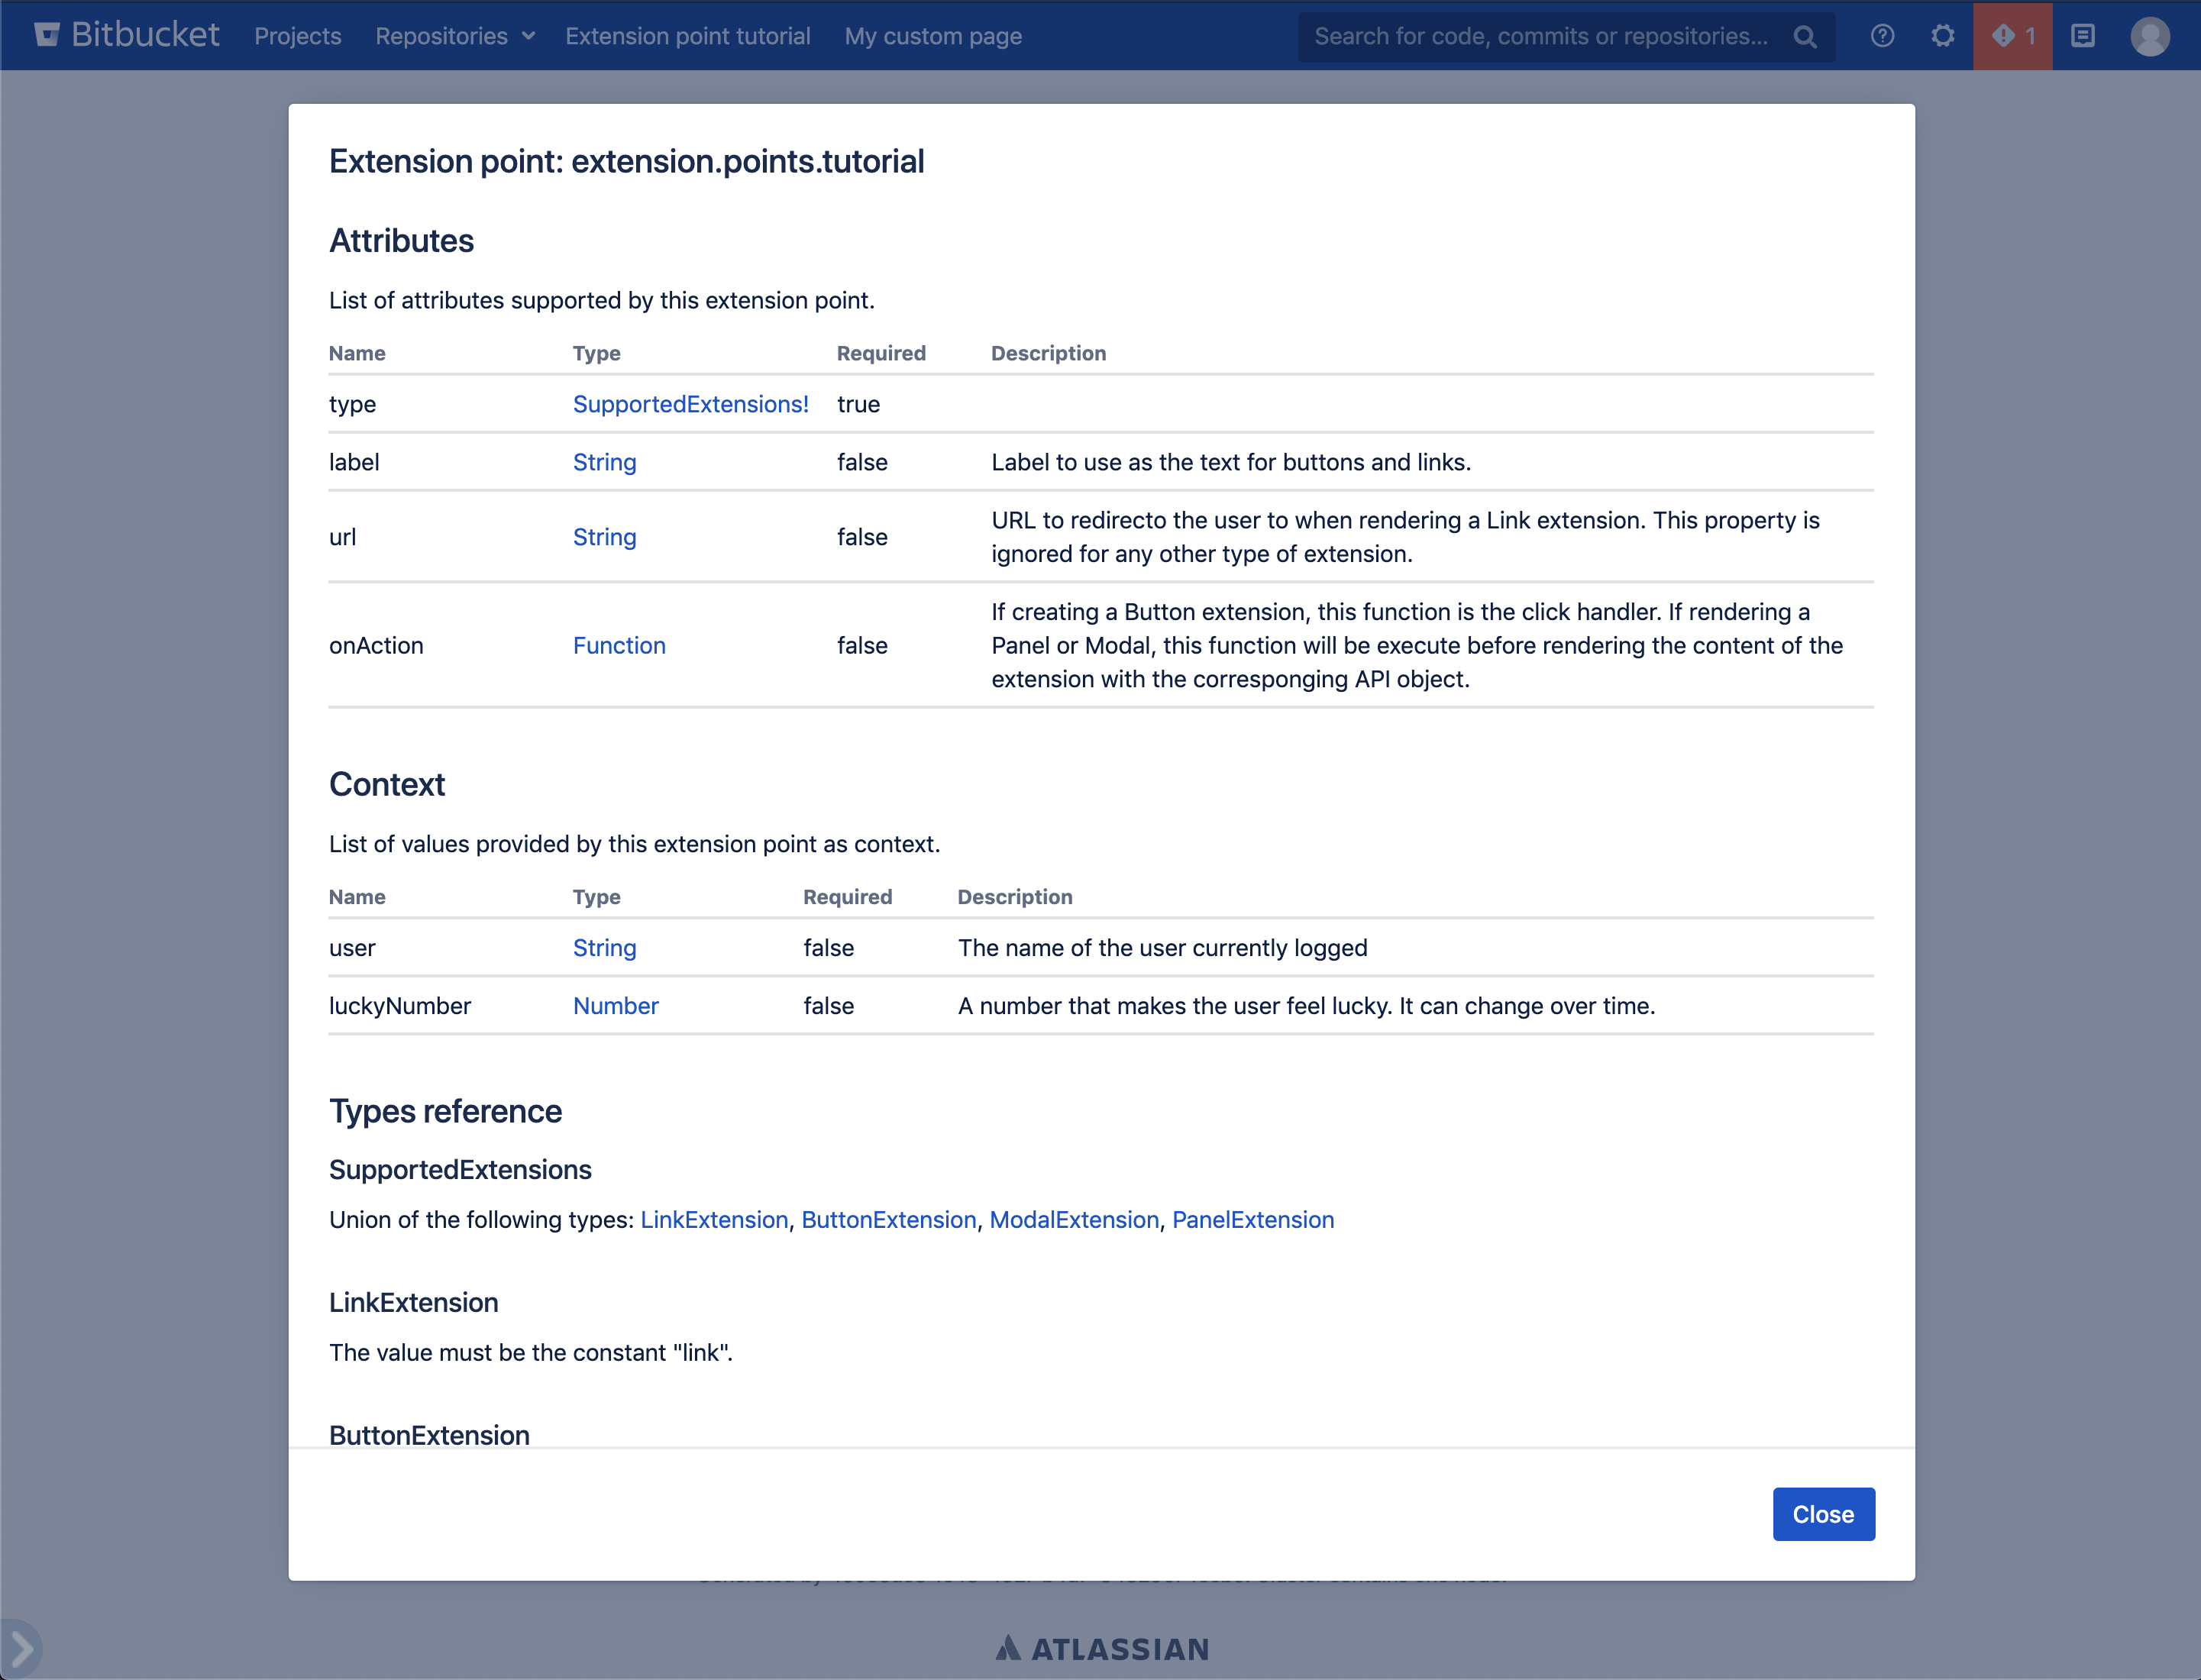
CSE schemas can auto-generate documentation for your extension points. You can improve the generated documentation by adding comments to the properties of your types and interfaces, and they will be added to the documentation too.
On /src/main/my-app/extensions/extension-points-tutorial/schema.cse.graphql, write:
1
2"""
---
extensionPoint: extension.points.tutorial
---
"""
type Schema {
    type: SupportedExtensions!

    """
    Label to use as the text for buttons and links.
    """
    label: String

    """
    URL to redirecto the user to when rendering a Link extension. This property is ignored for any other type of extension.
    """
    url: String

    """
    If creating a Button extension, this function is the click handler.

    If rendering a Panel or Modal, this function will be execute before rendering the content of the extension
    with the corresponging API object.
    """
    onAction: Function
}

union SupportedExtensions = LinkExtension | ButtonExtension | ModalExtension | PanelExtension

type ContextSchema {
    """
    The name of the user currently logged
    """
    user: String

    """
    A number that makes the user feel lucky. It can change over time.
    """
    luckyNumber: Number
}
Activating the discovery feature
Before displaying the documentation for your schemas, you need to activate the discovery feature. This feature sends a signal to the CSE registry to activate its debug mode,
which will make all the discovery icons visible (more on this later). The feature should be enabled when using the ?extensions=true
query parameter in the URL bar.
By default, this feature is not provided by products, so you might need to set it up as part of your extension point.
On ./src/main/my-app/extensions/extension-points-tutorial/extension-points-page.jsx, write:
1
2import React, { useState } from 'react';
import { useDiscovery } from '@atlassian/clientside-extensions-components';

import { useExtensions, ExtensionPointInfo } from './schema.cse.graphql';

const MyPage = () => {
    const [userInfo, setUserInfo] = useState({ user: 'Jon Doe', luckyNumber: 42 });
    const extensions = useExtensions(userInfo);
    const [discovery, setDiscovery] = useDiscovery();

    useEffect(() => {
        /* interval logic */
    }, []);

    // activate discovery mode when the URL contains the extensions query param.
    useEffect(() => {
        const url = new URL(window.location);
        setDiscovery(discovery || url.searchParams.has('extensions'));
    }, []);

    const renderExtension = (extension) => {
        /* rendering extension logic */
    };

    return (
        <PageContainer>
            <h2>
                extension.points.tutorial <ExtensionPointInfo />
            </h2>
            {extensions.map(renderExtension)}
        </PageContainer>
    );
};

/** page declaration for guides only **/
Displaying the documentation
After you write enough information about your schemas and provide the discovery feature, you can import the ExtensionPointInfo
component directly from the schema and use it. This component contains the statically generated documentation for the schema you created.
Use the ExtensionPointInfo as follows.
On ./src/main/my-app/extensions/extension-points-tutorial/extension-points-page.jsx, write:
1
2import React, { useState } from 'react';
import { useDiscovery } from '@atlassian/clientside-extensions-components';

import { useExtensions, ExtensionPointInfo } from './schema.cse.graphql';

const MyPage = () => {
    const [userInfo, setUserInfo] = useState({ user: 'Jon Doe', luckyNumber: 42 });
    const extensions = useExtensions(userInfo);
    const [discovery, setDiscovery] = useDiscovery();

    useEffect(() => {
        /* interval logic */
    }, []);

    // activate discovery mode when the URL contains the extensions query param.
    useEffect(() => {
        const url = new URL(window.location);
        setDiscovery(discovery || url.searchParams.has('extensions'));
    }, []);

    const renderExtension = (extension) => {
        /* rendering extension logic */
    };

    return (
        <PageContainer>
            <h2>
                extension.points.tutorial <ExtensionPointInfo />
            </h2>
            {extensions.map(renderExtension)}
        </PageContainer>
    );
};

/** page declaration for guides only **/
Go to http://localhost:7990/bitbucket/plugins/servlet/extension-points?extensions=true
and make sure the ?extensions=true query parameter is present. You should see a blue discovery icon on the screen
where your extension point is.
![]()
Clicking the icon displays a modal with the documentation of your extension point.

Recap
You now how to provide good documentation to developers using your extension points.
Make sure to visit the extension points API reference guide to see all the features available to consume extensions.
Rate this page: