Dialog and Sidebar Views - Archived
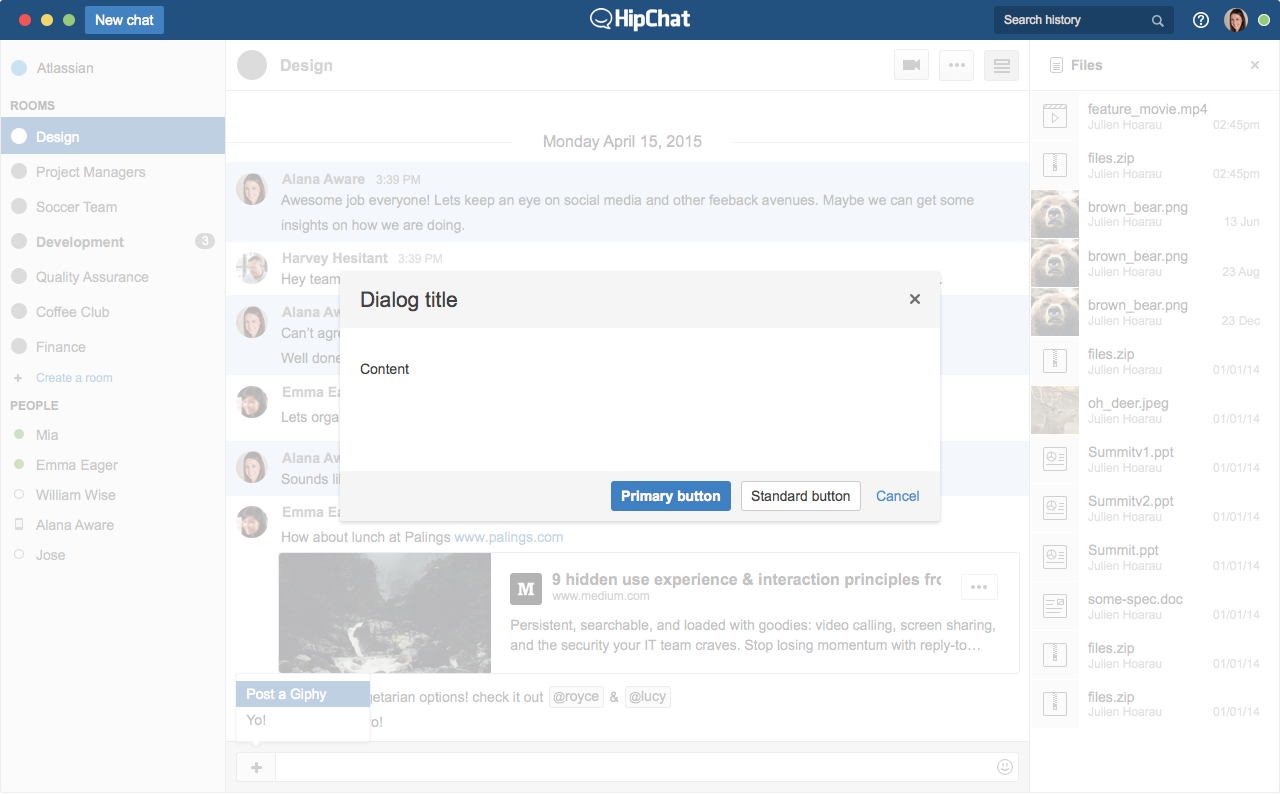
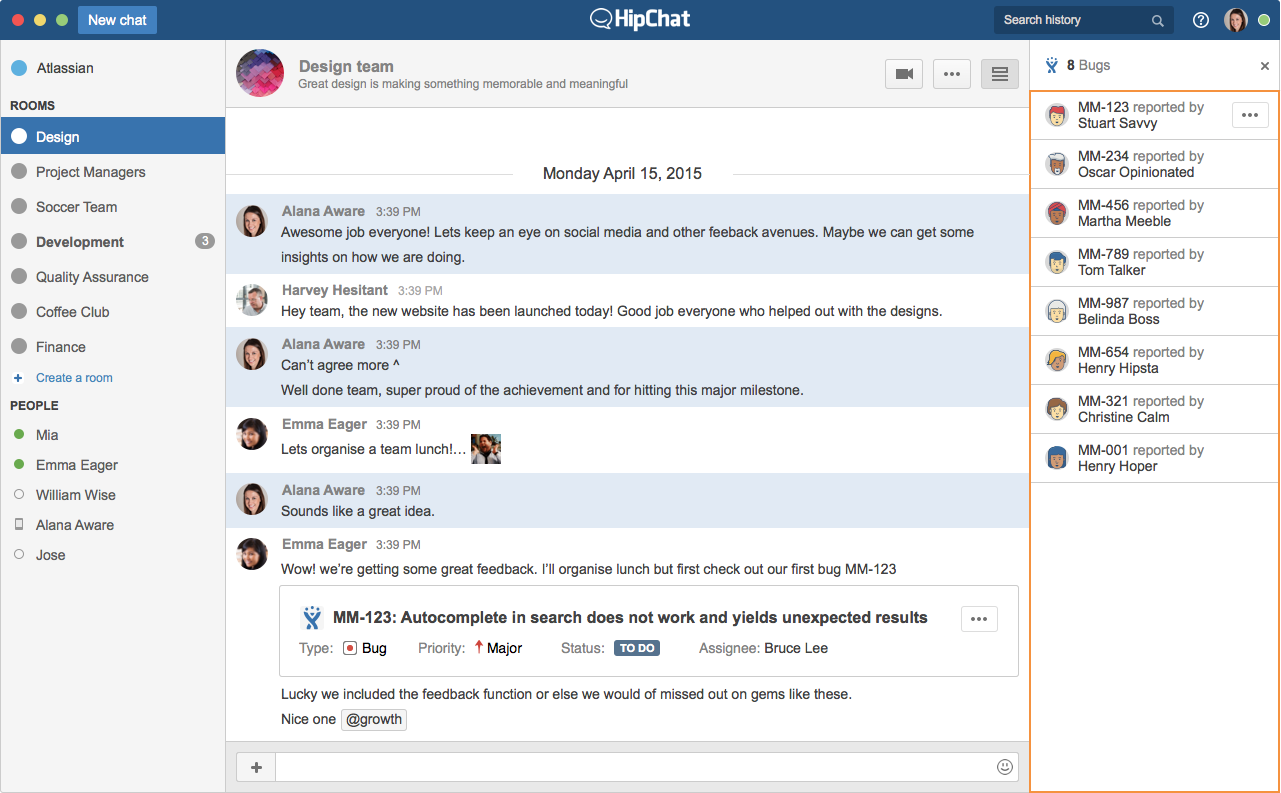
Add-ons can contribute custom HTML Views inside HipChat, currently in modal dialogs or the HipChat right sidebar.
More information
For more information about dialogs, read Dialog - Archived
For more information about contributing a sidebar, read Sidebar - Archived
The concepts in this section apply to both dialogs and sidebars.
Declaring a View
A View is declared in the add-on descriptor. For example, for a View in the HipChat right sidebar:
1
2"capabilities": {
    ...,
    "webPanel": [
        {
            "key": "myaddon-sidebar",
            "name": {
                "value": "My Add-on Sidebar"
            },
            "location": "hipchat.sidebar.right",  --> Defines where the view will appear
        "url": "{{baseUrl}}/my-sidebar"       --> Url of the page shown in the view
        }
    ]
}
Depending on the type of View, it can be opened from a HipChat Action (Message Action, Card Action, Input Action), or from another View using the Javascript API.
View the Dialog - Archived and Sidebar - Archived sections for more details on how to declare a specific View.
Implementing a View
For examples of how to implement a Dialog or Sidebar View, see:
Required Imports
A page exposed by your add-on and loaded in a View must include the following elements:
- The HipChat Javascript client library www.hipchat.com/atlassian-connect/all.js. This will enable you to use the Javascript API from within the view. If your add-on is going to support HipChat server, make sure to include
all.jsfrom the HipChat Server base url. The URL of the HipChat Server instance is part of the capabilities document that the add-ons fetch during the installation process. - Optionally: the Atlassian User Interface library (AUI) for creating user interfaces according to the Atlassian Design Guidelines (ADG)
1
2<head>
   <script src="https://www.hipchat.com/atlassian-connect/all.js"></script>
    <link rel="stylesheet" href="//aui-cdn.atlassian.com/aui-adg/5.9.5/css/aui.css" media="all">
</head>
HipChat JWT token
When a user opens the view, HipChat makes a GET request to the URL specified in the add-on's capability descriptor for this view.
The request contains a JWT token, which is signed using the installation's shared secret. In your implementation, you should validate the signature of this token (which guarantees that the request originated from HipChat).
The JWT token contains contextual information about the call: OAuth ID, room ID, user ID, etc.
Add-on JWT token
You can use the Javascript API to generate a JWT token which you can include in any request you send from your add-on front-end to your add-on back-end.
For example, if you want to post a message to the HipChat room when a user clicks on a button in the sidebar:
- In the add-on front-end code:
- Request a JWT token using the HipChat Javascript API, with
HipChat.auth.withToken(callback) - Make a REST call to your add-on back-end, including this token in the "authentication" HTTP header
- Request a JWT token using the HipChat Javascript API, with
1
2...
<button class="aui-button" id="sendCard" >Send a Card</button>
...
$( "#sendCard" ).click(function() {
   //This will request a JWT token from the HipChat client, signed with the installation shared secret,
   //which you use to secure the REST call
   HipChat.auth.withToken(function(err, token) {
      //then, make a REST call to the add-on backend, including the JWT token
      $.ajax({
         type: "POST",
         url: "/send-message",
         headers: { 'authorization': 'JWT ' + token },
         data: {cardDescription: 'This card was posted from the Sidebar'},
         dataType: 'json',
         error: function (jqXHR, status) {
            alert('fail' + status.code);
         }
      });
   });
});
- In the add-on backend code:
- Expose a POST endpoint for your add-on front-end (in our case: /send-message)
- Extract the JWT token from the "authorization" header
- Decode the JWT token
- The JWT token contains information about the context the call came from (OAuth ID, group ID, room ID, user ID)
- Lookup the installation details using the OAuth ID
- Validate the signature JWT token using the shared secret from the installation
- Generate an API access tokens
- To post a message to the room, follow instructions from Sending Messages: make a REST call to HipChat, using:
- The room ID extracted from the JWT token
- The access token generated
Rate this page: