Creating a custom preset filter
How to create a custom preset filter
This 'how to' guide will demonstrate how to create your very own custom preset filter using Web fragments.
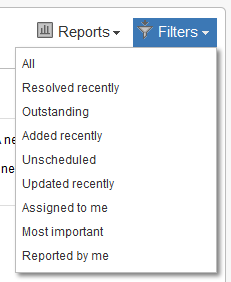
A preset filter is a link to the JIRA issue navigator with pre-defined filter attributes. These filters are available from the 'Filters' drop-down menu on the project summary page of a JIRA project.
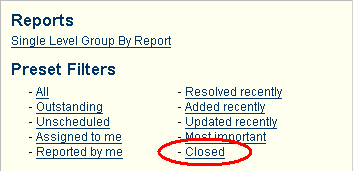
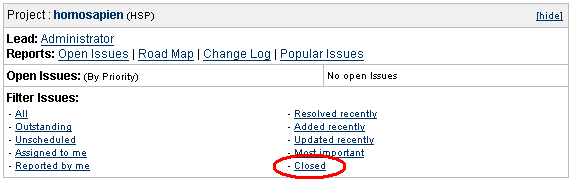
Prior to JIRA 4.0, these links appear in the 'Project Portlet' and on the 'Browse Project' page:

Creating a new preset-filter is easy and simple to add to your JIRA plugins. All you need to do is define a new web-item module in your atlassian-plugin.xml with the section attribute set to 'system.preset.filters'. JIRA will automatically add a new filter link to both the browse project page and the project portlets. The following web-item template is the minimal required to create a preset filter. (Please refer to the Web fragments for further details.)
1
2<web-item key="[FILTER_KEY]" name="[FILTER_NAME]" section="system.preset.filters">
    <label key="[FILTER_LABEL]" />
    <link>[FILTER_URL]</link>
</web-item>
The above attribute values (enclosed in '[JIRA:' and ']') are explained in the Preset Issue Filters Drop-down Location documentation. The main challenge of making a preset filter is generating the [JIRA:FILTER_URL]. For example the following relative URL repesents the standard JIRA preset filter Outstanding
1
2/secure/IssueNavigator.jspa?reset=true&mode=hide&pid=10240&resolution=-1&sorter/field=updated&sorter/order=DESC
This may seem cryptic or cumbersome to create/modify manually and require you to know exactly what the field and its values are. The best approach to generating these links is to use the Issue Navigator to filter the issues as normal. Once you have finished filtering the issues, you simply copy the link provided by the JIRA:permlink (by right clicking on it and copying the links target, this may depend on the browser you are using).
Step by Step Example: 'All closed issues in current project'
This example will demonstrate how to create a new preset filter called Closed which finds all issues in Closed status for a given project.
-
Start off with the minimal web-item module defined above
1 2
<web-item key="[FILTER_KEY]" name="[FILTER_NAME]" section="system.preset.filters"> <label key="[FILTER_LABEL]" /> <link>[FILTER_URL]</link> </web-item> -
Change the attribute values to desired values (excluding the [JIRA:FILTER_URL] for now)
1 2
<web-item key="filter_closed" name="Closed Issues" section="system.preset.filters"> <label key="Closed" /> <link>[FILTER_URL]</link> </web-item> -
Now to generate the filter url
-
Goto the Issue Navigator and set the following search fields as follows:
- Project: select any one single project (this is to get the fields id)
- Status: Closed
then click onView(orView & Hide) button
-
Right click on the JIRA:permlink and copy its target link (You can also click on the
permlinkand copy from the address bar) to get the absolute URL. You should get something like the following:1 2
http://company.com:8080/contextpath/secure/IssueNavigator.jspa?reset=true&pid=10000&status=6&sorter/field=issuekey&sorter/order=DESC -
We will need to escape reserved characters such as the ampersand '&' with '&'
1 2
http://company.com:8080/contextpath/secure/IssueNavigator.jspa?reset=true&pid=10000&status=6&sorter/field=issuekey&sorter/order=DESC -
(Optional) To make your preset-filter work on any JIRA instance (different host/context path), it is better to make the absolute URL from the previous step into a relative one. This step involves simply removing everything before
/secure/IssueNavigator.jspa.
The relative URL would be:1 2
/secure/IssueNavigator.jspa?reset=true&pid=10000&status=6&sorter/field=issuekey&sorter/order=DESC -
This URL will give us the closed issues for the project with the id
10000. To make this dynamic we replace10000with$helper.project.idwhich will get the current project's id (please refer to Web fragments for further details). So our final [JIRA:FILTER_URL] is given by:1 2
/secure/IssueNavigator.jspa?reset=true&pid=$helper.project.id&status=6&sorter/field=issuekey&sorter/order=DESC
-
-
The final
web-itemwould look something like this:1 2 3 4 5
<web-item key="filter_closed" name="Closed Issues" section="system.preset.filters"> <label key="Closed" /> <link>/secure/IssueNavigator.jspa?reset=true&pid=$helper.project.id&status=6&sorter/field=issuekey&sorter/order=DESC</link> </web-item>
There are more attributes and elements that can be defined for the web-item module to provide additional features such as internationalisation and ordering of the filters. Please refer to Web Item Plugin Module and Web Section Plugin Module for details.
You can now just add that to your atlassian-plugin.xml and 'Closed' will appear as a new 'Filters' drop-down menu item. If you are using versions of JIRA prior to 4.0, 'Closed' will appear on the 'Browse Project' page and in the 'Project Portlet':
Compiling and installing the preset filter as a plugin in JIRA
The above steps showed how to make a single plugin module, this however is not the complete plugin. A JIRA plugin is a single JAR (Java ARchive) file with atleast a plugin descriptor (an XML file called atlassian-plugin.xml). This XML file includes one or more of the plugin module's and contains additional information specifying the overall plugin's details such as its name, description, version, etc'.
-
The following sample can be used as a template to create the
atlassian-plugin.xmlfile.1 2
<!-- the plugin key must be unique, think of it as the 'package' of the plugin --> <atlassian-plugin key="com.atlassian.plugin.sample" name="Sample Plugin"> <!-- a short block describing the plugin itself --> <plugin-info> <description>This is a brief textual description of the plugin</description> <!-- the version of the plugin --> <version>1.0</version> <!-- the versions of the application this plugin is for --> <application-version min="3.7" max="3.7"/> <!-- details of the plugin vendor --> <vendor name="Atlassian Software Systems Pty Ltd" url="http://www.atlassian.com"/> </plugin-info> <!-- ... Add your plugin modules here ... --> </atlassian-plugin>Modifying the attributes of the template and adding the preset filter plugin module where marked, the final file will look like the attached: JIRA:atlassian-plugin.xml.
-
Now the
atlassian-plugin.xmlneeds to be packaged as a single JAR file. There are various ways of doing this, two simple ways are:-
In a command line with
jarinstalled, run the following command (with atlassian-plugin.xml in the current directory):1 2
jar -cvf plugin-name.jar atlassian-plugin.xmlOR
-
Add the
atlassian-plugin.xmlfile to a ZIP file (eg. using WinZip/WinRAR), then rename the ZIP file with a.jarextension (ie. renamefile.ziptofile.jar)
The final jar file should look something like JIRA:preset-filter-example-plugin.jar
-
-
To install the JAR file:
- Shut down JIRA
- copy the jar file into '.../atlassian-jira/WEB-INF/lib/'
- Start up JIRA.
- Go to 'Administration > Plugins' and confirm that the plugin is listed and enabled (look for the name specified in atlassian-plugin.xml - eg. Sample Plugin).
- Enjoy!
Please note that the steps outlined above are only valid for packaging basic plugins such as the preset filters. For a more comprehensive plugin, you may need to include additional resources. Please refer to the JIRA developer documentationand Setting up your plugin project for more details.
You can get a full sample plugin from the Jira Plugin Development Kit which extends the web-item defined above by internationalising it and placing the 'Closed' link under the 'All' filter.
Rate this page: