Creating an AJAX dialog
Level of experience: Intermediate
Our tutorials are classified as 'beginner', 'intermediate' and 'advanced'. This one is at 'intermediate' level. If you have never developed a plugin before, you may find this one a bit difficult.
Overview
This tutorial shows you how to develop an AJAX Dialog in JIRA. To do this, you create an add watchers plugin, a dialog that allows a user to specify watchers on the view issue page in JIRA or add other users to as watchers on the view issue page. As with all plugins, your plugin will consist of the following components:
- Java classes encapsulating the plugin logic
- Resources for display of the plugin UI
- Plugin descriptor to enable the plugin module in JIRAi
All these components will be contained within a single JAR file. Each component is further discussed in the examples below.
Required Knowledge
To complete this tutorial, you must already understand the basics of Java development: classes, interfaces, methods, how to use the compiler, and so on. You should also understand:
- How to create an Atlassian plugin project using the Atlassian Plugin SDK.
- How to open the plugin project in your IDE.
- How to compile your project and create a JAR file using Maven.
Plugin Source
We encourage you to work through this tutorial. If you want to skip ahead or check your work when you are done, you can find the plugin source code on Atlassian Bitbucket. Bitbucket serves a public Git repository containing the tutorial's code. To clone the repository, issue the following command:
1
2$ git clone https://atlassian_tutorial@bitbucket.org/atlassian_tutorial/jira-dialog-tutorial.git
Alternatively, you can download the source using the Downloads page here: https://bitbucket.org/atlassian_tutorial/jira-dialog-tutorial
Step 1. Create the Plugin Project
Use the appropriate atlas-create-application-plugin command to create your plugin. For example, atlas-create-jira-plugin or atlas-create-confluence-plugin.
When you create the plugin using the above SDK, you will be prompted for some information to identify your plugin. Enter the following information:
- group-id:
com.example.dialog - artifact-id:
- version:
1.0 - package:
com.example.dialog
Follow these steps to build and install your plugin, so that you can test your code. If you have not already started the application, start it now:
- Open a command window and go to the plugin root folder (where the
pom.xmlis located). - Run
atlas-run(oratlas-debugif you might want to launch the debugger in your IDE).
From this point onwards, you can use QuickReload to reinstall your plugin behind the scenes as you work, simply by rebuilding your plugin.
FastDev and atlas-cli have been deprecated. Please use Automatic Plugin Reinstallation with QuickReload instead.
To trigger the reinstallation of your plugin:
- Make the changes to your plugin module.
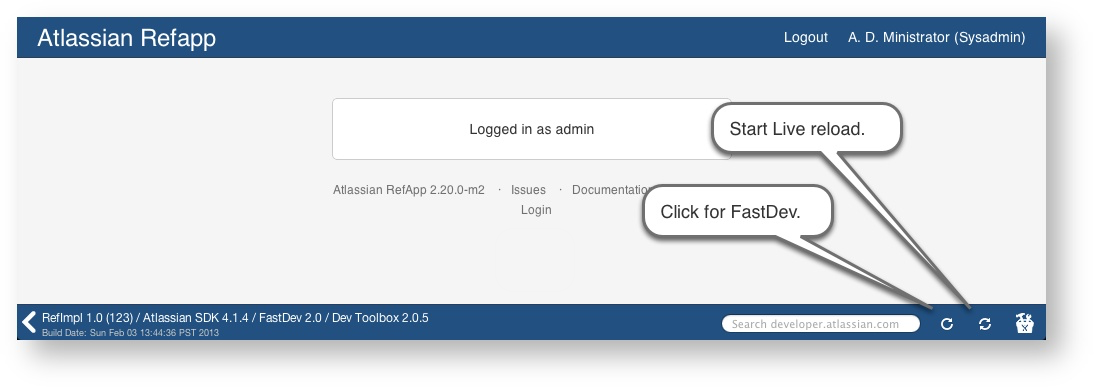
- Open the Developer Toolbar.
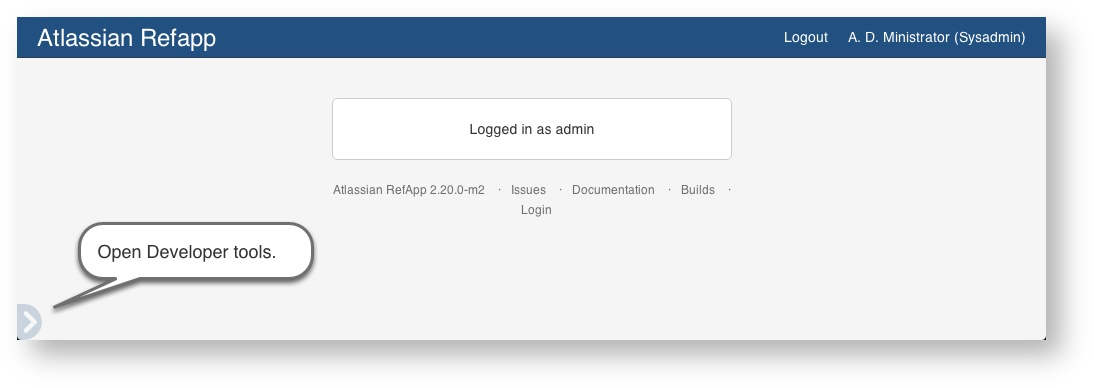
- Press the FastDev icon.
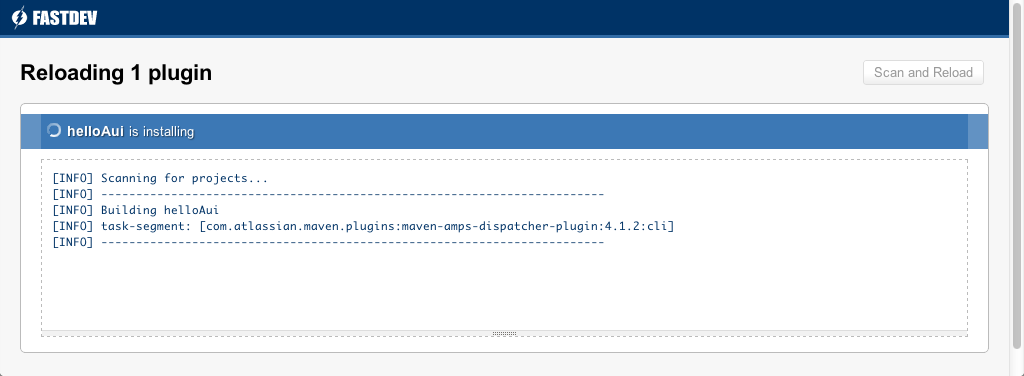
 The system rebuilds and reloads your plugin:
Use live reload to view real-time updates to templates and other resources:
- Open the Developer Toolbar.
- Press the live reload icon. The icon starts to revolve indicating it is on.
- Edit your project resources.
- Save your changes: Back in the host application, your plugin displays any user visible changes you make.
Go back to the browser. The updated plugin has been installed into the application, and you can test your changes.
The full instructions are in the SDK guide.
Step 2. Add Plugin Metadata to the POM
Now you need to edit your POM (Project Object Model definition file) to add some metadata about your plugin and your company or organisation.
-
Edit the
pom.xmlfile in the root folder of your plugin. -
Add your company or organisation name and your website to the
<organization>element:1 2
<organization> <name>Example Company</name> <url>http://www.example.com/</url> </organization> -
Update the
<description>element:1 2
<description>This plugin allows a user to specify watchers via a dialog on the view issue page</description> -
Save the file.
Step 3. Register the Plugin Module in the Plugin Descriptor
Now you will add the required plugin modules to your plugin descriptor at src/main/resources/atlassian-plugin.xml. The plugin descriptor is an XML file that identifies the plugin to JIRA and defines the functionality that the plugin requires.
Here's a basic plugin descriptor:
1
2<atlassian-plugin key="${project.groupId}.${project.artifactId}" name="${project.artifactId}" plugins-version="2">
    <plugin-info>
        <description>${project.description}</description>
        <version>${project.version}</version>
        <vendor name="${project.organization.name}" url="${project.organization.url}" />
    </plugin-info>
</atlassian-plugin>
Note that some of the information from the POM is transferred to the plugin descriptor using variable names such as ${project.artifactId}.
Now you are ready to move onto writing some code to make your plugin do something.
Step 4. Add internalization support
With any good plugin, you will want to add support for different languages.
To do this, you will need to add a i18n resource.
- Create a package named com.example.dialog in the resources folder
- Create a file named i18n.properties in the package you just created
- Edit atlassian-plugin.xml, add a new resource that is a child of the atlassian-plugin element (see below)
1
2<atlassian-plugin ...>
...
<resource type="i18n" name="i18n" location="com.example.dialog" />
...
</atlassian-plugin>
Step 5. Add link to view issue page
You will need a way to trigger the dialog. You will be adding a triggering link to the voters and watchers section of the more actions menu.
To do this, you will write a web-item module. A web-item module is a descriptor for a HTML <a> tag (link).
Edit atlassian-plugin.xml, add a new module that is a child of the atlassian-plugin element (see below)
1
2<atlassian-plugin ...>
...
<web-item key="tutorial.operations.webitem" name="My Dialog Item" section="operations-voteswatchers" weight="1">
    <label key="tutorial.labels.add.watchers" />
    <link linkId="add-watchers">/AddWatchers!default.jspa?id=${issue.id}</link>
</web-item>
...
</atlassian-plugin>
The table below only contains attributes/elements meaningful to the code example above. For complete documentation see web-item module.
Attribute | Description |
|---|---|
Section | This is the where our triggering link will be placed in the JIRA User Interface (operations-voteswatchers section) |
Element | Description |
label |
|
link | Contains url to your action (we will set this up later). This value is rendered as a velocity template, giving you access to it's field. You will need to use this to add the issueId request parameter.
|

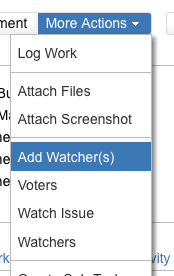
On the view issue page, your triggering link should appear under the more actions menu.
Step 6. Add JavaScript web-resource
Clicking your triggering link you will take you to an error page. Forget about the error for now, concentrate on getting a dialog to display.
To do this, you will need to add JavaScript to the page. This is done by writing a Web Resource Plugin Module.
-
Create a new file named tutorial.js under the resources directory.
-
Edit atlassian-plugin.xml, add a new module that is a child of the atlassian-plugin element (see below)
1 2
<atlassian-plugin ...> ... <web-resource name="Resources" key="resources"> <resource name="tutorial.js" type="download" location="/js/tutorial.js"/> <context>atl.general</context> </web-resource> ... </atlassian-plugin>Element
Description
resource
location - The location of the JavaScript file you created. (This path is relative to the resources directory)
context
On which page the JavaScript file should be added. atl.general will add it to all pages.
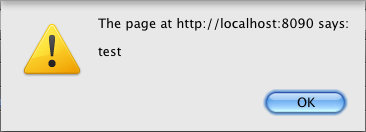
On the view issue page, confirm your JavaScript file is present by adding alert("test") to the top of your JavaScript file.
Step 7. Bind Dialog to Triggering Link
Now that you can include JavaScript on the page, you need to use it to bind a dialog to your triggering link.
To do this, add the following snippet to your JavaScript file:
1
2jQuery(function () {
    new AJS.FormPopup({
        id: "add-watchers-dialog",
        trigger: "#add-watchers"
    });
});
-
Wrapping a function in jQuery() delays the functions execution until the entire page has loaded and your trigger link is available to bind to.
-
AJS.FormPopup is an Atlassian JavaScript control that launches a dialog from a specified trigger. It accepts an object of options.
-
The AJS.FormPopup control uses the triggering link's href attribute to form the request
Option
Required
Description
id
Yes
ID attribute specified on the Dialog DOM node
trigger
Yes
A jQuery selector that locates your triggering link
ajaxOptions
No
Allows you to specify additional request options (See jQuery AJAX)
Response code handling 200 - dialog will remain open and the content replaced. 204 - dialog will close and the page refreshed
On the view issue page, clicking your link should now open a dialog.
Step 8. Add Java Action
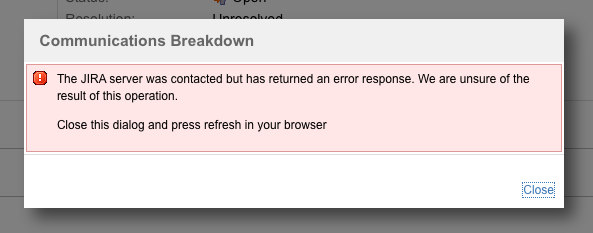
In the previous screenshot, you may have noticed a Communications Breakdown Error message in your dialog. This is because we need to create an action.
To do this, you will write a Webwork plugin module.
-
Create AddWatchers class in the com.example.dialog package.
1 2
public class AddWatchers extends AbstractIssueSelectAction { private final WatcherManager watcherManager; private final BeanFactory beanFactory; private String[] watcherUserNames = new String[0]; private List<String> validUsernames = new ArrayList<String>(); @Override public String doDefault() throws Exception { return INPUT; } } -
Register your action, add a new module that is a child of the atlassian-plugin element.
1 2
<atlassian-plugin ...> ... <webwork1 key="tutorial.actions" name="Adds Watchers" class="java.lang.Object"> <actions> <action name="com.example.dialog.AddWatchers" alias="AddWatchers"> <view name="input">/templates/add-watchers.vm</view> </action> </actions> </webwork1> ... </atlassian-plugin>For a full description of all the elements in the code snippet above see webwork elements. Below are the elements that are meaningful to this tutorial.
Element
Description
action
- name - Fully qualified Java Class
alias - Name used in URL |
view
Path to velocity template (Path relative to resources directory)
- name - Fully qualified Java Class
-
Finally, your need to create a view (velocity template) for your action. Create a file under the Resources directory named add-watchers.vm.
-
Edit add-watchers.vm, add a header tag.
1 2
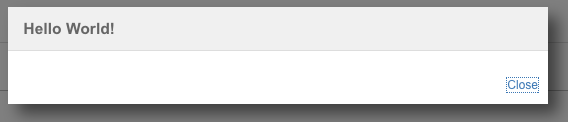
<h2>Hello World!</h2>
The first heading tag, for example <h2>, will be used as the title of the dialog.
On the view issue page, clicking your triggering link should now reveal a Hello World dialog
Step 9. Add Form Markup
Having a blank dialog is no good. It is time for you to now add the form that will submit a comma separated list of username's back to the action.
For a dialog form, the HTML MUST follow this schema.
1
2<h2 class="dialog-title">[TITLE HERE]</h2>
<form class="aui" action="[ACTION HERE]" method="post">
    <div class="content-body"><!-- [FIELDS HERE] --></div>
    <div class="content-footer"><!-- [SUBMIT & CANCEL BUTTONS HERE]</div>
</form>
Considering this, your HTML should look similar to below:
1
2
3
4
5
6
7
8
9
10
11
12
13
14
15
16
17
18
19
20
21
22
23
24<h2 class="dialog-title">$i18n.getText('tutorial.labels.add.watchers')</h2>

<form class="aui" action="AddWatchers.jspa" method="post">

    <input type="hidden" name="id" value="$action.id" />

    <div class="content-body">

        <div class="field-group">
            <label>$i18n.getText('tutorial.fields.users.label') <span class="aui-icon icon-required"></span></label>
             <textarea name="watcherUserNames" class="textarea long-field"></textarea>
            <div class="description">$i18n.getText('tutorial.fields.users.desc'))</div>
        </div>
    </div>

    <div class="buttons-container content-footer">
        <div class="buttons">
            <a href="#" class="cancel">$i18n.getText('tutorial.common.cancel')</a>
            <input class="button" type="submit" value="$i18n.getText('tutorial.common.add')" />
        </div>
    </div>

</form>
Any item with a class of cancel will close the dialog when clicked.
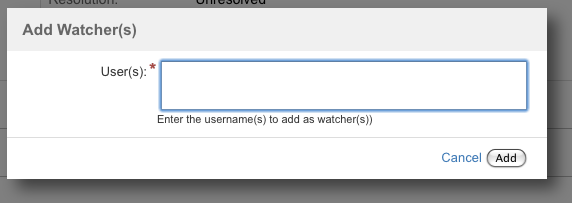
On the view issue page, clicking your triggering link should display_ Add Watchers(s) Form.
Step 10. Storing submitted values
Now that you have a form displaying correctly, the next step is to persist the submitted input.
To do that you will need to submit the username's to the WatcherManager.
1
2public class AddWatchers extends AbstractIssueSelectAction
{
    private final WatcherManager watcherManager;
    private final BeanFactory beanFactory;
    private String[] watcherUserNames = new String[0];
    private List<String> validUsernames = new ArrayList<String>();

    public AddWatchers(final WatcherManager watcherManager, final BeanFactory beanFactory)
    {
        this.watcherManager = watcherManager;
        this.beanFactory = beanFactory;
    }


    @Override
    public String doDefault() throws Exception
    {
        return INPUT;
    }

    @Override
    public String doExecute() throws Exception
    {
        for (String validUsername : validUsernames)
        {
            watcherManager.startWatching(UserUtils.getUser(validUsername), getIssue());
        }

        return returnCompleteWithInlineRedirect("/browse/" + getIssueObject().getKey());
    }

    public void setWatcherUserNames(String userNames) throws Exception
    {
        if(StringUtils.isNotBlank(userNames))
        {
            watcherUserNames = userNames.split(",", 10); // split into array of user names

        }
    }
}
After submitting your form with valid usernames, page should be refreshed and watchers added.

Step 10. Add Error Handling
If the user supplies an incorrect input you will want to return an error message to be displayed in the dialog.
To do this, you will want to:
-
Add a doValidation method to your action.
1 2
public class AddWatchers extends AbstractIssueSelectAction { ... @Override protected void doValidation() { for (String username : watcherUserNames) { username = username.trim(); if (UserUtils.existsUser(username)) { validUsernames.add(username); } else { addErrorMessage(beanFactory.getInstance(getRemoteUser()).getText("tutorial.errors.user", username)); } } } ... } -
Update your view to display errors.
1 2
#if ($action.hasAnyErrors()) <div class="form-message error"> #foreach ($error in $action.getErrorMessages()) <p>$textutils.htmlEncode(${error})</p> #end #foreach ($error in $action.errors) <p>$textutils.htmlEncode(${error})</p> #end </div> #end
Congratulations, that's it
Have a chocolate!
Rate this page: