Basic plugin tutorial
Applicable: | This tutorial applies to Jira 5.0 or higher. |
Level of experience: | This is an advanced tutorial. You should have completed at least one intermediate tutorial before working through this tutorial. See the list of tutorials in DAC. |
Time estimate: | It should take you approximately 1 hour to complete this tutorial. |
Overview of the Tutorial
This tutorial shows you how to PLUGIN PURPOSE in HOST APPLICATION. Your completed plugin will consist of the following components:
- Java classes encapsulating the plugin logic.
- Resources for display of the plugin UI.
- A plugin descriptor (XML file) to enable the plugin module in the Atlassian application.
When you are done, all these components will be packaged in a single JAR file.
Prerequisite Knowledge
To complete this tutorial, you must already understand the basics of Java development: classes, interfaces, methods, how to use the compiler, and so on. You should also understand:
- Java classes encapsulating the plugin logic
- Resources for display of the plugin UI
- Plugin descriptor to enable the plugin module in Atlassian applications
All these components will be contained within a single JAR file. Each component is further discussed in the examples below.
We'll be making extensive use of SAL, which exports a bunch of services that can be used for persistence, user authorization, and other common tasks in a way that will work in any Atlassian application.
For rendering the form, we'll use the Atlassian Template Renderer. ATR is a plugin that provides services to other plugins that allow them to render templates, typically in Velocity.
For styling our forms to make them look good and for communicating with the server via ajax, we'll be using AUI.
To create our REST resources, which our JavaScript will communicate with, we'll use the REST module.
Plugin Source
We encourage you to work through this tutorial. If you want to skip ahead or check your work when you are done, you can find the plugin source code on Atlassian Bitbucket. Bitbucket serves a public Git repository containing the tutorial's code. To clone the repository, issue the following command:
1
2git clone https://bitbucket.org/atlassian_tutorial/REPO_NAME
Alternatively, you can download the source using the get source option here: https://bitbucket.org/atlassian_tutorial/REPO_NAME. You can check out the source code here.
About these Instructions
You can use any supported combination of OS and IDE to construct this plugin. These instructions were written using Eclipse Classic Version 3.7.1 on a MacBook Air running Mac OS X. If you are using another combination, you should use the equivalent operations for your specific environment.
Step 1. Create the Plugin Project
In this step, you'll use the two atlas- commands to generate stub code for your plugin and setup the stub code as an Eclipse project. The atlas- commands are part of the Atlassian Plugin SDK, and automate much of the work of plugin development for you.
-
Open a terminal and navigate to your Eclipse workspace directory.
-
Enter the following command to create a XXX plugin skeleton:
1 2
atlas-create-refapp-pluginWhen prompted, enter the following information to identify your plugin:
group-id
com.atlassian.plugins.tutorial.refappartifact-id
adminUI
version
1.0-SNAPSHOTpackage
com.atlassian.plugins.tutorial.refapp.adminui -
Confirm your entries when prompted.
-
Change to the adminUI directory created by the previous step.
-
Run the command:
1 2
atlas-mvn eclipse:eclipse -
Start Eclipse.
-
Select File->Import.
Eclipse starts the Import wizard. -
Filter for Existing Projects into Workspace (or expand the General folder tree).
-
Press Next and enter the root directory of your workspace.
Your Atlassian plugin folder should appear under Projects. -
Select your plugin and click Finish.
Eclipse imports your project.
What the Plugin Generator Creates
- pom.xml - a Maven project object model (POM) file
- src/main/rec/atlassian-plugin.xml - an Atlassian plugin descriptor file
- src/main/java/com/atlassian/plugins/tutorial/refapp/ - Directory Containing Source Files
- MyPlugin.java - a file to hold the plugin source code
- src/test/java/com/atlassian/plugins/tutorial/refapp/adminui - Directory Containing Test Files
- MyPluginTest.java - a test file
- src/test/java/it - Directory Containing Test Files
- MyPluginTest.java - a test file
Step 2. Review and Tweak (Optional) the Generated Stub Code
It is a good idea to familiarize yourself with the stub plugin code. In this section, we'll check a version value and tweak a generated stub class. Open your plugin project in Eclipse and follow along in the next sessions to tweak some.
Add Plugin Metadata to the POM
Now you need to edit your POM (Project Object Model definition file) to add some metadata about your plugin and your company or organisation.
-
Edit the
pom.xmlfile in the root folder of your plugin. -
Add your company or organisation name and your website to the
<organization>element:1 2
<organization> <name>Example Company</name> <url>http://www.example.com/</url> </organization> -
Update the
<description>element:1 2
<description>This plugin has an admin UI that can be used in any Atlassian product.</description> -
Save the file.
Verify Your Jira Version
When you generated the stub files, a default Jira version was included in your pom.xml file (Project Object Model definition file). This file is located at the root of your project and declares the project dependencies. Take a moment and examine the Jira dependency:
- Open the
pom.xmlfile. - Scroll to the bottom of the file.
- Find the
<properties>element.
This section lists the version of the Jira and also the version of theatlas-commands you are running. - Verify that the Jira version is the one you want.
- Save the
pom.xmlfile
Review the Generated Plugin Descriptor
Your stub code contains a plugin descriptor file atlassian-plugin.xml. This is an XML file that identifies the plugin to the host application (Jira) and defines the required plugin functionality. In your IDE, open the descriptor file which is located in your project under src/main/resources and you should see something like this:
1
2<atlassian-plugin key="${project.groupId}.${project.artifactId}" name="${project.artifactId}" plugins-version="2">
    <plugin-info>
        <description>${project.description}</description>
        <version>${project.version}</version>
        <vendor name="${project.organization.name}" url="${project.organization.url}" />
    </plugin-info>
</atlassian-plugin>
Step 3. Add a Servlet Module
For this tutorial, you will need a Servlet plugin module. You'll add this the atlas-create-refapp-plugin-module command.
-
Open a command window and go to the plugin root folder (where the
pom.xmlis located). -
Run
atlas-create-refapp-plugin-module. -
Choose the option labeled
21: Servlet. -
Supply the following information as prompted:
Enter New Classname
MyServlet(This is the default.)Package Name
com.atlassian.plugins.tutorial.refapp.adminui.servlet -
Choose
Nfor Show Advanced Setup. -
Choose
Nfor Add Another Plugin Module. -
Confirm your choices.
The generation runs and the command exits. -
At the root of your project directory, run the command:
1 2
atlas-mvn eclipse:eclipseThis command updates the
.classpathand other key Eclipse resources. -
Return to Eclipse and Refresh your project.
Remember to run atlas-mvn eclipse:eclipse and refresh step each time you edit your pom.xml and or modify your plugin source with an Atlassian command. It will ensure that your Eclipse project has what it needs.
What the Module Generator Did
Each module generator does generates a different structure and modifications. This generator did the following:
- pom.xml - added the servlet depedencies
- src/main/rec/atlassian-plugin.xml - added servlet resources
- src/main/java/com/atlassian/plugins/tutorial/refapp/ - Directory
- adminUI.properties - a file for internationalization strings
- servlet/MyServlet.java - a file containing servlet code
- src/test/java/com/atlassian/plugins/tutorial/refapp/adminui - Directory
- servlet/MyServletTest.java - a test file
- src/test/java/it - Directory
- com/atlassian/plugins/tutorial/refapp/adminui/servlet/MyServletFuncTest.java - a test file
This module generation added the following dependencies to the project pom.xml file:
1 2<dependency> <groupId>javax.servlet</groupId> <artifactId>servlet-api</artifactId> <version>2.4</version> <scope>provided</scope> </dependency> <dependency> <groupId>org.apache.httpcomponents</groupId> <artifactId>httpclient</artifactId> <version>4.1.1</version> <scope>test</scope> </dependency> <dependency> <groupId>org.mockito</groupId> <artifactId>mockito-all</artifactId> <version>1.8.5</version> <scope>test</scope> </dependency>
The javax.servlet has a scope of provided. Maven resolves this for your locally for you to compile your plugin. At runtime, the OSGi service platform provided by Apache Felix container resolves this dependency. The test scope for the org.apache.httpcomponents and the org.mockito dependencies tells Maven that the dependency need only be available for the testing phases. Apache Felix does not need to resolve these.
The generated also added a number o the atlassian-plugin.xml descriptor file, the generator added the following:
1
2<resource type="i18n" name="i18n" location="com.atlassian.plugins.tutorial.refapp.adminUI"/>
<servlet name="My Servlet" i18n-name-key="my-servlet.name" key="my-servlet" class="com.atlassian.plugins.tutorial.refapp.adminui.servlet.MyServlet">
    <description key="my-servlet.description">The My Servlet Plugin</description>
    <url-pattern>/myservlet</url-pattern>
</servlet>
The i18n resource supports internationalization of the servlet UI.
Step 4. Build, install and run the plugin
Follow these steps to build and install your plugin, so that you can test your code.
-
Make sure you have saved all your code changes to this point.
-
Open a terminal window and navigate to the plugin root folder (where the
pom.xmlfile is). -
Run the following command:
1 2
atlas-runThis command builds your plugin code, starts a refapp instance, and installs your plugin in it. This may take several seconds. When the process has finished, you will see many status lines on your screen concluding with something like the following:
1 2
[INFO] HOSTAPP started successfully in 71s at http://localhost:XXXX/HOSTAPP [INFO] Type CTRL-D to shutdown gracefully [INFO] Type CTRL-C to exit -
Open your browser and navigate to the local refapp instance started by
atlas-run.
For example, the default address is localhost:2990/refapp for refapp. See Plugin SDK Supported Applications and Default Ports for other applications. -
At the refapp login screen, enter a username of
adminand a password ofadmin. -
Navigate to your servlet location:
localhost:2990/jira/plugins/servlet/myservlet
You should see something similar to the following:
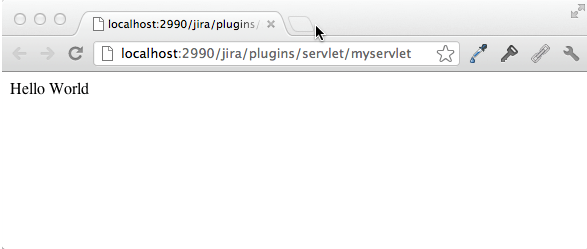
At this point, all of your servlet code is generated. You haven't added any bells and whistles. Things are about to change.
Step 5. Add Velocity and User Management Modules
By default, the servlet module is not pre-configured to use Velocity templates (Atlassian's preferred template engine for servlets). Let's set up Velocity so that we don't write HTML inside our servlet code. We'll use the plugin module generator to import the TemplateRenderer which imports the Velocity template renderer. We'll also import UserManager a feature of the shared access layer (SAL) that will allow us to get information about the logged in user. To add these components, do the following:
-
Open a command window and go to the plugin root folder (where the
pom.xmlis located). -
Run
atlas-create-refapp-plugin-module. -
Choose the option labeled
Component Import. -
Follow the prompts to add the
TemplateRendererEnter the fully qualified path name
com.atlassian.templaterenderer.TemplateRendererModule Key
Press return to take the default
TemplateRendererFilter (not require)
Press return to accept the default which is none.
-
Choose
Yfor Add Another Plugin Module. -
Choose the option labeled
Component Import. -
Follow the prompts to add the
UserManagerEnter the fully qualified path name
com.atlassian.sal.api.user.UserManagerModule Key
Press return to take the default
userManagerFilter (not require)
Press return to accept the default which is none.
-
Choose
Yfor Add Another Plugin Module. -
Choose the option labeled
Component Import. -
Follow the prompts to add the
UserManagerEnter the fully qualified path name
1 2
com.atlassian.sal.api.auth.LoginUriProviderModule Key
Press return to take the default
loginUriProviderFilter (not require)
Press return to accept the default which is none.
-
Yfor Add Another Plugin Module.
Allow the generation to finish. The generator updates youratlassian-plugin.xmlwith a component for theTemplateRendererand two for SAL:1 2
<component-import key="templateRenderer" interface="com.atlassian.templaterenderer.TemplateRenderer" filter=""/> <component-import key="userManager" interface="com.atlassian.sal.api.user.UserManager" filter=""/> <component-import key="loginUriProvider" interface="com.atlassian.sal.api.auth.LoginUriProvider" filter=""/>The
component-importplugin module allows you to access Java components shared by other plugins, even if the component is upgraded at runtime.
Update your dependencies
-
Open the
pom.xmlfile inside the root of your project. -
Find the
<dependencies>section. -
Insert the following inside the
<dependencies>section:1 2
<dependency> <groupId>com.atlassian.templaterenderer</groupId> <artifactId>atlassian-template-renderer-api</artifactId> <version>1.3.1</version> <scope>provided</scope> </dependency> <dependency> <groupId>com.atlassian.sal</groupId> <artifactId>sal-api</artifactId> <version>2.7.1</version> <scope>provided</scope> </dependency> -
Save your file.
-
Return to your terminal.
-
At the root of your project directory, run the command:
1 2
atlas-mvn eclipse:eclipseThis command updates the
.classpathand other key Eclipse resources. -
Return to Eclipse and Refresh your project.
Step 6. Update Your Servlet Code
In this step, you use code from the SAL and template renderer dependencies to add functionality to your plugin.
Add a Check for Admin Privileges
The shared access layer (SAL) gives your plugin access to the most common Atlassian services. These servers include but are not limited to:
- job scheduling
- internationalization lookups
- persistence for plugin settings
- plugin upgrade framework
Because this project creates an admin page, the servlet should check that the user is an administrator. The SAL UserManager provides that functionality to your servlet. In Eclipse, locate the MyServlet.java class and do the following:
-
Add the following additional
importlistings to your class:1 2
import java.net.URI; import com.atlassian.sal.api.auth.LoginUriProvider; import com.atlassian.sal.api.user.UserManager; -
Add the following fields and constructor to your
MyServletclass:1 2
private final UserManager userManager; private final LoginUriProvider loginUriProvider; public MyServlet(UserManager userManager, LoginUriProvider loginUriProvider) { this.userManager = userManager; this.loginUriProvider = loginUriProvider; }The constructor instantiates an instance of the
UserManager and a loginUriProvider. -
Replace the generated
doGetmethod with the following:1 2
public void doGet(HttpServletRequest request, HttpServletResponse response) throws IOException, ServletException { String username = userManager.getRemoteUsername(request); if (username == null || !userManager.isSystemAdmin(username)) { redirectToLogin(request, response); return; } response.setContentType("text/html"); response.getWriter().write("<html><body>Hello World</body></html>"); }The
doGetmethod usesgetRemoteUsernameto check that the user is logged in (the username is notnull)isSystemAdmin). If the user is neither logged in or an administrator, the code calls redirectToLogin to call a helper method to redirect the user to the application login page. -
Add the
redirectToLoginmethod and its supportinggetURImethod to theMyServletclass:1 2
private void redirectToLogin(HttpServletRequest request, HttpServletResponse response) throws IOException { response.sendRedirect(loginUriProvider.getLoginUri(getUri(request)).toASCIIString()); } private URI getUri(HttpServletRequest request) { StringBuffer builder = request.getRequestURL(); if (request.getQueryString() != null) { builder.append("?"); builder.append(request.getQueryString()); } return URI.create(builder.toString()); }The
redirectToLoginmethod uses another service provided by SAL, the LoginUriProvider. The servlet uses this API to construct a URI to the application's login page. The method also provides the page with a URI parameter representing the page the user is redirected to. The servlet passes it the current URI redirecting the user back to the admin UI where they can properly authenticate. Passing aLoginUriProviderinstance to the constructor ensures that the UI is injected by the plugin system. -
Close and save the
MyServlet.javafile.
Create a Velocity Template for the Page
-
Create an
admin.vmfile inPLUGIN_ROOT/src/main/resourcesdirectory. -
Edit the file.
-
Add the following code to the file:
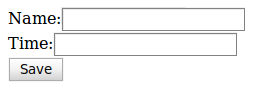
1 2
<html> <head> <title>My Admin</title> </head> <body> <form id="admin"> <div> <label for="name">Name</label> <input type="text" id="name" name="name"> </div> <div> <label for="age">Age</label> <input type="text" id="age" name="age"> </div> <div> <input type="submit" value="Save"> </div> </form> </body> </html>This velocity template renders a simple HTML form that looks like the following:
-
Close and save the
admin.vmfile.
Render the Form in Your Servlet
You use the Atlassian template renderer API to render the form. In Eclipse, open the MyServlet.java class and do the following:
-
Add an
TemplateRendererto the import section.1 2
import com.atlassian.templaterenderer.TemplateRenderer; -
Update the
MyServletclass with the following code:1 2
public class MyServlet extends HttpServlet{ private static final Logger log = LoggerFactory.getLogger(MyServlet.class); private final UserManager userManager; private final LoginUriProvider loginUriProvider; private final TemplateRenderer templateRenderer; public MyServlet(UserManager userManager, LoginUriProvider loginUriProvider, TemplateRenderer templateRenderer) { this.userManager = userManager; this.loginUriProvider = loginUriProvider; this.templateRenderer = templateRenderer; } @Override public void doGet(HttpServletRequest request, HttpServletResponse response) throws IOException, ServletException { String username = userManager.getRemoteUsername(request); if (username == null || !userManager.isSystemAdmin(username)) { redirectToLogin(request, response); return; } response.setContentType("text/html;charset=utf-8"); templateRenderer.render("admin.vm", response.getWriter()); } // redirectToLogin and getUri methods NOT DISPLAYED for brevityThis code includes a new
rendererfield. Initialize that field in theMyServletconstructor. The response has changed, now instead of returning an HTML output you use a Velocity template and write the contents of that template. -
Close and save the file.
Test Your Changes
- Open a terminal window and navigate to the plugin root folder (where the
pom.xmlfile is). - Run the
atlas-runcommand to start the Jira instance, and install your plugin in it. - After atlas-run complete, open your browser and navigate to our servlet location:
localhost:2990/refapp/plugins/servlet/myservlet - The
UserManagercode recognizes you haven't logged in yet. Jira prompts you for a login. - At the Jira login screen, enter a username of
adminand a password ofadmin.
Jira displays your form. - Enable live reload and leave Jira running.
Live reload allows you to view changes to Velocity resources, Javascript and other non-compiled resources as you make them.
Step 7. Improve the Form's Look and Feel
The form you added is very plain. Moreover, it appears in Jira without all the "standard" look-n-feel of Jira. By customizing the Velocity template you can add the look and feel users expect in a Jira page. There are a number of standard page decorators available to all Atlassian plugins.
Add the Atlassian Admin Decorator
A page decorator allows your form to appear in appear in an Atlassian application without the need for you to actually generate headers, footers, sidebars and so forth.
-
Edit the admin.vm file.
-
Add the
atl.admindecorator to the page in the <head> element.
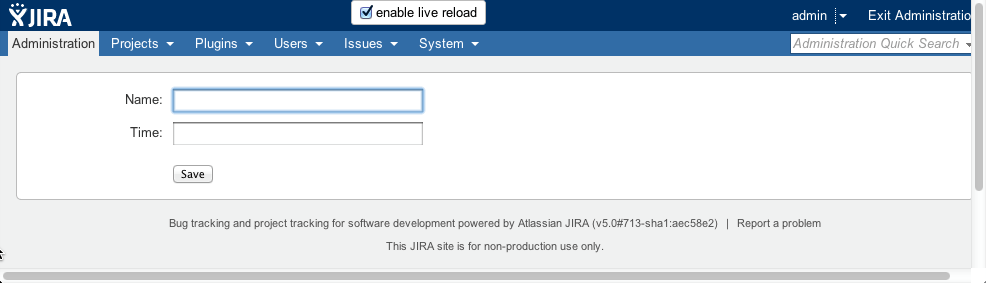
When you are done the<head>element appears as follows:1 2
<head> <title>MyServlet Admin</title> <meta name="decorator" content="atl.admin"> </head>This code decorates your page for you.
-
Save the
admin.vmfile. -
Switch back to your browser running your servlet in Jira.
At this point your page should have reloaded and should appear as follows:

If for some reason you don't see this, try refreshing your page.
Include Atlassian User Interface (AUI) Components
AUI is a set of reusable, cross-browser-tested components (markup, CSS, and Javavscript. In this step, you add the WebResourceManager to your plugin. It is this manager that gives your plugin access to the CSS, Javascript, and other resources that typically appear in <script> and <link> tags in standard HTML. By requireResource you include all the resources for the web-resource module plus all of its dependencies.
The Velocity context created by the TemplateRenderer automatically gives your plugin access to the WebResourceManager The Velocity context makes a number of commonly useful available APIs available, like the WebResourceManager. We'll see another one that is included automatically below, when we get to internationalizing our template.
-
Edit the adin.vm file.
-
Include the resource manager in the
<head>element.
When you are done your template looks like the following:1 2
<head> <title>MyServlet Admin</title> <meta name="decorator" content="atl.admin"> $webResourceManager.requireResource("com.atlassian.auiplugin:ajs") </head> -
Add some class attributes to the existing form and its components:
1 2
<html> <head> <title>MyServlet Admin</title> <meta name="decorator" content="atl.admin"> $webResourceManager.requireResource("com.atlassian.auiplugin:ajs") </head> <body> <form id="admin" class="aui"> <div class="field-group"> <label for="name">Name:</label> <input type="text" id="name" name="name" class="text"> </div> <div class="field-group"> <label for="age">Age:</label> <input type="text" id="age" name="age" class="text"> </div> <div class="field-group"> <input type="submit" value="Save" class="button"> </div> </form> </body> </html>In an AUI page, the aui, field-group, text, and button classes are defined for you. There is no need to create your own .CSS file. You can see the Forms page for detailed information about forms in AUI.
-
Save the
admin.vmfile.
At this point, live reload reflects your changes - a nicely aligned set of components!
Add Support for Internationalization (i18n)
You'll find add internationalization pretty easily, the code generator has already done a lot of work for you. When you added a servlet module, the code generator assumed you would want to internationalize your plugin at some point. So, the generator added the i18n resource to your atlassian-plugin.xml file and that resources references the src/main/resources/com/atlassian/plugins/tutorial/refapp/adminUI.properties file the generator also added.
The adminUI.properties file has some values defined already, for example the my-servlet.name and the my-servlet.description property.
-
Edit the
adminUI.propertiesfile. -
Add new properties that represent the labels in your forms.
The file should like this when you are done:1 2
my-servlet.name=My Servlet my-servlet.description=The My Servlet Plugin adminUI.admin.label=My Servlet Admin adminUI.admin.name.label=Name adminUI.admin.age.label=Age adminUI.admin.save.label=Save -
Replace the the hard-coded text values in the
admin.vmtemplate with lookups for the internationalized text.
The file contents should look like the following:1 2
<html> <head> <title>$i18n.getText("adminUI.admin.label")</title> <meta name="decorator" content="atl.admin" /> $webResourceManager.requireResource("com.atlassian.auiplugin:ajs") </head> <body> <form id="admin" class="aui"> <div class="field-group"> <label for="name">$i18n.getText("adminUI.admin.name.label")</label> <input type="text" id="name" name="name" class="text"> </div> <div class="field-group"> <label for="age">$i18n.getText("adminUI.admin.age.label")</label> <input type="text" id="age" name="age" class="text"> </div> <div class="field-group"> <input type="submit" value="$i18n.getText("adminUI.admin.save.label")" class="button"> </div> </form> </body> </html>$i18nis an instance of SAL'sI18nResolverAPI. TheTemplateRenderersupplies the resolver just like theWebResourceManager. You used it to resolve your message keys to actual text. Since these changes are in a properties file, they aren't picked up by live reload. -
Reload your plugin with FastDev to see your changes.
Now, all that is left to do for full internationalization is to translate the values in the properties file. You won't do that in this tutorial.
Step 8. Add Support through SAL and REST
Your form is pretty simple. It doesn't include any data and the servlet doesn't support POSTs for updates. To display data in the form and update the configuration, you'll use JavaScript to make AJAX requests to a REST resource. To populate the form we will make a GET request to a resource that will return the configuration as JSON.
Before we can start writing our JavaScript in earnest there are a few things we need to do. We need to know the applications base URL for making our ajax requests. We also need to tweak our template a little bit so that it will include the JavaScript that we're writing in addition to the AUI stuff.
Add Another SAL Module
To find out what the application base URL is, you'll use another SAL API, the ApplicationProperties interface.
-
Open a command window and go to the plugin root folder (where the
pom.xmlis located). -
Run
atlas-create-refapp-plugin-module. -
Choose the option labeled
Component Import. -
Follow the prompts to add the
ApplicationPropertiesEnter the fully qualified path name
com.atlassian.sal.api.ApplicationPropertiesModule Key
Press return to take the default
applicationPropertiesFilter (not require)
Press return to accept the default which is none.
-
Choose Y for Add Another Plugin Module.
-
Choose the option labeled Template Context item
-
Follow the prompts to add the item:
Prompt Response Enter Plugin Module Name
Application Properties Context ItemEnter Context Key
applicationPropertiesEnter Component-Ref Key (leave blank to specify class):
applicationPropertiesGlobal Access? N Show Advanced Setup? N -
Choose Y for Add Another Plugin Module.
-
Choose the option labeled Web Resource:
-
Follow the prompts to add the
item:Prompt Response Enter Plugin Module Name
ResourcesEnter Resource Name
admin.jsEnter Resource Type
downloadEnter Location (path to resource file) admin.jsAdd Resource Parameter? N Add Resource N Show Advanced Setup? Y Module Key [resources]: Press enter. Module Description [The Resources Plugin]: Press enter. i18n Name Key [resources.name]: Press enter. i18n Description Key [resources.description]: Press enter. Add Dependency? Y Enter Dependency com.atlassian.auiplugin:ajsAdd Dependency? N Add Web Resource Context? N Add Web Resource Transformation? N Add Conditions? N -
Choose N for Add Another Plugin Module.
The generator updates your project. -
At the root of your project directory, run the
atlas-mvneclipse:eclipse command.
What the Generator Added
The generated added a number lines to your atlassian-plugin.xml file:
1
2<template-context-item name="Application Properties Context Item" i18n-name-key="application-properties-context-item.name" key="application-properties-context-item" context-key="applicationProperties" global="false" component-ref="applicationProperties">
    <description key="application-properties-context-item.description">The Application Properties Context Item Plugin</description>
  </template-context-item>
  <web-resource name="Resources" i18n-name-key="resources.name" key="resources">
    <description key="resources.description">The Resources Plugin</description>
    <resource name="admin.js" type="download" location="admin.js"/>
    <dependency>com.atlassian.auiplugin:ajs</dependency>
  </web-resource>
Modify the Generated Code
- Return to Eclipse and Refresh your project.
- Edit the atlassin-plugin.xml descriptor
Add a REST Module
To find out what the application base URL is, you'll use another SAL API, the ApplicationProperties interface.
-
Open a command window and go to the plugin root folder (where the
pom.xmlis located). -
Run
atlas-create-refapp-plugin-module. -
Choose the option labeled REST Plugin Module
-
Follow the prompts to add the following:
Enter New Classname
ConfigResourceEnter Package Name:
com.atlassian.plugins.tutorial.refapp.adminui.restEnter REST path
configresourceEnter Version 1.0 Show Advanced Setup N -
Choose Y for Add Another Plugin Module.
-
Choose the option labeled Component Import and follow the prompts to enter the following:
Enter the fully qualified path name
com.atlassian.sal.api.pluginsettings.PluginSettingsFactoryModule Key
Press return to take the default
pluginSettingsFactoryFilter (not require)
Press return to accept the default which is none.
-
Choose Y for Add Another Plugin Module.
-
Choose the option labeled **Component Import **and follow the prompts to enter the following:
Enter the fully qualified path name
com.atlassian.sal.api.transaction.TransactionTemplateModule Key
Press return to take the default transactionTemplate
Filter (not require)
Press return to accept the default which is none.
-
Choose N for Add Another Plugin Module.
-
Allow the plugin generation to complete.
What the Generator Added
The generated added a number lines to your atlassian-plugin.xml file:
1 2<component-import key="pluginSettingsFactory" interface="com.atlassian.sal.api.pluginsettings.PluginSettingsFactory" /> <component-import key="transactionTemplate" interface="com.atlassian.sal.api.transaction.TransactionTemplate" /> <rest name="Config Resource" i18n-name-key="config-resource.name" key="config-resource" path="/configresource" version="1.0"> <description key="config-resource.description">The Config Resource Plugin</description> </rest>
Step 9. Write Some REST Code
The REST code builds a configuration resource your plugin will use to store configuration data.
Edit the Configuration Resource Class
-
Open the
ConfigResource.javain your project. -
Replace the existing content with the following code:
1 2
package com.atlassian.plugins.tutorial.refapp.adminui.rest; import javax.servlet.http.HttpServletRequest; import javax.ws.rs.Consumes; import javax.ws.rs.GET; import javax.ws.rs.PUT; import javax.ws.rs.Path; import javax.ws.rs.Produces; import javax.ws.rs.core.Context; import javax.ws.rs.core.MediaType; import javax.ws.rs.core.Response; import javax.ws.rs.core.Response.Status; import javax.xml.bind.annotation.XmlAccessType; import javax.xml.bind.annotation.XmlAccessorType; import javax.xml.bind.annotation.XmlElement; import javax.xml.bind.annotation.XmlRootElement; import com.atlassian.sal.api.pluginsettings.PluginSettings; import com.atlassian.sal.api.pluginsettings.PluginSettingsFactory; import com.atlassian.sal.api.transaction.TransactionCallback; import com.atlassian.sal.api.transaction.TransactionTemplate; import com.atlassian.sal.api.user.UserManager; import com.atlassian.plugins.rest.common.security.AnonymousAllowed; @Path("/config") public class ConfigResource { private final UserManager userManager; private final PluginSettingsFactory pluginSettingsFactory; private final TransactionTemplate transactionTemplate; public ConfigResource(UserManager userManager, PluginSettingsFactory pluginSettingsFactory, TransactionTemplate transactionTemplate) { this.userManager = userManager; this.pluginSettingsFactory = pluginSettingsFactory; this.transactionTemplate = transactionTemplate; } }This contains all the import statements we need, as well as a simple class constructor. To populate the application web form, we issue a GET request to the resource that returns the data as JSON. JAXB serializes our configuration object for us, making life a bit easier.
-
Add an inner class the encapsulates the configuration data:
1 2
@XmlRootElement @XmlAccessorType(XmlAccessType.FIELD) public static final class Config { @XmlElement private String name; @XmlElement private int age; public String getName() { return name; } public void setName(String name) { this.name = name; } public int getAge() { return age; } public void setAge(int age) { this.age = age; } }This inner class encapsulates a few properties, a
Stringand anint. The@XmlRootElementand@XmlElementannotations are JAXB annotations. The@XmlRootElementannotation declares that instances of this type can be serialized to XML, and with a little magic in the REST module, to JSON as well. The@XmlElementannotations declare that the attributes should be treated as XML elements or JSON object properties. If we were to serialize an instance of this class to XML, it would look like this:1 2
<config> <name>Charlie</name> <age>5</age> </config>And in JSON, like this:
1 2
{ "name": "Charlie", "age": 5 } -
Add a GET method, which returns a
Responsewith an instance of theConfigtype we've just created as the entity.1 2
@GET @Produces(MediaType.APPLICATION_JSON) public Response get(@Context HttpServletRequest request) { String username = userManager.getRemoteUsername(request); if (username == null || !userManager.isSystemAdmin(username)) { return Response.status(Status.UNAUTHORIZED).build(); } return Response.ok(transactionTemplate.execute(new TransactionCallback() { public Object doInTransaction() { PluginSettings settings = pluginSettingsFactory.createGlobalSettings(); Config config = new Config(); config.setName((String) settings.get(Config.class.getName() + ".name")); String age = (String) settings.get(Config.class.getName() + ".age"); if (age != null) { config.setAge(Integer.parseInt(age)); } return config; } })).build(); }The GET method first performs the now familiar user check. We then construct a
Responsewith an entity that is returned from a call to a funky transactionTemplate.execute method, providing it with an instance of TransactionCallback. If you've used Spring's TransactionTemplate, this should look familiar to you. For everyone spoiled by AOP, the summary is that we are accessing data that is coming from a database--well, it's not in Fisheye or Crucible, but work with me here!Once we have a reference to a
PluginSettingsobject, things are pretty easy.PluginSettingscan be thought of as a persistent map. Just usegetto retrieve data andputto add or update values.Namespace your keys! Because this is global application configuration data, it is important that you do some kind of namespacing with your keys. Whether you use your plugin key, a class name or something else entirely is up to you. Just make sure it is unique enough that conflicts with other configuration data won't occur.
-
Add a
PUTmethod.1 2
@PUT @Consumes(MediaType.APPLICATION_JSON) public Response put(final Config config, @Context HttpServletRequest request) { String username = userManager.getRemoteUsername(request); if (username == null || !userManager.isSystemAdmin(username)) { return Response.status(Status.UNAUTHORIZED).build(); } transactionTemplate.execute(new TransactionCallback() { public Object doInTransaction() { PluginSettings pluginSettings = pluginSettingsFactory.createGlobalSettings(); pluginSettings.put(Config.class.getName() + ".name", config.getName()); pluginSettings.put(Config.class.getName() +".age", Integer.toString(config.getAge())); return null; } }); return Response.noContent().build(); }The
@Consumesannotation declares that we expect a request with aapplication/jsonbody. We expect JSON in a form that matches the serialized form of theConfigobject we created earlier, so that the REST module can deserialize to aConfigobject, which it then passes to theputmethod.Next, we do the authentication and authorization check to make sure no one can modify the configuration except admin users. Then, we wrap our modifications in
TransactionCallback, which we pass to thetransactionTemplate, just like we did when we were retrieving the configuration. SincePluginSettingsis just a persistent map, we just use theputmethod to put the new configuration values into it and we're done.Finally, we return
204 No Content, which tells the client that the update succeeded and there's nothing left to be said. -
Close and save the
ConfigResource.javafile.
Why did we Use TransactionTemplate?
To ensure that reads and writes don't clash and give us inconsistent data, we need to protect ourselves any time we access PluginSettings data. The TransactionTemplate frees us from needing to know the application-specific transaction creation and usage semantics. If we didn't use the TransactionTemplate, we'd need code something like this:
1
2Transaction tx = // go out and find or create transaction in application specific way
tx.start();
try
{
  // access plugin settings and do other work
  tx.commit();
}
catch (Exception e)
{
  tx.rollback();
}
But TransactionTemplate takes care of managing the transaction for us, by calling TransactionCallback to perform the real work. The return value of the TransactionTemplate.execute method is the return value of calling TransactionCallback.doInTransaction.
Inside our TransactionCallback.doInTransaction method, we use the PluginSettingsFactory to create a reference to the global, application-wide settings data. We need to use the global settings object because we're configuring a plugin. If we were storing data associated with a project (in Jira, Bamboo, Fisheye or Crucible) or a space (in Confluence), we'd instead use the PluginSettingsFactory.createSettingsForKey method, where the key is the project or space the configuration data should be associated with.
Step 9. Use Javascript to Wire REST and the Form
You have added a REST resource that is capable of getting and setting values in the database. This resource is loaded along with your plugin into the container. You use the JQuery implementation in AUI to populate your form. You'll make use of jQuery's ajax method to communicate with your REST resources.
Add JavaScript for GETting the configuration
We'll start out by making a GET request and setting the values of the input fields.
-
Create a
src/main/resources/admin.jsfile in your project. -
Edit the file and add the following function:
1 2
AJS.toInit(function() { var baseUrl = AJS.$("meta[name='application-base-url']").attr("content"); function populateForm() { AJS.$.ajax({ url: baseUrl + "/rest/configresource/1.0/config", dataType: "json", success: function(config) { AJS.$("#name").attr("value", config.name); AJS.$("#age").attr("value", config.age); } }); } populateForm(); });This is pretty straight forward JavaScript if you are familiar with jQuery.
AJS.toInitis equivalent to usingjQuery(function() {...})orjQuery(document).ready(function() {...})to have some JavaScript executed when the document is ready. Our first task is to find the application base URL in the document that we added previously. Having done that, we can go on to query the server to find the current config. Once we have the config, we can populate our data. -
Add the following function to
admin.js, after thepopulateFormfunction but before the call topopulateForm.1 2
function updateConfig() { AJS.$.ajax({ url: baseUrl + "/rest/configresource/1.0/config", type: "PUT", contentType: "application/json", data: '{ "name": "' + AJS.$("#name").attr("value") + '", "age": ' + AJS.$("#age").attr("value") + ' }', processData: false }); }This is the function we call to update the server configuration. It's very minimal; we haven't included error checking and we really should be escaping quotes and other special characters when creating our data, but that is left as an exercise for the reader. Now, we just need to hook that function up to our form.
-
After the call to
populateForm()inadmin.jsadd:1 2
AJS.$("#admin").submit(function(e) { e.preventDefault(); updateConfig(); });Now, whenever the form is submitted, instead of the usual, default action of POSTing the form data, our
updateConfig()method is called and our updated configuration is submitted as aPUTrequest to the configuration resource. -
Save and close the file.
Access the Application Properties from Your Template
The template-context-item allow you to put objects into the Velocity or other renderer's context so that you can use them in your templates. As an alternative, we could pass the ApplicationProperties component into our servlet, which is where we'll do the rendering from, and pass put it into the rendering context when we call the render method. Using the context item just makes that automatic, and if we were using the renderer in multiple places, makes the ApplicationProperties object available in all contexts without a bunch of duplicated code.
We use the ApplicationProperties.getBaseUrl() method to find the application base URL.
-
Edit the
admin.vmtemplate. -
Replace the existing
$webResourceManager.requireResourcecall with the following:1 2
$webResourceManager.requireResource("com.atlassian.plugins.tutorial.refapp.adminUI:resources") -
Add a new
<meta>tag to the<head>element.1 2
<meta name="application-base-url" content="$applicationProperties.getBaseUrl()">At this point the
admin.vmfile should look like the following:1 2
<html> <head> <title>$i18n.getText("adminUI.admin.label")</title> <meta name="decorator" content="atl.admin" /> $webResourceManager.requireResource("com.atlassian.plugins.tutorial.refapp.adminUI:resources") <meta name="application-base-url" content="$applicationProperties.getBaseUrl()"> </head> <body> <form id="admin" class="aui"> <div class="field-group"> <label for="name">$i18n.getText("adminUI.admin.name.label")</label> <input type="text" id="name" name="name" class="text"> </div> <div class="field-group"> <label for="age">$i18n.getText("adminUI.admin.age.label")</label> <input type="text" id="age" name="age" class="text"> </div> <div class="field-group"> <input type="submit" value="$i18n.getText("adminUI.admin.save.label")" class="button"> </div> </form> </body> </html> -
Save and close the file.
Build, install and run the plugin
-
Open a terminal window and navigate to the plugin root folder (where the
pom.xmlfile is). -
Enter
atlas-runto build your plugin. -
Open your browser and navigate to the local Jira instance started by
atlas-run.
For example, the default address is localhost:2990/refapp for Jira. See Plugin SDK Supported Applications and Default Ports for other applications. -
At the Jira login screen, enter a username of
adminand a password ofadmin. -
Navigate to your servlet location:
localhost:2990/refapp/plugins/servlet/myservlet
You should see something similar to the following:
Rate this page: