Convert component to servlet module
In this tutorial, you'll build an interactive dialogue with your plugin. When you generated the plugin skeleton, the Atlassian SDK automatically created a class called MyPluginComponent. However, to better fit your interactive plugin, you'll change your Java code to replace the component with a servlet module.
Learn a bit about about component modules
Component modules define specific Java components. The plugin system then injects these modules into your plugin for you, using the Spring framework of the Atlassian container. A component module is part of a page, while a servlet is an entire server-side page. This makes a servlet more suitable for your interactive plugin.
This tutorial discusses the Atlassian container and relationships in future sections.
Step 1. Create and modify MyPluginServlet.java
In this part of the tutorial you'll create a Java class called MyPluginServlet.javaServlets run server-side Java, and your servlet is where you'll run your plugin code. Servlets are most often used to run web applications, and your purpose here isn't so different - you'll just use it to run your plugin.
-
Create an empty class file called
MyPluginServlet.javaundersrc/main/java/com/atlassian/plugins/tutorial/refapp:1 2
$ touch src/main/java/com/atlassian/plugins/tutorial/refapp/MyPluginServlet.java -
Open the empty file.
You can open the file from the command line, or from your file directory tool like Finder or My Computer. The following command pertains to Textwrangler users with the CLI tools installed.1 2
$ edit src/main/java/com/atlassian/plugins/tutorial/refapp/MyPluginServlet.java -
Add the following code to
MyPluginServlet.java:1 2
package com.atlassian.plugins.tutorial.refapp; import org.slf4j.Logger; import org.slf4j.LoggerFactory; import javax.servlet.*; import javax.servlet.http.HttpServlet; import javax.servlet.http.HttpServletRequest; import javax.servlet.http.HttpServletResponse; import java.io.IOException; public class MyPluginServlet extends HttpServlet { private static final Logger log = LoggerFactory.getLogger(MyPluginServlet.class); @Override protected void doGet(HttpServletRequest req, HttpServletResponse resp) throws ServletException, IOException { resp.setContentType("text/html"); resp.getWriter().write("<html><body>Hello! You did it.</body></html>"); } }MyPluginServletextendsHttpServlet, and inherits thedoGet()method. This method allows your class to accept POST requests. In response, it prints "Hello! You did it!" to the screen. -
Save and close the file.
Step 2. Add the servlet module to the atlassian-plugin.xml file
Now that you've written your Java class, you need to define it in the atlassian-plugin.xml descriptor file as a plugin module. You'll use a servlet module type. It's possible to add this module to your plugin from the command line, but in this case it's more expedient to add the code directly to the descriptor file.
-
Add your modified
MyPluginServletclass to the file.Replace
1 2
<component key="myPluginComponent" class="com.atlassian.plugins.tutorial.refapp.MyPluginComponent" public="true"> <interface>com.atlassian.plugins.tutorial.refapp.MyPluginServlet</interface> </component>with
1 2
<servlet name="adminUI" class="com.atlassian.plugins.tutorial.refapp.MyPluginServlet" key="test"> <url-pattern>/test</url-pattern> </servlet>atlassian-plugin.xmlshould appear as following:1 2
<atlassian-plugin key="${project.groupId}.${project.artifactId}" name="${project.name}" plugins-version="2"> <plugin-info> <description>${project.description}</description> <version>${project.version}</version> <vendor name="${project.organization.name}" url="${project.organization.url}" /> <param name="plugin-icon">images/pluginIcon.png</param> <param name="plugin-logo">images/pluginLogo.png</param> </plugin-info> <!-- add our i18n resource --> <resource type="i18n" name="i18n" location="adminUI"/> <!-- add our web resources --> <web-resource key="adminUI-resources" name="adminUI Web Resources"> <dependency>com.atlassian.auiplugin:ajs</dependency> <resource type="download" name="adminUI.css" location="/css/adminUI.css"/> <resource type="download" name="adminUI.js" location="/js/adminUI.js"/> <resource type="download" name="images/" location="/images"/> <context>adminUI</context> </web-resource> <!-- publish our component --> <servlet name="adminUI" class="com.atlassian.plugins.tutorial.refapp.MyPluginServlet" key="test"> <url-pattern>/test</url-pattern> </servlet> <!-- import from the product container --> <component-import key="applicationProperties" interface="com.atlassian.sal.api.ApplicationProperties" /> </atlassian-plugin> -
Save and close the file.
-
From your project root in terminal (
atlastutorial/adminUI) run the following command if you made your changes from Eclipse:1 2
$ atlas-mvn eclipse:eclipse -
In Eclipse or your IDE, click File > Refresh.
Step 3. View the servlet in RefApp
You've created a skeleton for your add-on and configured a servlet in Eclipse. Now you'll launch RefApp from your project root and confirm you can navigate to the servlet.
-
Change directory to your project root.
1 2
$ cd adminUI -
Enter the following command to start up RefApp:
1 2
$ atlas-run -
Locate the RefApp URL.
After a few moments your terminal will display a message with the URL of the application. RefApp usually launches on port 5990.1 2
[INFO] [talledLocalContainer] Tomcat 6.x started on port [5990] [INFO] refapp started successfully in 46s at http://localhost:5990/refapp [INFO] Type Ctrl-D to shutdown gracefully [INFO] Type Ctrl-C to exit -
Copy the URL and paste it into your browser.
The URL will resemble localhost:5990/refapp. -
Click Login from the upper right-hand corner.
-
Log in with the username
adminand the passwordadmin. -
Navigate to the
servletat localhost:5990/refapp/plugins/servlet/test.
The servlet loads. Your screen should display the following message:
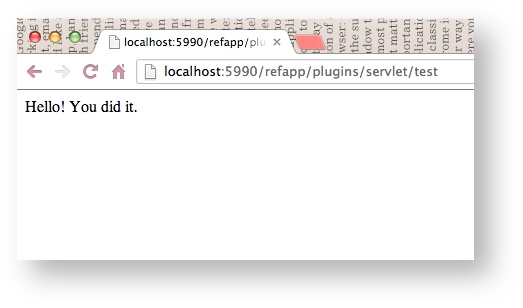
If you don't see the message, ensure you ran atlas-mvn eclipse:eclipse to update your project. If the problem persists, restart the RefApp from terminal with the command CTRL+D, atlas-clean, and then atlas-run.
Next Steps
Now that your plugin skeleton is built and your servlet configured, run the plugin in JIRA.
Rate this page: