This is an archive of a 3-part tutorial written by Bentley Cook, originally written for our retired Trello blog. All code used in this tutorial can be found in our example project collection. Look for the folders titled "trello-power-up-tutorial-part-x".
Please also take a look at the repository's README first.
Building A Trello Power-Up: Part One
In this post, we'll walk you through building a Power-Up for Trello. We'll build a Power-Up that gives teams the power to add size estimates to Trello cards.
Don't know what a Power-Up is? You can read about them here and check out popular Power-Ups here. We'll start from the very beginning and hopefully end up with a Power-Up you and your team can customize and use internally!
Imagine the Scenario
You and your team use Trello to manage projects. You keep a list of ideas for projects that you might want to tackle one day. Some of them are great ideas but might take the team a while to complete. You want to use t-shirt sizing as a way of quickly ball-parking the size of projects so that you and the team can better understand the list at a glance.
Getting Started
We will need a server hosting all of our front-end code. For this tutorial I'm going to be using Glitch. It is a great tool for getting started. If you want to follow along in Glitch, I've put together a skeleton project to get you started.
Power-Ups require that the assets be served over HTTPS. Trello loads the assets into the web client on an iframe, so you'll want to update your CORS settings to allow Trello.com to make requests to receive your files. For example, using express in node.js we have:
1
2var cors = require('cors');
var express = require('express');
var app = express();

app.use(cors({ origin: 'https://trello.com' }));
Firstly, we're going to want to register our Power-Up with Trello. If you want, you can create a new Workspace to add the Power-Up to. Login to Trello and visit the custom Power-Up admin portal at https://trello.com/power-ups/admin.
You should see a list of the Workspaces for which you are an admin. Choose the Workspace you'd like to add the Power-Up to. Then click the "New" button. You will be presented with a form to fill out.
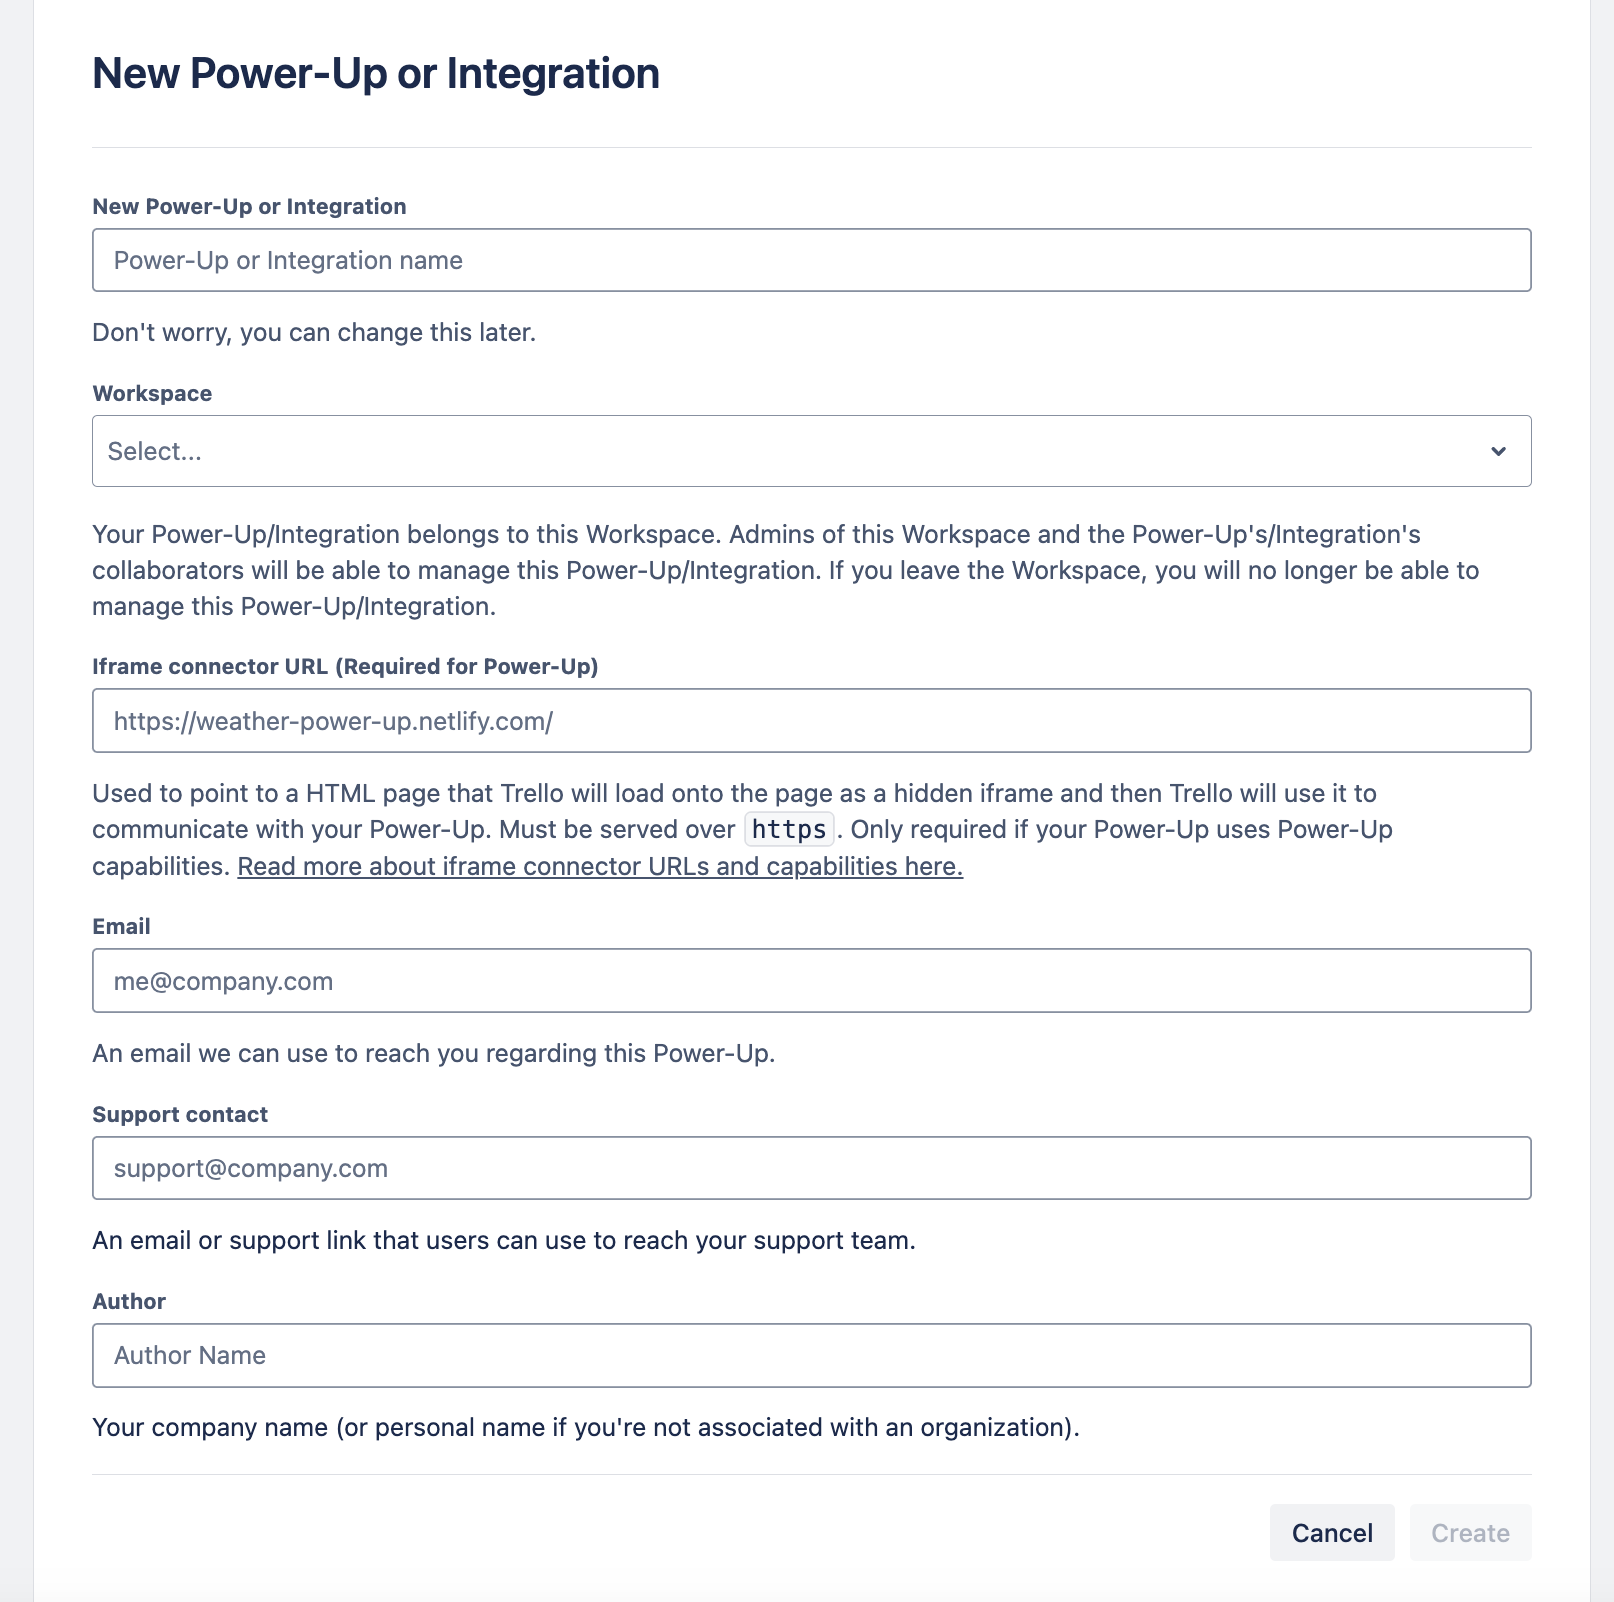
For the sake of brevity, we'll skip over what all of the fields are used for and focus on the ones you need to get started. You can read more about all of the fields at Managing Apps.
The most important field is the iframe connector field. This field is used to point to a HTML page that Trello will load onto the page as a hidden iframe and then Trello will use it to communicate to our Power-Up via window.postMessage. If you're following along on Glitch, you should click the "Share" button and copy and paste the "Live Site" URL of your project into this field. It should look something like https://your-project-name.glitch.me If you're using a different hosting option, you're going to want to create the HTML page we describe below and, once it is live, put the URL to access it into the iframe connector field.
Fill in the other required fields, then press the Create button.
Connector Should Be Hosted Over HTTPS
The URL you provide must be hosted over HTTPS or Trello won't be able to communicate with it.
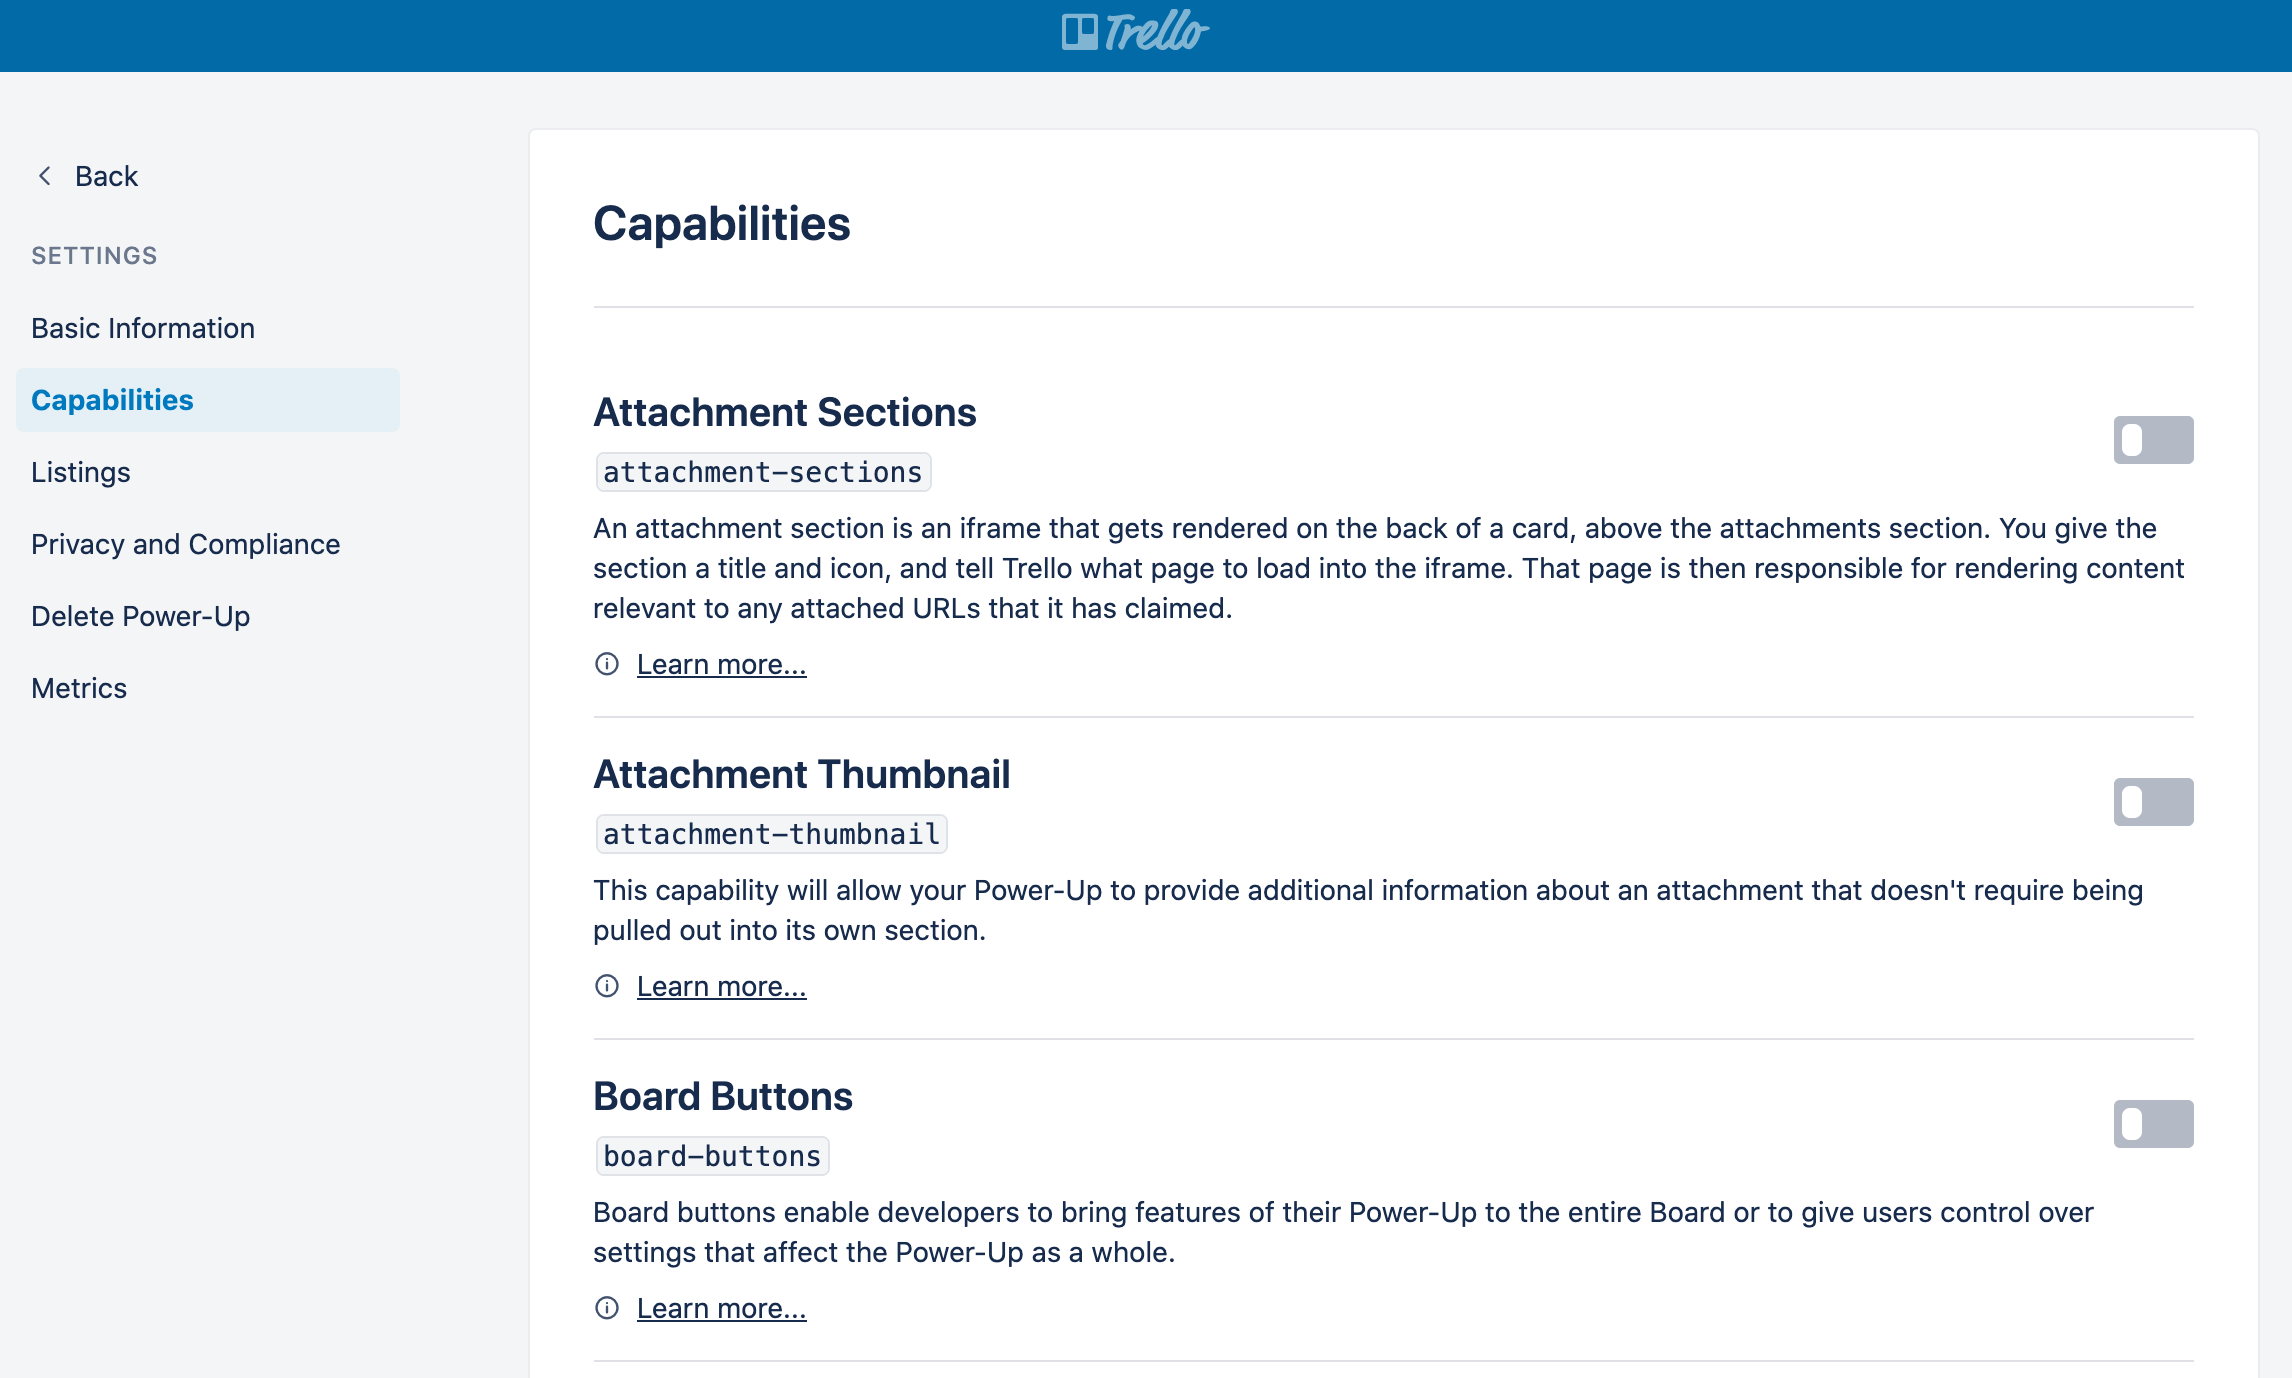
The second most important part of the Power-Up Admin Portal are capabilities. We want to turn on the correct capabilities that our Power-Up will need.
After creating the Power-Up, head over to the Capabilities tab.
To start, we're only going to make use of the card-buttons capability. This capability will allow us to add a button onto the back of a card. We'll use that button to load a form with a drop-down input that contains estimation sizes a user can select. Turn on the switch for the card-buttons capability:
Initial HTML Connector
Let's take a look at what our index.html file looks like:
1
2<!DOCTYPE html>
<html>
  <head>
    <meta charset="utf-8" />
  </head>
  <body>
    <script src="https://p.trellocdn.com/power-up.min.js"></script>
    <script src="/client.js"></script>
  </body>
</html>
Not a whole lot to see here, huh? 🤔 We're including the Power-Up client library (power-up.min.js) as we'll need it to interact with Trello. Additionally, we pull in our own client.js file.
Before we dive into the contents of client.js let's talk a little bit more about the capability we turned on above. When you turn on a capability, you're saying to Trello, “Hey, I want to do something here!” And when the time comes, Trello will reach out to you and say, “You told us you wanted to do something for card-buttons! What do you want to do?” This conversation takes place via the connector html page we included above. Your response for each capability should be included in the initialization of the Trello client library on the connector. Here, we're using client.js to cover this:
1
2TrelloPowerUp.initialize({
  'card-buttons': function(t, options){
    return [{
      icon: 'https://cdn.glitch.com/1b42d7fe-bda8-4af8-a6c8-eff0cea9e08a%2Frocket-ship.png?1494946700421',
      text: 'Estimate Size',
    }];
  },
});
When we initialize the Trello client library, for each of the capabilities we've turned on, we must include a function that Trello will call at the point in time that they should be invoked. We call these function capability handlers. In the case of card-buttons, when a user views the back of a card, Trello will call the function we have defined above.
The card-buttons capability expects the end-result of the function call to be an array of objects with each object representing a button to include on the card back. In our case, we're only showing a single button with an icon and text.
And just like that, we've got the bare minimum needed for a Power-Up! 🚀
If you haven't yet, save the custom Power-Up admin form. Now go to a board in the same workspace as the Power-Up and enable your Power-Up. It will be under the "Custom" tab in the Power-Up directory.
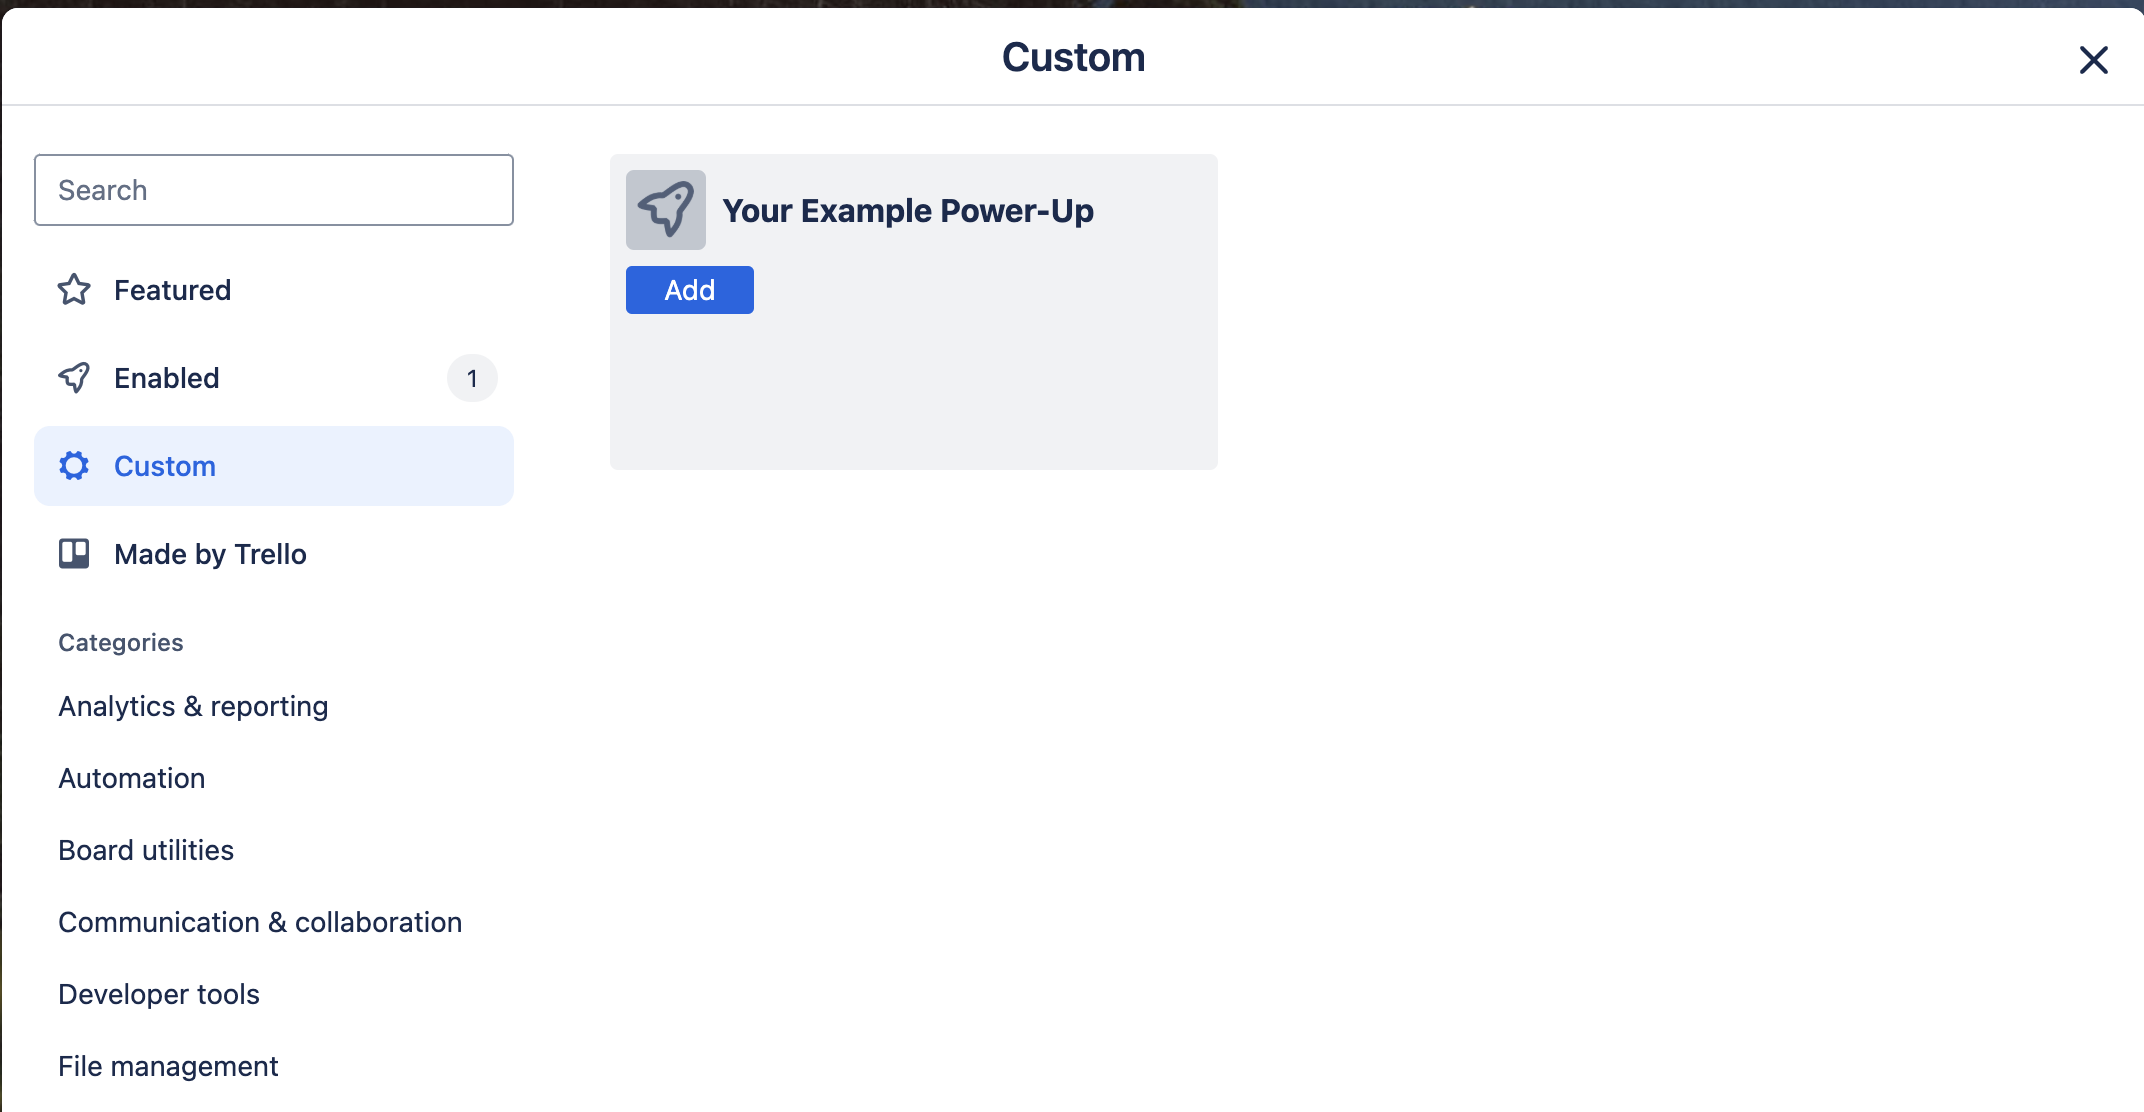
After you enable your Power-Up, create a card and open it. When a card is opened, the card-buttons capability is run for each enabled Power-Up. You will now see your Power-Up's card button (called "Estimate Size", in this example) listed on the left under "Power-Ups".
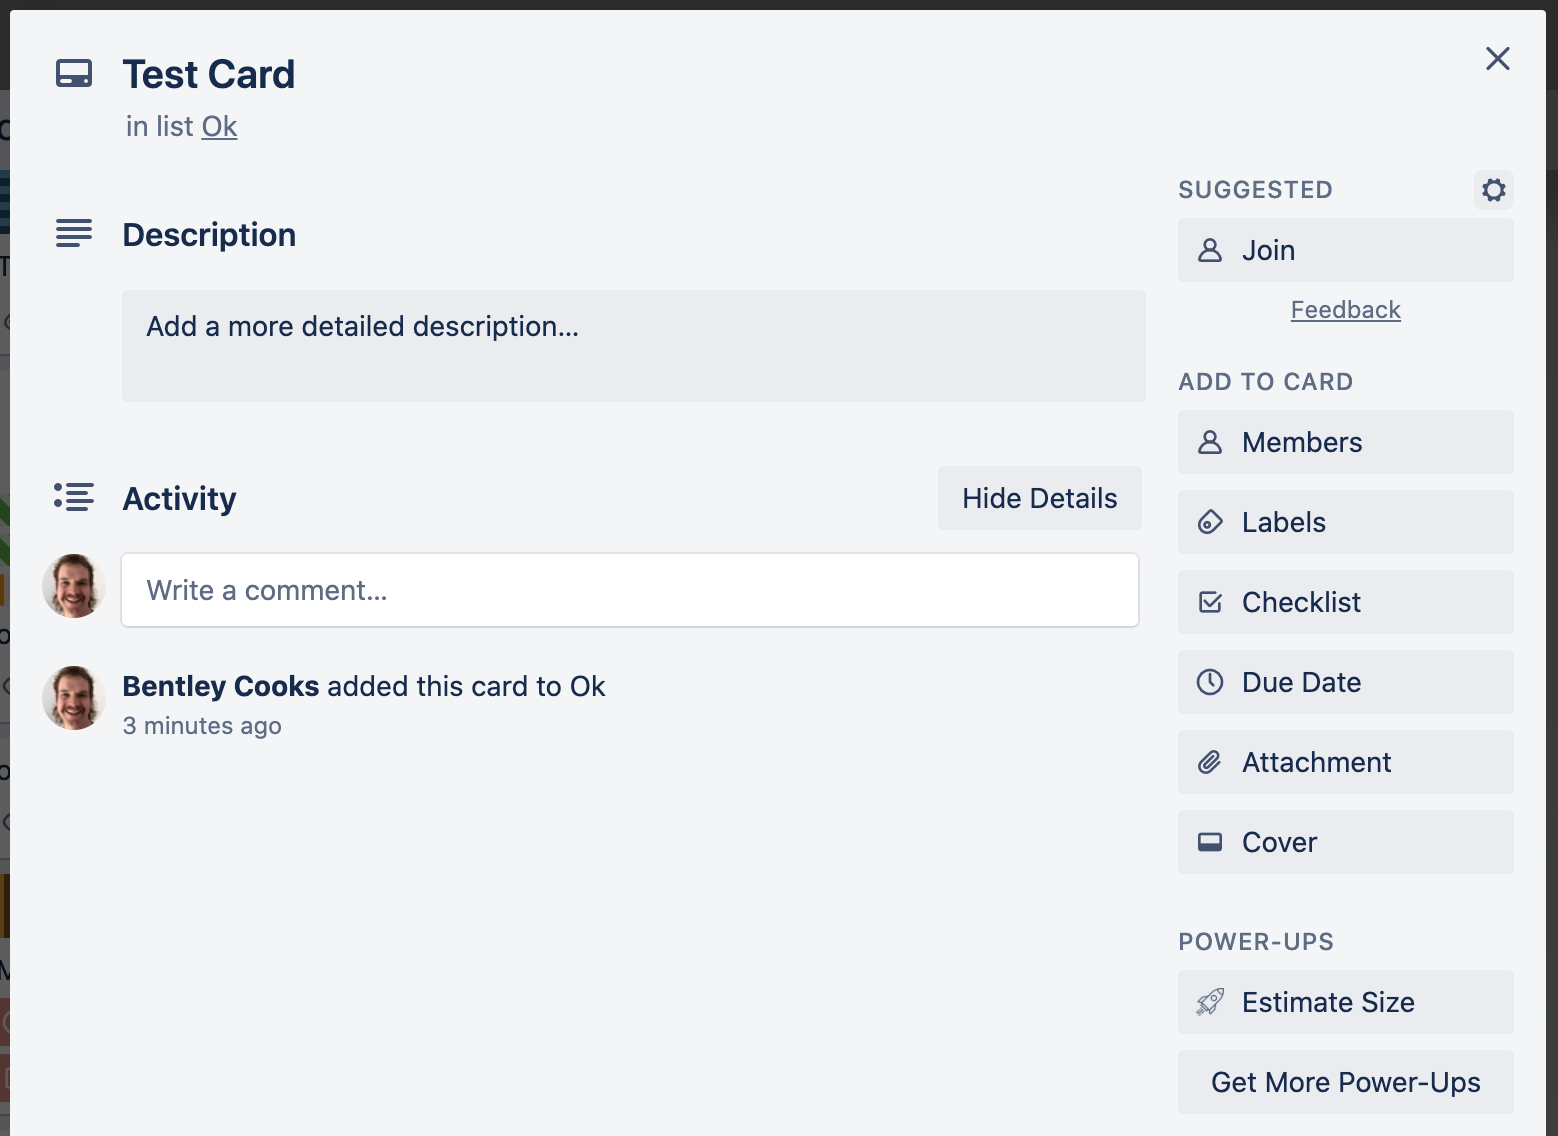
Check it out:
Adding Functionality
Now that our Power-Up "works" we want to add some functionality. Let's start by using the Power-Up client library's t.popup method to provide some functionality to our button via the callback capability.
When we return the list of buttons that we want to show the user, each button object can include a callback parameter in addition to the text and icon that we're already using. The callback parameter expects a function that will be called when the user clicks the button. For our callback, we just want to show the user an HTML page that includes our drop-down form. We'll use the t.popup method to render the page. It will be displayed adjacent to the element in the current context. Pop-ups are designed for lists of capabilities or content that a user is expected to click on.
Here's our updated client.js:
1
2TrelloPowerUp.initialize({
  "card-buttons": function (t, options) {
    return [
      {
        icon: "https://cdn.glitch.com/1b42d7fe-bda8-4af8-a6c8-eff0cea9e08a%2Frocket-ship.png?1494946700421",
        text: "Estimate Size",
        callback: function (t) {
          return t.popup({
            title: "Estimation",
            url: "estimate.html",
          });
        },
      },
    ];
  },
});
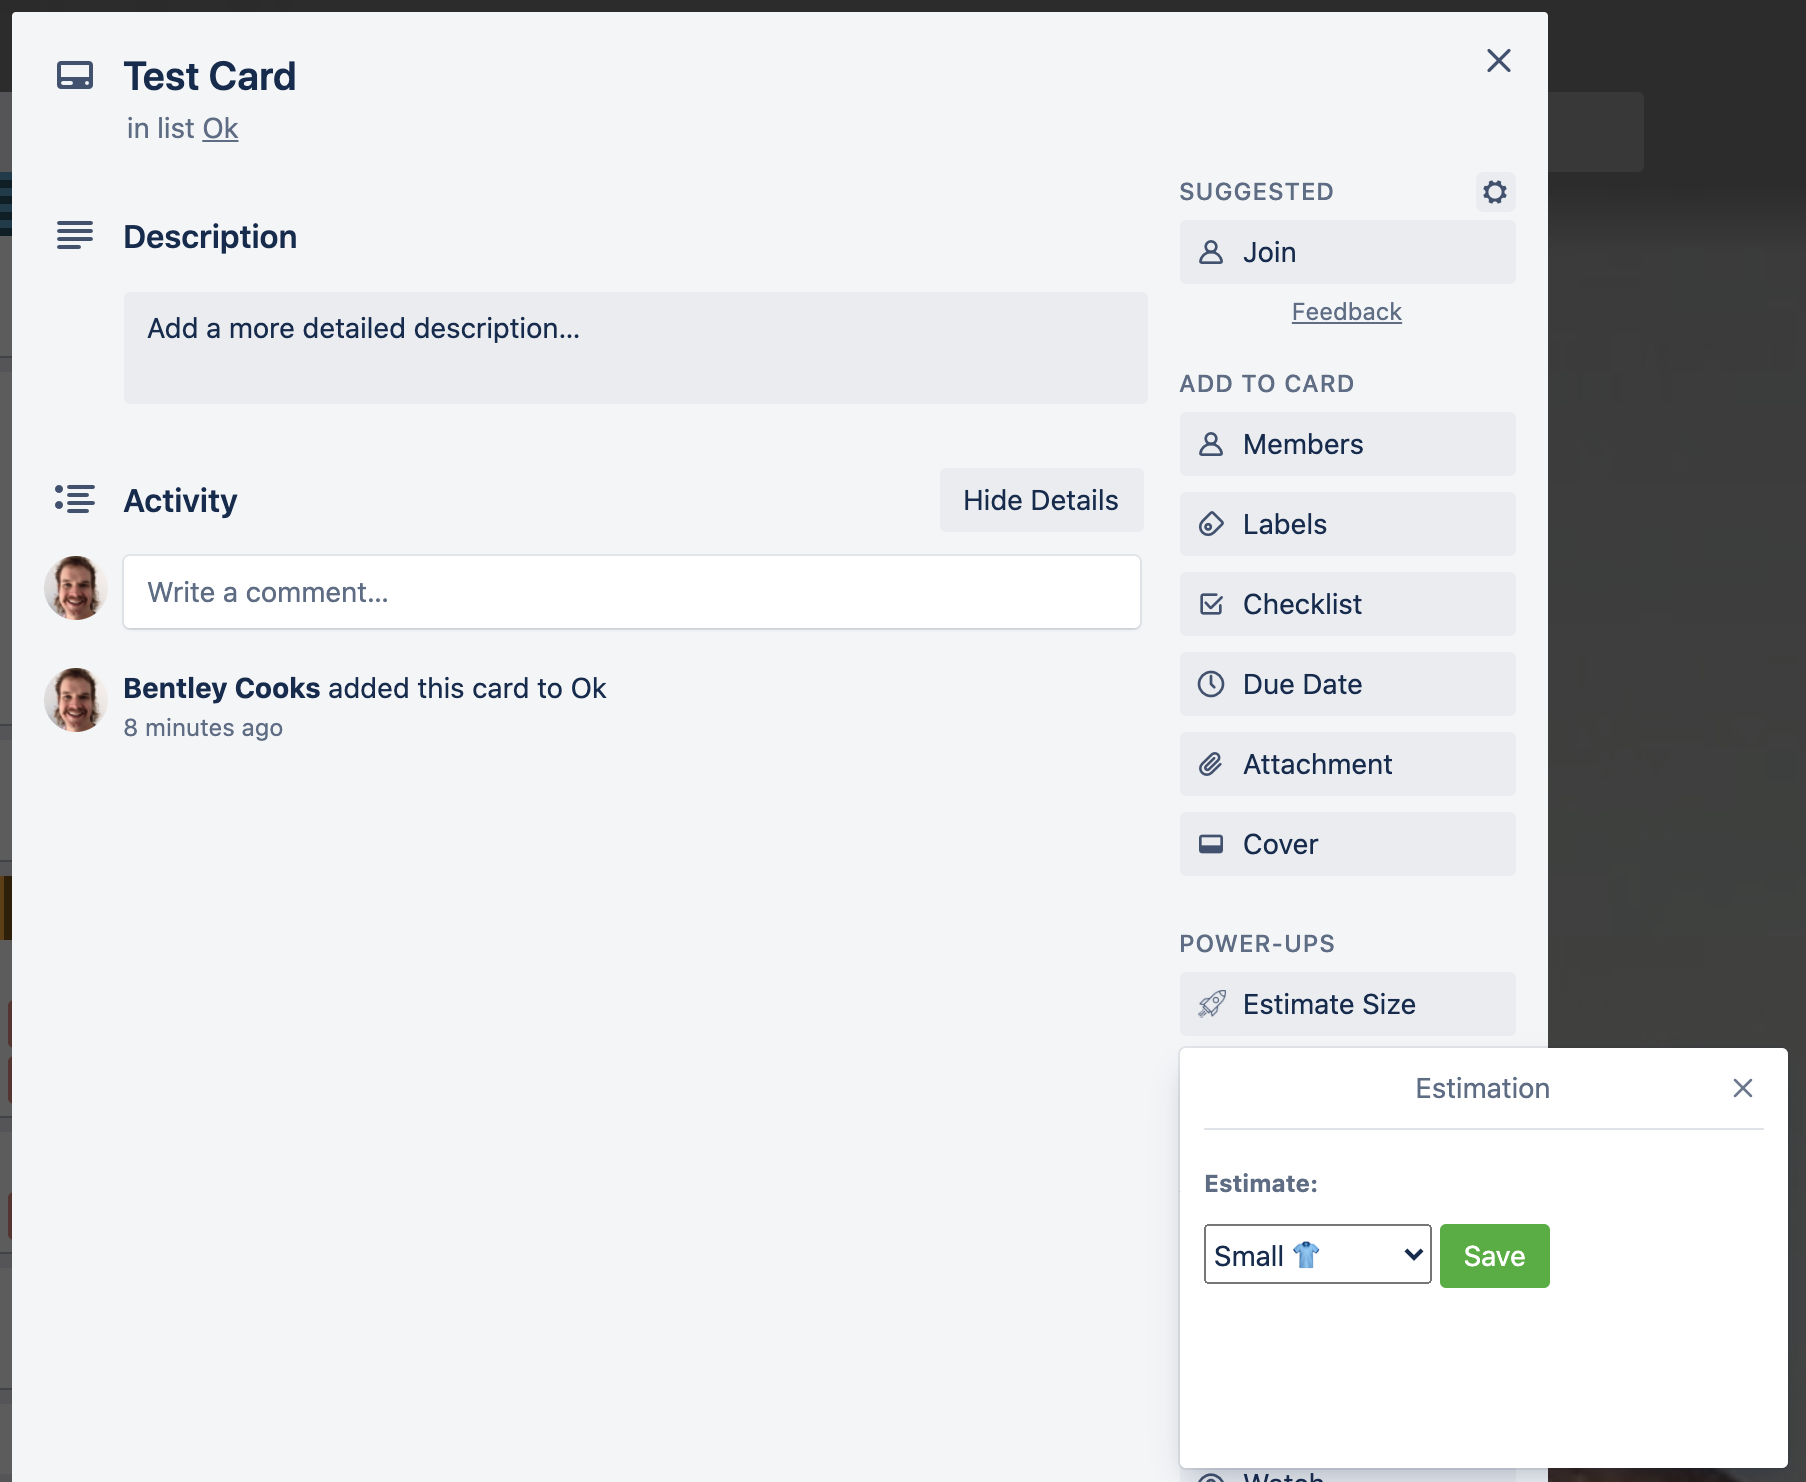
Now that we're trying to show an html page called estimate.html we should probably add it to the project as well… It should contain a form with drop-down items for our sizing scheme.
Check out estimate.html:
1
2<html>
  <head>
    <link rel="stylesheet" href="https://p.trellocdn.com/power-up.min.css" />
    <style>
      select {
        height: 30px;
      }
    </style>
    <script src="https://p.trellocdn.com/power-up.min.js"></script>
  </head>
  <body>
    <form id="estimate">
      <label for="estimateSize">Estimate:</label>
      <select name="size" id="estimateSize">
        <option value="small">Small 👕</option>
        <option value="medium">Medium 👚</option>
        <option value="large">Large 👔</option>
        <option value="x-large">Extra Large 👖</option>
      </select>
      <button type="submit" class="mod-primary">Save</button>
    </form>
  </body>
</html>
We're including Power-Ups' styles here so that our Power-Up looks and feels like Trello does. No need to add any extra styling!
If we go refresh Trello and take a look at our Power-Up, we can see that we've got the drop-down showing!
But, nothing happens when we click the save button! Let's fix that by including some JavaScript in our iframe. We'll create a new file called /js/estimate.js and include it on estimate.html:
1 2… <button type="submit" class="mod-primary">Save</button> </form> <script src="./js/estimate.js"></script> </body> </html>
We want to make use of the Power-Up client library in this new javascript file loaded from estimate.html page. To do so, we need to instantiate an instance of the library for our use:
var t = TrelloPowerUp.iframe();
Because we are on a new iframe (as opposed to our original connector page), we need to initiate the Power-Up client library with a call to .iframe() instead of .initialize().
.iframe() vs .initialize()
.initialize() should only be called once on the connector page. It should never be called by any other page.
.iframe() should be used to interact with the Power-Up client library on any page that isn't the connector. It should only be called once per a page.
.initialize() and .iframe() should never be called on the same page.
You may have noticed the gap of space between our save button and the bottom of the popup. That's doesn't look very Trello-y, so let's fix it!
The client library provides a method t.render() that expects a function to be called by the web client when there are updates. We can use it along with t.sizeTo() to resize our popup on load:
1
2t.render(function () {
  t.sizeTo("#estimate").done();
});
After reloading, that looks much better!
Storing Data In Trello
Now we need to handle what happens when the user clicks on our button. We'll want to save our data so that we can display it in a badge later on. The client library provides a number of data setting and getting methods. We only care about using this estimate within the context of the card, so we will save it to the context of the card using t.set(). We'll trigger setting the data by adding an event listener to our button and then use t.closePopup() to close our popup since the user has nothing left to do. Now our js/estimate.js should look like this:
1
2var t = TrelloPowerUp.iframe();

window.estimate.addEventListener("submit", function (event) {
  // Stop the browser trying to submit the form itself.
  event.preventDefault();
  return t.set("card", "shared", "estimate", window.estimateSize.value).then(function () {
    t.closePopup();
  });
});

t.render(function () {
  t.sizeTo("#estimate").done();
});
We can test that our data has been set properly by checking the plugindata field for our card via Trello's API. You can make a GET request to https://api.trello.com/1/cards/{yourCardId}/plugindata (documentation here) with your API key and token and you will see the data stored on the card. It should look something like:
1
2[
  {
    "id": "591b06d48d971c4c59be0b72",
    "idPlugin": "5914735007cb5508b5064001",
    "scope": "card",
    "idModel": "591affde9068cae91542b976",
    "value": "{\"estimate\":\"small\"}",
    "access": "shared"
  }
]
Don't 🎊 just yet! If you open the popup via the card button, select a size, hit the button, and then re-open the popup, you'll notice that your previous selection isn't initially selected. When the iframe loads, we'll want to check to see if there is a value that has already been set, and if so pre-select it for our list. Adding this leaves our js/estimate.js looking like:
1
2/* global TrelloPowerUp */

var t = TrelloPowerUp.iframe();

window.estimate.addEventListener("submit", function (event) {
  event.preventDefault();
  return t.set("card", "shared", "estimate", window.estimateSize.value).then(function () {
    t.closePopup();
  });
});

t.render(function () {
  return t
    .get("card", "shared", "estimate")
    .then(function (estimate) {
      window.estimateSize.value = estimate;
    })
    .then(function () {
      t.sizeTo("#estimate").done();
    });
});
Now we can reload Trello, click on our card button, and see that the size we selected last time is already selected for us! You can see all of the code for this project here.
Next Steps
We've added the ability for a user to select a size, but you can only see the size when the card button is clicked. This doesn't provide a lot of perspective to the Trello board. In part two we will use the card-badges and card-details-badges to surface the data!
Rate this page: