This is an archive of a 3-part tutorial written by Bentley Cook, originally written for our retired Trello blog. All code used in this tutorial can be found in our example project collection. Look for the folders titled "trello-power-up-tutorial-part-x".
Please also take a look at the repository's README first.
Building A Trello Power-Up: Part Two
You made it to part two! 👻
At the end of the previous post, we had a functional Power-Up that included a button on the back of a card that you could use to add an estimate to the card. Now we want to take this new data we're collecting and display it in such a way that it adds more perspective to the Trello board.
To follow along, you can remix the previous post's final result here. Or you can remix the final project from this post here.
Card Badges
Right now it is a bit of work for a user to get to the estimates for each card. Starting at the board view, a user would have to click a card and then click on our card button just to see the estimate for that card. Ideally, a team should be able to look at a board and know the estimates of cards without clicking on anything! To make this a reality, we're going to make use of another capability in our Power-Up - card badges.
As its name might imply, the card badges capability allows Power-Ups to add badges to the front of cards. Trello uses card badges already for a number of features. Below you can see an example of a badge that indicates the number of attachments on the card and another to display the due date of the card:

For now, we'll settle with displaying an icon and the estimate for the given card.
To start, let's add the card badge capability to our client.js and initialize it with some text and an icon:
1
2/* global TrelloPowerUp */

TrelloPowerUp.initialize({
  "card-buttons": function (t, options) {
    return [
      {
        icon: "https://cdn.glitch.com/c69415fd-f70e-4e03-b43b-98b8960cd616%2Frocket-ship-grey.png?1496162964717",
        text: "Estimate Size",
        callback: function (t) {
          return t.popup({
            title: "Estimation",
            url: "estimate.html",
          });
        },
      },
    ];
  },
  "card-badges": function (t, options) {
    return [
      {
        icon: "https://cdn.glitch.com/c69415fd-f70e-4e03-b43b-98b8960cd616%2Frocket-ship-grey.png?1496162964717",
        text: "3",
      },
    ];
  },
});
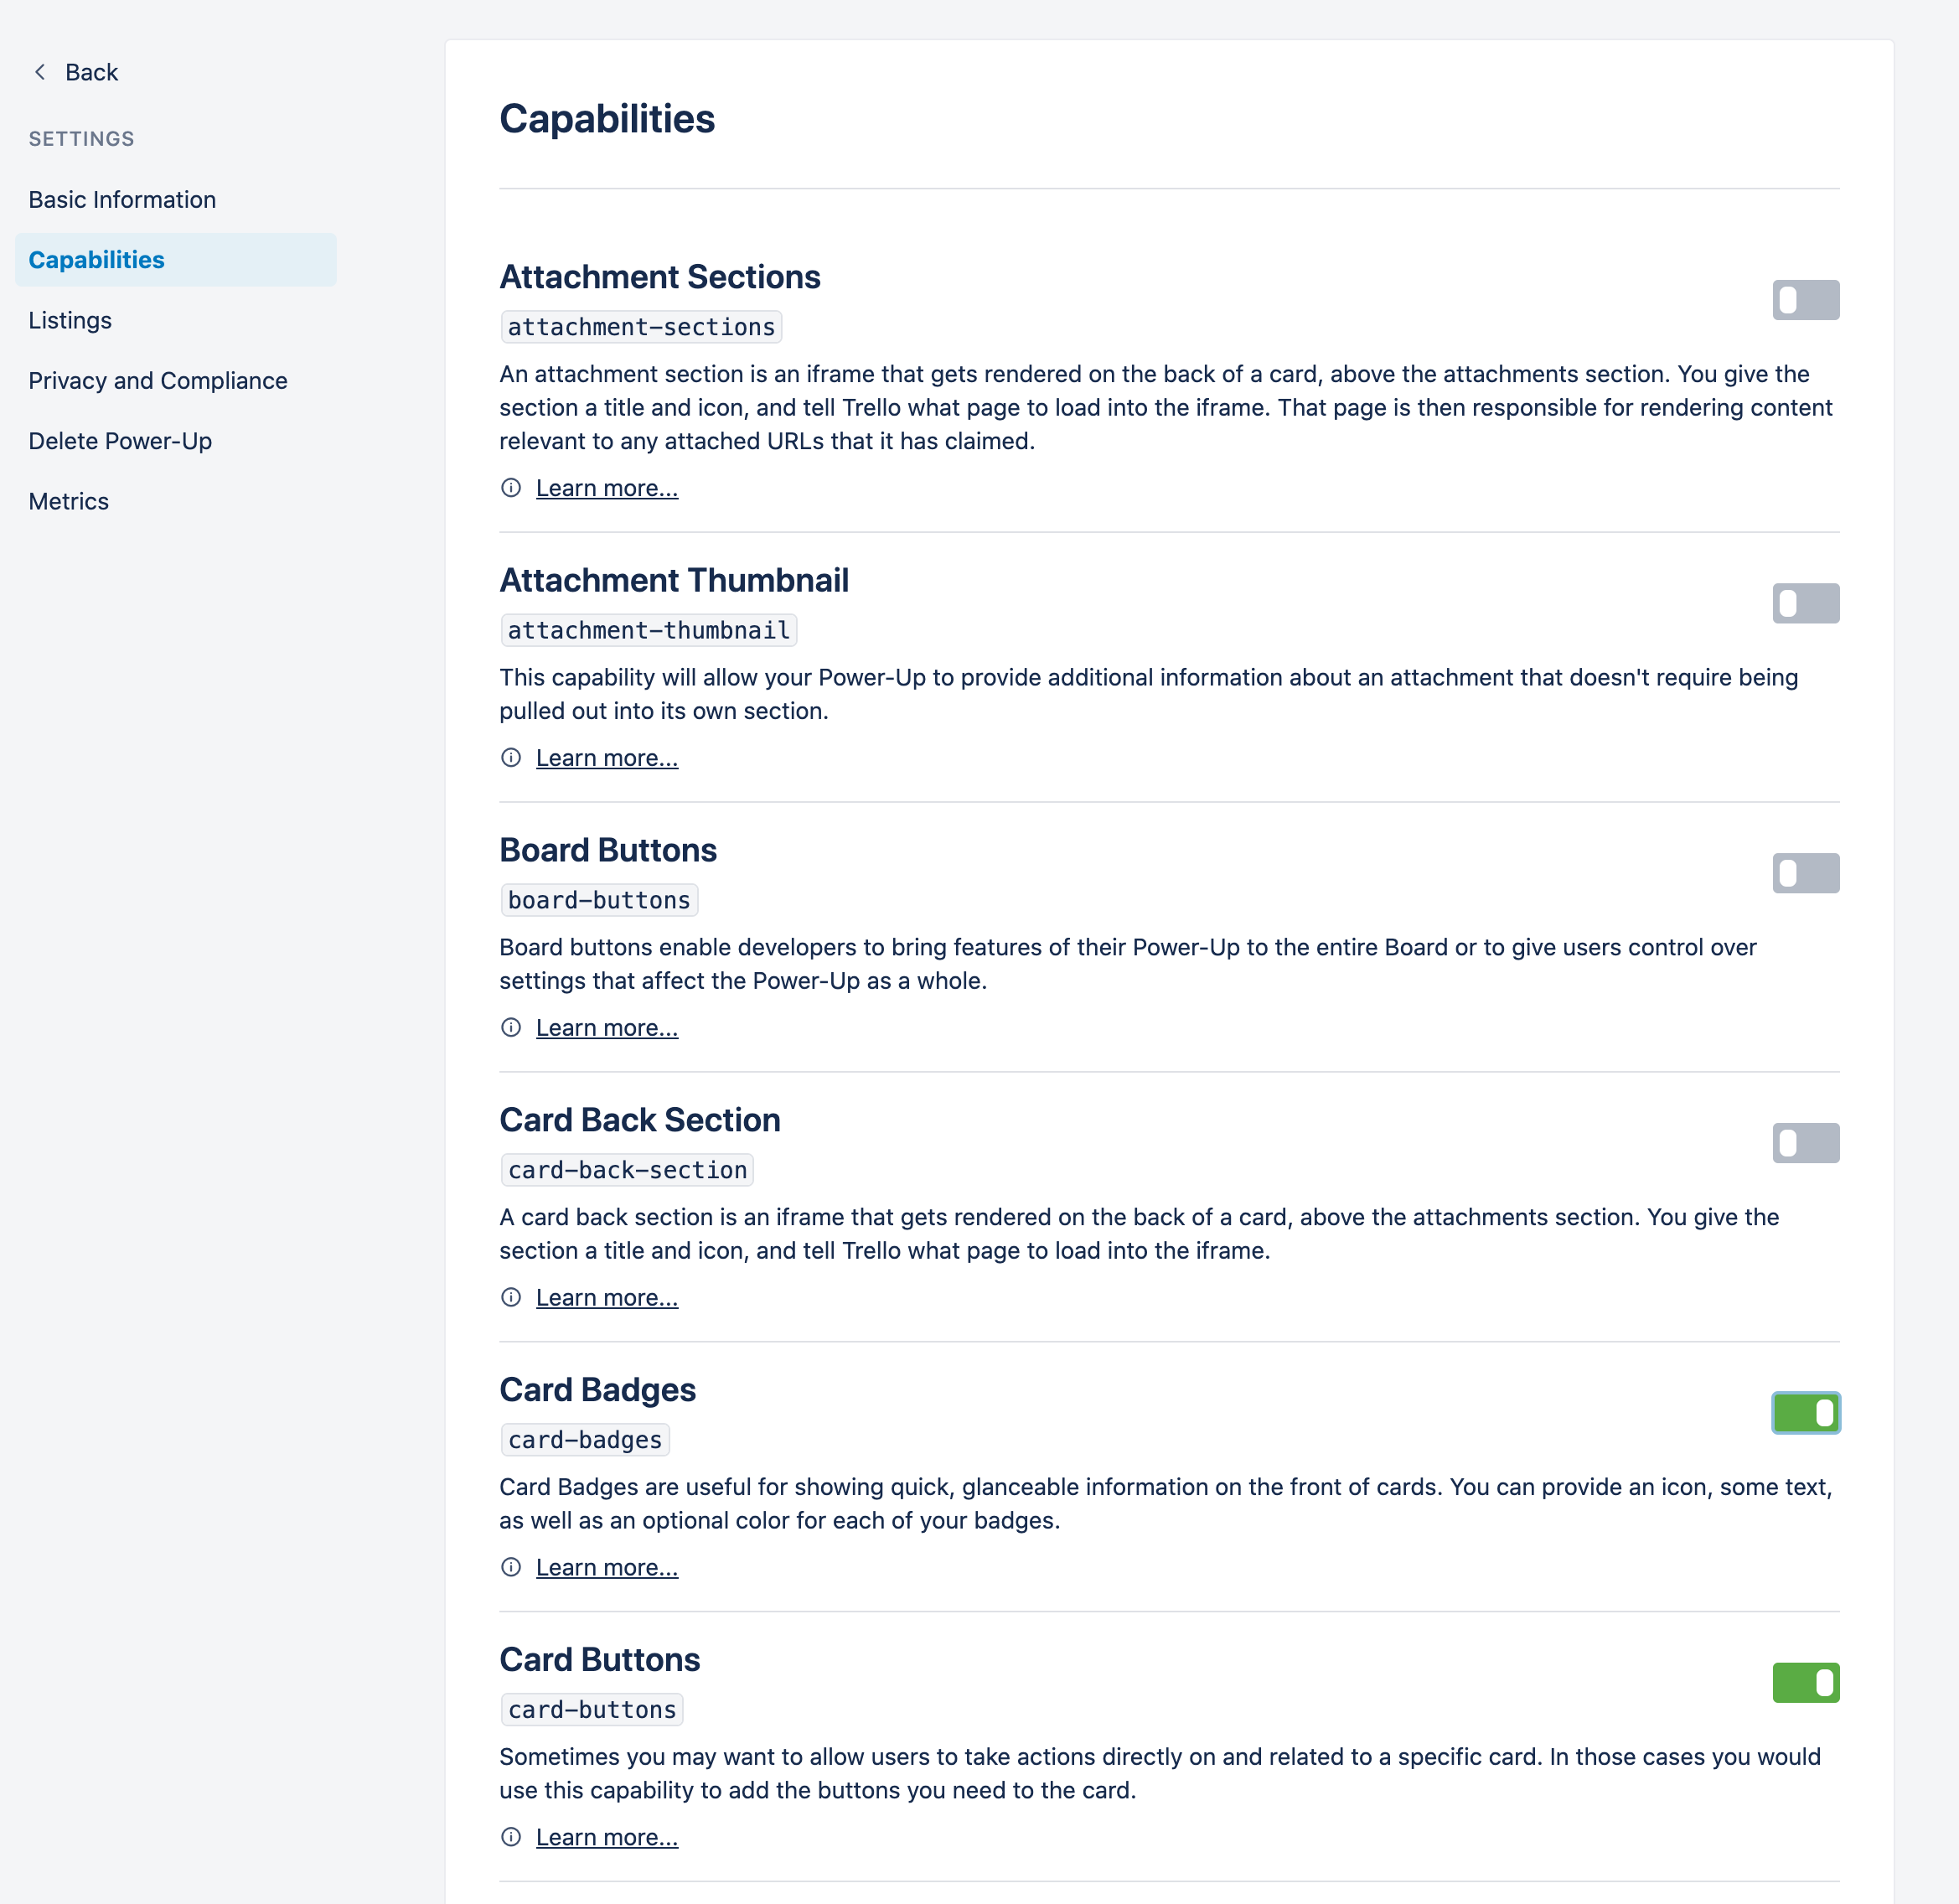
Now we can reload our Trello board and we should see our text and icon. Right?! 😖 Whoops! 😬 We forgot that we need to let Trello know we plan to make use of this new capability. Head over to the custom Power-Up admin portal and turn on the card-badges capability and save the form.
Now when we refresh we can see our badge on every card!
Using Up-To-Date Data
Our Power-Up doesn't provide a lot of extra context with a static number being displayed. To display the estimate that we've set for cards with the card-button capability, we'll need to do a little more work when we initialize the badge.
Since our estimate was stored using t.set(), we can retrieve it using t.get(). We can grab the data we want while initializing the badge, and pass it back to Trello once we have it. Trello supports asynchronous operations by allowing you to return a Promise in any of your capability functions. Just make sure your Promise properly resolves to the actual data that Trello is expecting for the capability. Let's update our client.js to do this:
1
2TrelloPowerUp.initialize({
  ...
  'card-badges': function(t, options) {
    return t.get('card', 'shared', 'estimate')
    .then(function(estimate) {
      return [{
        icon: 'https://cdn.glitch.com/c69415fd-f70e-4e03-b43b-98b8960cd616%2Frocket-ship-grey.png?1496162964717',
        text: estimate
      }];
    });
  },
});
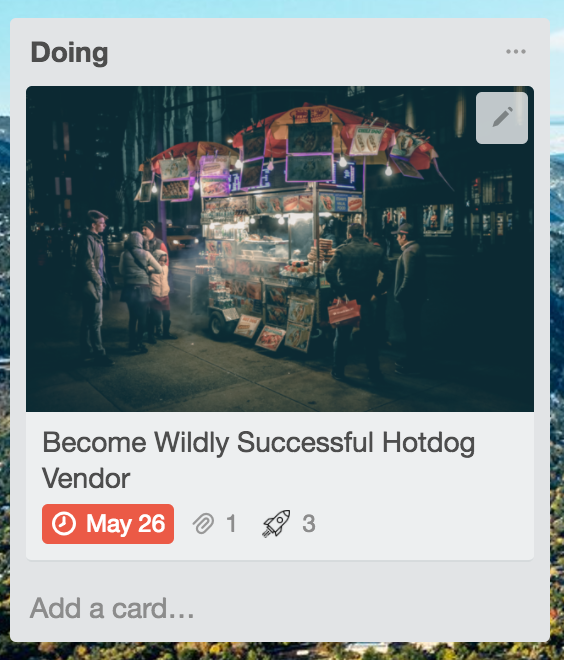
Now when we refresh Trello we see our cards' actual estimates! 🚀
But if we take a look at a card without an estimate we see a lonely rocketship... 😥
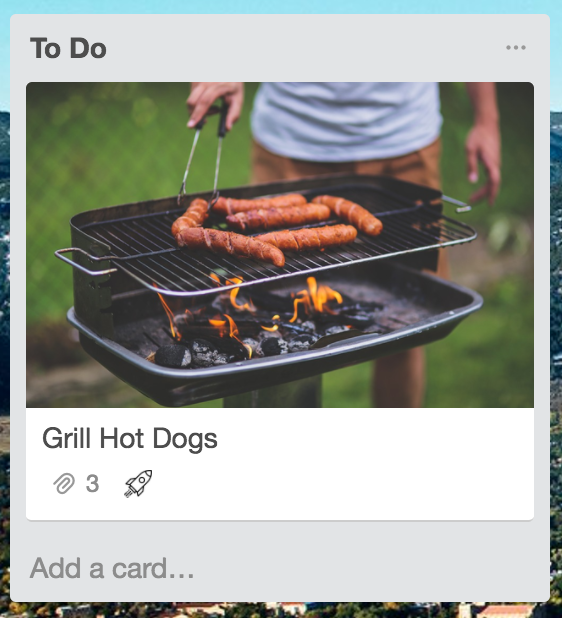
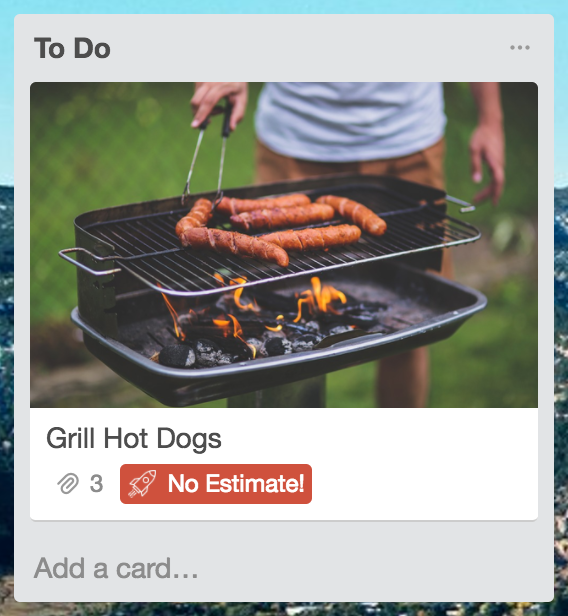
If our cards don't have an estimate set, then our call to retrieve data t.get('card', 'shared', 'estimate') returns null. If a card doesn't have an estimate, then our team needs to take a look at it! Let's use some color to draw attention to the fact that it hasn't been estimated.
In our Promise chain, let's replace a null value with a more useful message and also give the badge a color so that our team knows they need to add an estimate. Additionally, because we're adding a color, we'll want to use a white icon for better contrast.
1
2var GREY_ROCKET_ICON = 'https://cdn.glitch.com/c69415fd-f70e-4e03-b43b-98b8960cd616%2Frocket-ship-grey.png?1496162964717';
var WHITE_ROCKET_ICON = 'https://cdn.glitch.com/c69415fd-f70e-4e03-b43b-98b8960cd616%2Fwhite-rocket-ship.png?1495811896182';

TrelloPowerUp.initialize({
  ...
  'card-badges': function(t, options) {
    return t.get('card', 'shared', 'estimate')
    .then(function(estimate) {
      return [{
        icon: estimate ? GREY_ROCKET_ICON : WHITE_ROCKET_ICON,
        text: estimate || 'No Estimate!',
        color: estimate ? null : 'red',
      }];
    });
  },
});
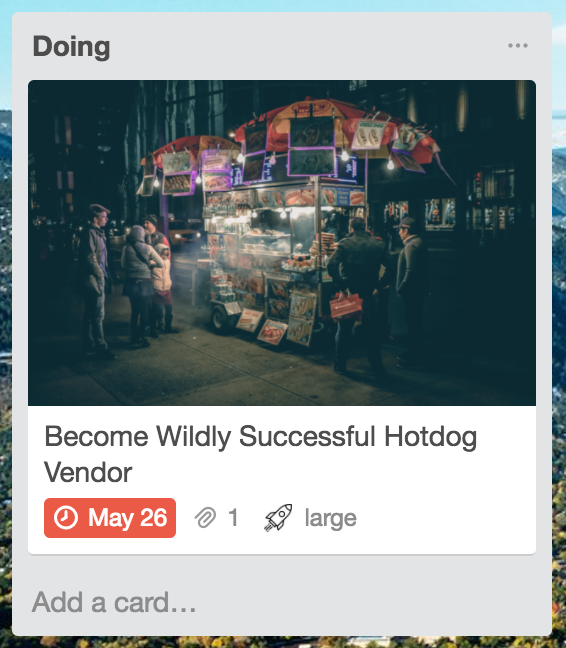
And now our badges show estimates and provide a bit more perspective!
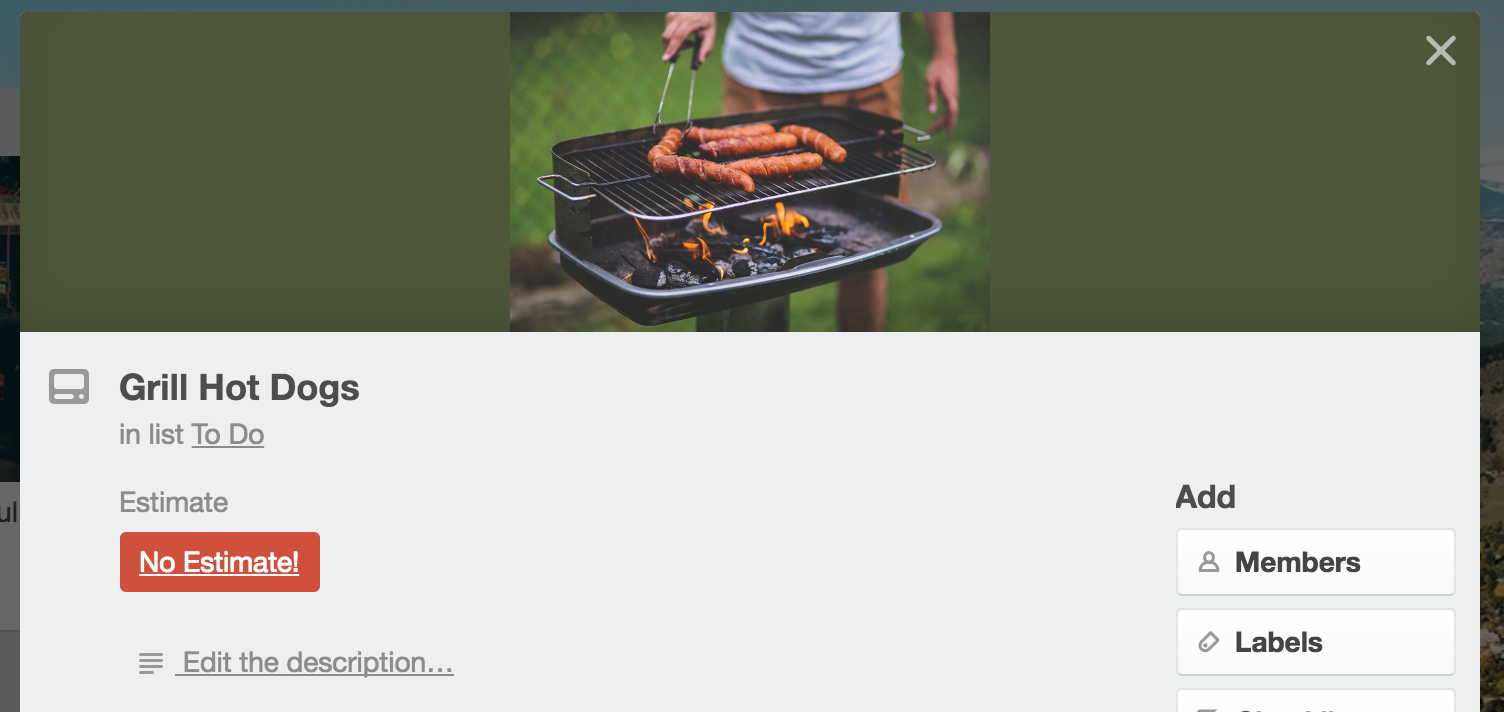
Card Detail Badges
If our goal is to provide our team with as much perspective as possible, it seems like a lot of work to have to click on a card button to see and set the estimate on a card. Let's use the card detail badges capability to display the estimate value and also provide an alternative way of setting the estimate.
To use the new capability, we'll start by adding it to our list of capabilities in custom Power-Up admin portal. Once we've turned it on and saved the form, we can add the capability to our Power-Up's intialize call in client.js. We'll start by adding a static version:
1
2TrelloPowerUp.initialize({
  ...
  'card-detail-badges': function(t, options) {
    return [{
      title: 'Estimate',
      color: 'red',
      text: 'Large',
    }]
  }
});
We'll make use of the card detail badge's callback capability, just as we did with the card button, to give the user the ability to select a size from a dropdown once they've clicked on the card detail badge:
1
2TrelloPowerUp.initialize({
  ...
  'card-detail-badges': function(t, options) {
    return [{
      title: 'Estimate',
      color: 'red',
      text: 'Large',
      callback: function(t) {
        return t.popup({
          title: "Estimation",
          url: 'estimate.html',
        });
      }
    }]
  }
});
And now we have a static detail badge that a user can click on to set an estimate for the card! Just as we did with the card badge, we can get the current estimate using the Power-Up client library's t.get() method and provide our user with a dynamic experience:
1
2TrelloPowerUp.initialize({
  ...
  'card-detail-badges': function(t, options) {
    return t.get('card', 'shared', 'estimate')
    .then(function(estimate) {
      return [{
        title: 'Estimate',
        text: estimate || 'No Estimate!',
        color: estimate ? null : 'red',
        callback: function(t) {
          return t.popup({
            title: "Estimation",
            url: 'estimate.html',
          });
        }
      }]
    });
  }
});
The card detail badge now warns the user with a red background when there isn't an estimate:
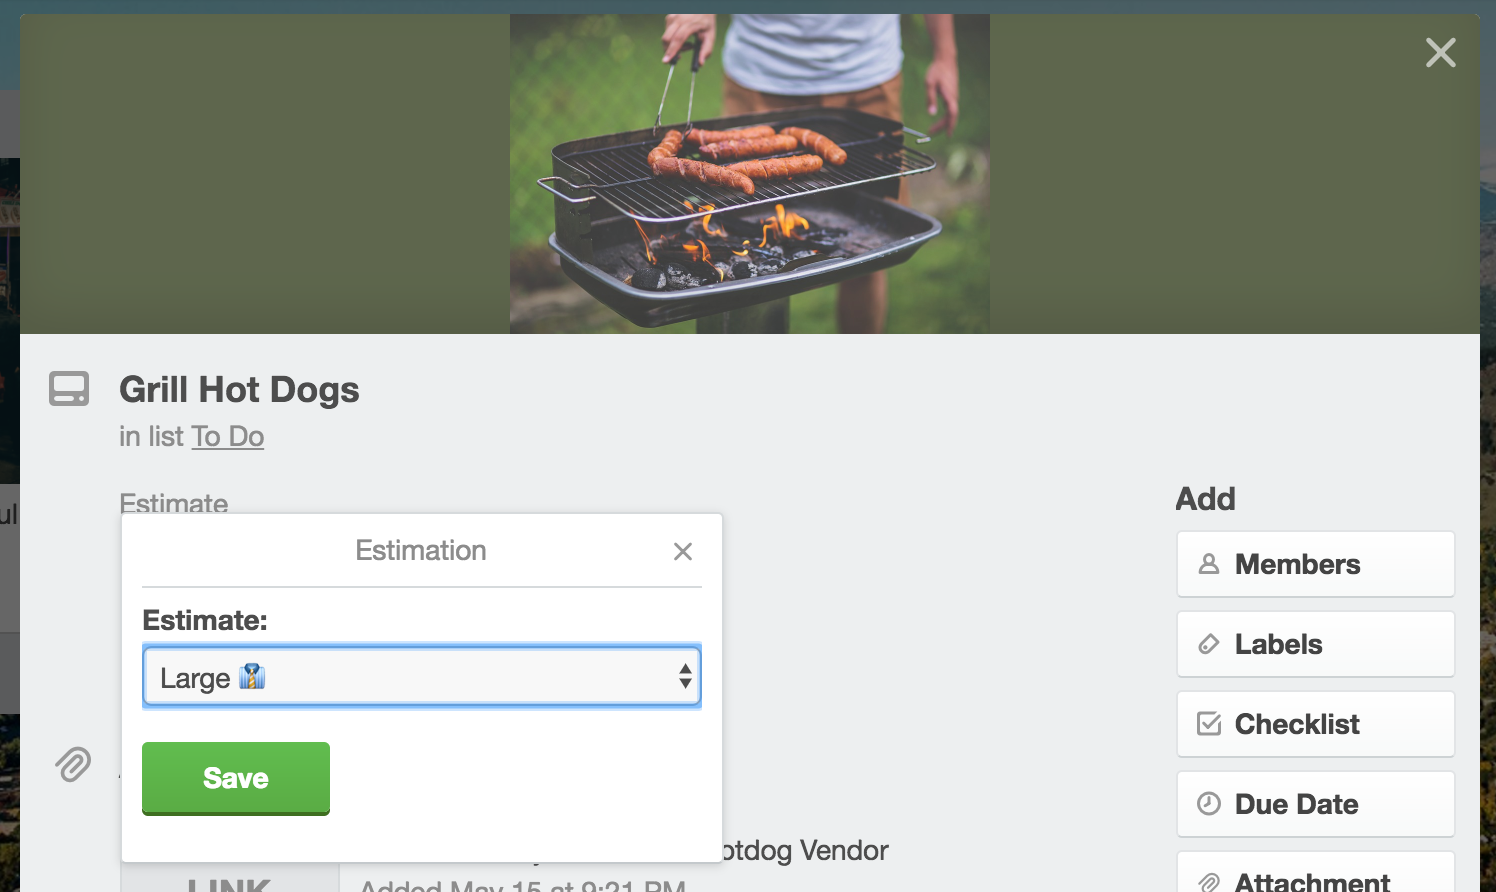
Allows a user to set the estimate by clicking on the card detail badge:
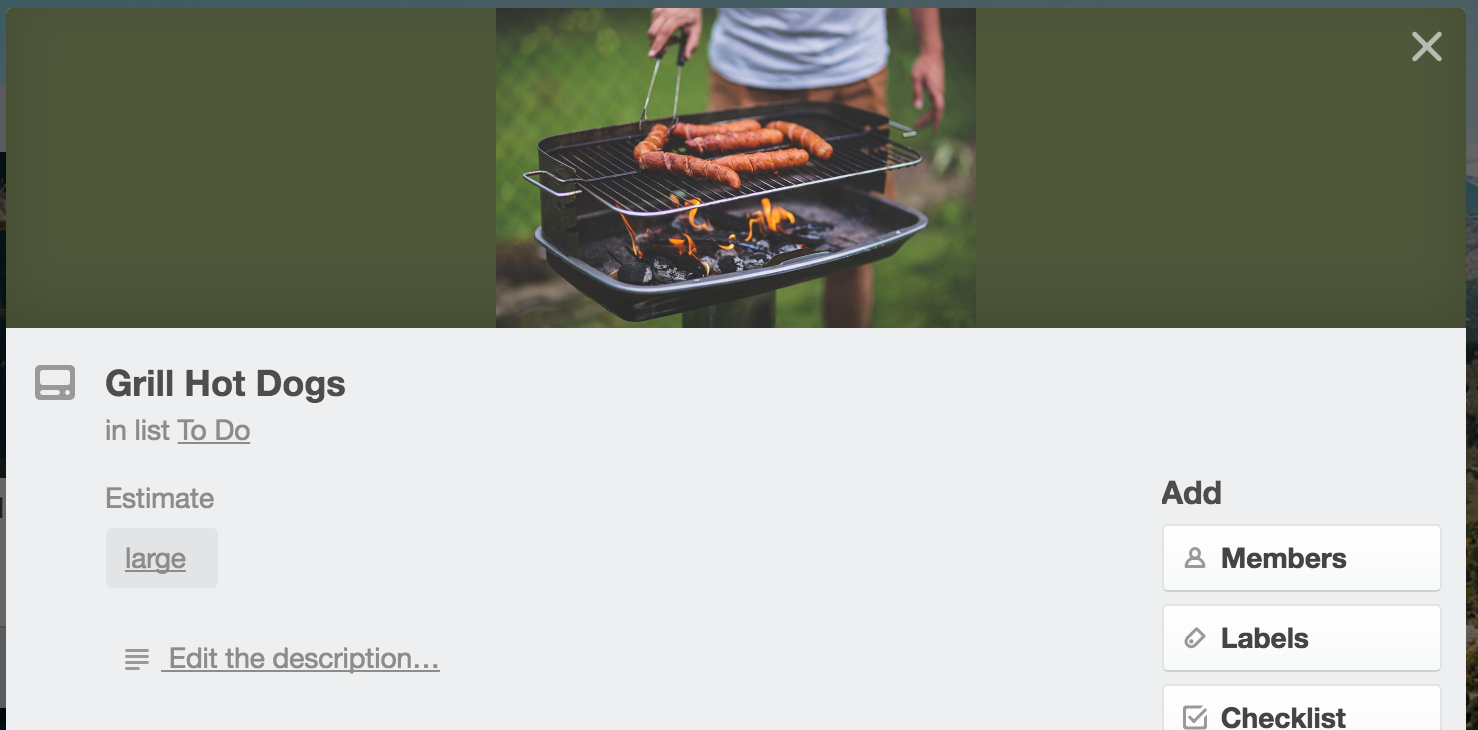
And shows the card's estimate when it has been set:
Up Next
Now that our users can view card estimates and easily add them via the card detail badge on the back of the card, we want to continue adding features! In the next post we will allow users to authorize with a third-party service to provide extra data to the estimation asynchronously. We'll setup a fake endpoint in our Node server for this and go through using t.authorize to manage the authorization flow.
Remember, you can see all of the code for this project here.
Rate this page: