Automate Bitbucket using triggers
This tutorial describes how to create a Forge app and install it in a Bitbucket workspace. The app responds to pull request created events in Bitbucket and adds a comment to the newly created pull request.
Forge invocation limits also apply to web triggers (scheduled and unscheduled). Refer to our platform invocation limits for more details.
You'll learn about Atlassian app events, the Runtime API, and tunneling.
Before you begin
To complete this tutorial, you need the latest version of Forge CLI. To update your CLI version, run npm install -g @forge/cli@latest
on the command line.
We recommend that you complete all the steps in Getting started so that you’re familiar with the Forge development process.
Set up a shared team workspace
For Bitbucket apps you need to join or create a shared Bitbucket team workspace (as Forge apps are not supported on personal workspaces). If you don't have a Bitbucket workspace, see the references below for related instructions:
A free Bitbucket team space can have up to 5 users.
Step 1: Create your app
Create an app based on the Trigger and Validators template.
-
Navigate to the directory where you want to create the app.
-
Create your app by running:
1 2
forge create -
Enter a name for the app. For example, pull-request-app.
-
Select the
Triggers and Validatorscategory. -
Select
Show All, and then select theAtlassian-app-triggertemplate from the list. -
Open the app directory to see the app files.
Step 2: Define app permissions
Your app needs to define the Forge app scopes to use when calling the Bitbucket Cloud REST API.
Add the Required Scopes
Your app needs to define the Forge app scopes to use when calling the Bitbucket Cloud REST API. In this section, we'll add the read:pullrequest:bitbucket scope (required for handling avi:bitbucket:created:pullrequest triggers and for adding comments to the pull request).
-
Open the
manifest.ymlfile. -
Replace it with the following content:
1 2
permissions: scopes: - 'read:pullrequest:bitbucket' modules: trigger: - key: pull-request-app-hello-world function: main events: - avi:bitbucket:created:pullrequest function: - key: main handler: index.run app: runtime: name: nodejs24.x id: <your_app_id>
See Scopes for detailed information about the available scopes.
The code above creates a trigger module that responds to the Atlassian app event avi:bitbucket:created:pullrequest. This event happens when a pull request is created in the Bitbucket workspace where the app is installed. When the event occurs, the main function is triggered.
Step 3: Use a tunnel to test the app
The main function is called when a new Bitbucket pull request is created. This function is located in the src/index.jsx file, which logs this message:
1
2export async function run(event, context) {
	console.log('Hello World!');
}
You’ll use the tunnel command from the Forge CLI to run your function locally, allowing you to quickly check your code changes. When a trigger is received by Forge (in the cloud), the function running locally is invoked.
-
In your app's top-level directory, deploy your app by running:
1 2
forge deploy -
Install the app on your workspace:
1 2
forge install -p bitbucket -
Enter the URL for your Bitbucket workspace. For example,
bitbucket.org/example-workspace. -
Start a tunnel by running:
1 2
forge tunnelThis enables you to test your app without having to deploy it after each change.
The tunnel works for changes to the code, not for configuration changes to the
manifest.ymlfile. If you change the app configuration in themanifest.yml, you need to redeploy the app (forge deploy), and then restart the tunnel (forge tunnel). -
Create a new pull request in a repo in your Bitbucket workspace.
-
Verify
Hello World!appears in your tunnel.

Step 4: Use the Bitbucket REST API to add a comment
In Step 3, we demonstrated how creating a new pull request invoked the run method in src/index.jsx.
In this step, you’ll create a function that uses the Runtime API to add a comment to the new pull request in response to the pull request created event.
-
In the app’s top-level directory, install the npm package dependency for the Runtime API by running:
1 2
npm install @forge/api --save -
Open the
src/index.jsxfile. -
Import the Runtime API by adding the following to the top of the file.
1 2
import api, { route } from "@forge/api"; -
Create the
addCommentfunction below therunfunction:1 2
async function addComment(workspaceId, repositoryId, pullRequestId, message) { const requestUrl = route`/2.0/repositories/${workspaceId}/${repositoryId}/pullrequests/${pullRequestId}/comments`; const body = { content: { raw: message } }; // Use the Forge Runtime API to fetch data from Bitbucket API using your app credential let response = await api.asApp().requestBitbucket(requestUrl, { method: "POST", headers: { "Content-Type": "application/json", }, body: JSON.stringify(body), }); // Error checking: a 201 is returned if the request is successful if (response.status !== 201) { console.log(response.status); const responseBody = await response.json(); throw `Unable to add comment to pull request ${pullRequestId}, status: ${ response.status }, response: ${JSON.stringify(responseBody, null, 2)}`; } return response.json(); } -
Modify the
runfunction to call theaddCommentfunction:1 2
export async function run(event, context) { const response = await addComment( event.workspace.uuid, event.repository.uuid, event.pullrequest.id, "Hello World! It's the Comment Issue app." ); console.log(JSON.stringify(response, null, 2)); } -
Start your tunnel if it’s not still running from Step 3.
-
Create a new pull request in the workspace where you installed your app, and verify the following:
- You receive a response message in the tunnel.
- The pull request you created now has a comment.
Your index.jsx should look like the following:
1 2import api, { route } from "@forge/api"; async function addComment(workspaceId, repositoryId, pullRequestId, message) { const requestUrl = route`/2.0/repositories/${workspaceId}/${repositoryId}/pullrequests/${pullRequestId}/comments`; const body = { content: { raw: message } }; // Use the Forge Runtime API to fetch data from Bitbucket API using your app credential let response = await api.asApp().requestBitbucket(requestUrl, { method: "POST", headers: { "Content-Type": "application/json", }, body: JSON.stringify(body), }); // Error checking: a 201 is returned if the request is successful if (response.status !== 201) { console.log(response.status); const responseBody = await response.json(); throw `Unable to add comment to pull request ${pullRequestId}, status: ${ response.status }, response: ${JSON.stringify(responseBody, null, 2)}`; } return response.json(); } export async function run(event, context) { const response = await addComment( event.workspace.uuid, event.repository.uuid, event.pullrequest.id, "Hello World! It's the Comment Issue app." ); console.log(JSON.stringify(response, null, 2)); }
Event payload
The event payload contains data about the event, as well as the workspace the event occurred in. In this tutorial, you extract the pull request ID from the payload, and use it when making your API call to ensure the comment is added to the correct pull request.
See Bitbucket events to learn more about the format of the event payload.
Step 5: Deploy your app
In Step 4, you made changes to your app using the Forge Runtime API and then tested the changes using a tunnel. Now that your app is working, deploy the changes so the app continues to work when the tunnel is closed.
-
Close the tunnel by pressing Ctrl+C.
-
Deploy the app by running:
1 2
forge deploy -
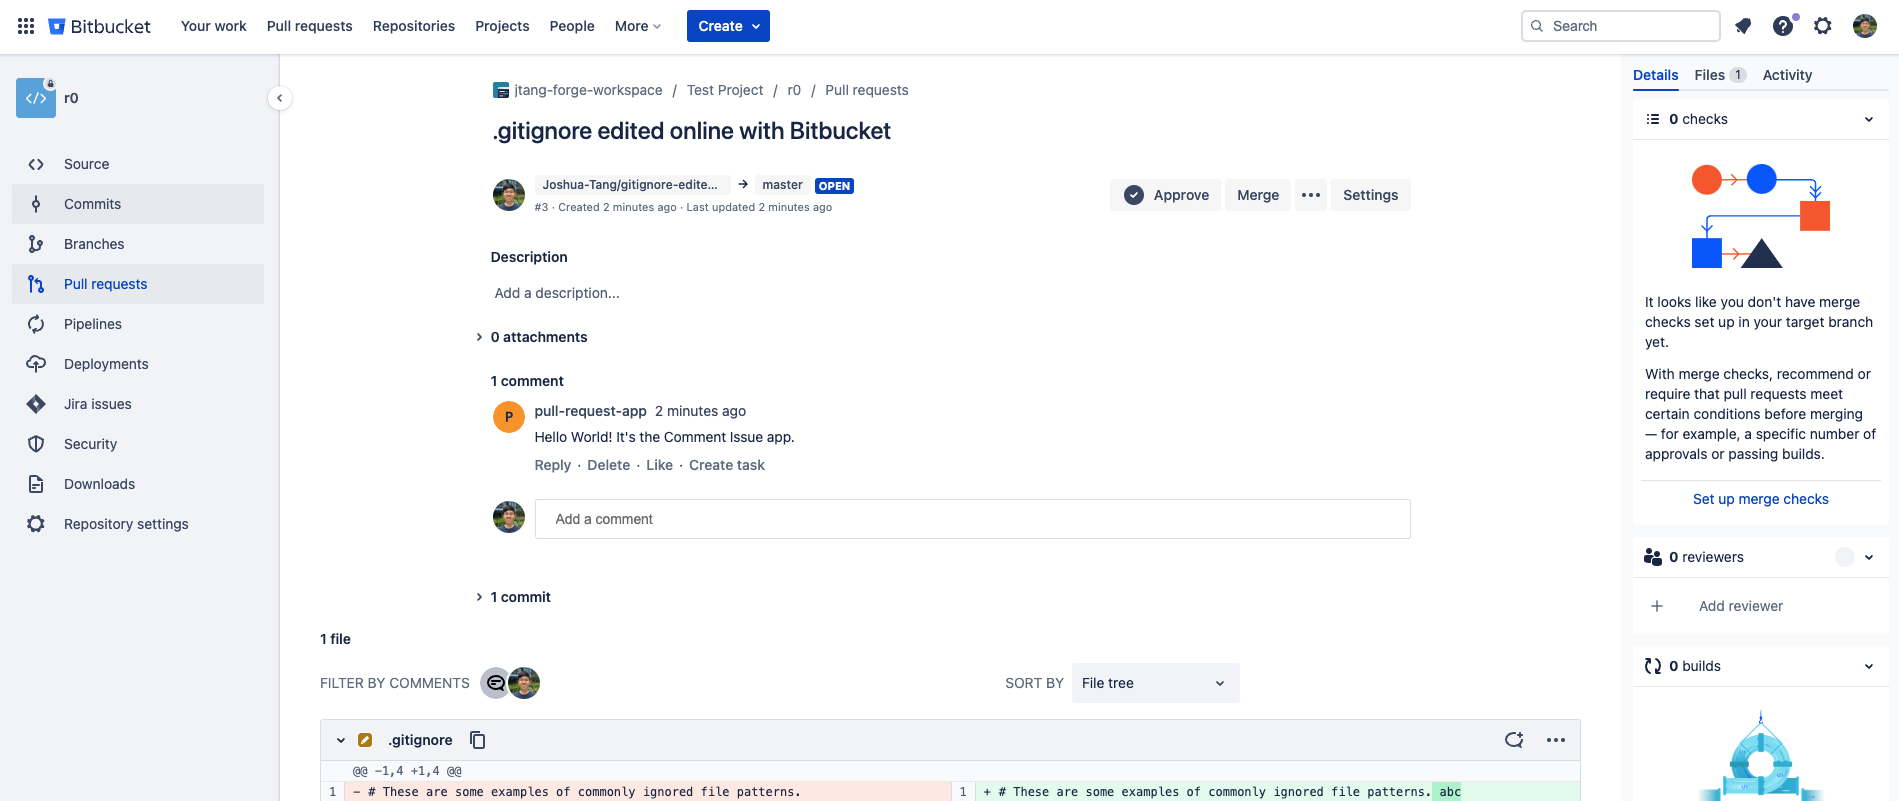
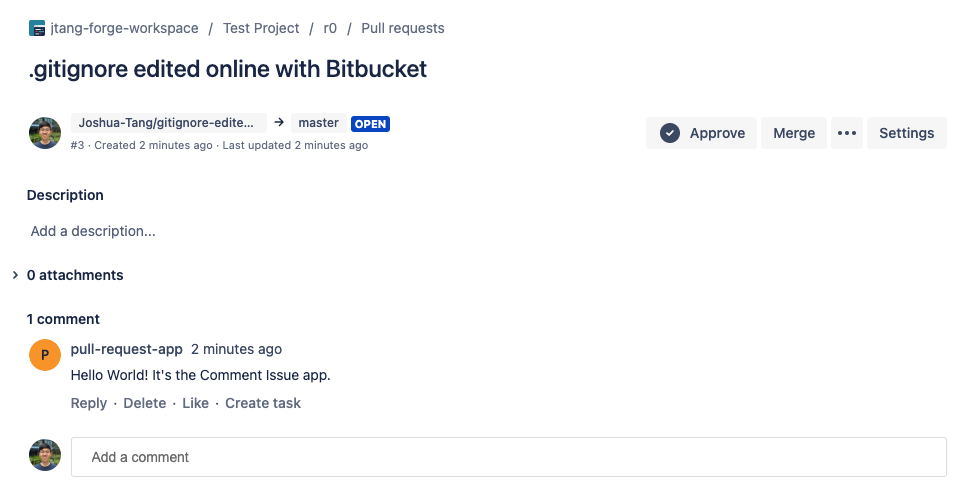
Create a pull request in the workspace the app is installed in, and confirm that the comment is created.
Great work! You’ve created a Forge app that:
- Detects when a pull request is created in the workspace where it is installed.
- Responds by adding a comment to the pull request.
You’ve tested the app using tunnelling, deployed it to the default development environment, and installed it into a Bitbucket workspace.
Next steps
Continue to one of the other tutorials or look through the reference pages to learn more.
- See the reference pages to learn what else you can do with what you’ve learned.
Developing for Atlassian Government Cloud
This content is written with standard cloud development in mind. To learn about developing for Atlassian Government Cloud, go to our Atlassian Government Cloud developer portal.
Rate this page: