Use highlighted text in a Confluence Forge app
This tutorial describes how to make a Forge app that uses highlighted text from a Confluence page. You might use this technique in a dictionary app, a custom glossary, or any app that requires users to highlight text on a page.
To create the app, you'll learn how to:
- Use the confluence:contextMenu module to add an item to the context menu dropdown, which appears when users highlight text on a published page.
Before you begin
This tutorial assumes you're already familiar with the basics of Forge development. If this is your first time using Forge, see Getting started first.
To complete this tutorial, you need the following:
- The latest version of Forge CLI. To update your CLI version, run
npm install -g @forge/cli@lateston the command line. - The latest version of UI Kit. To update your version, navigate to the app's top-level
directory, and run
npm install @forge/ui@latest --saveon the command line.
Set up a cloud developer site
An Atlassian cloud developer site lets you install and test your app on Atlassian apps including Confluence and Jira. If you don't have one yet, set it up now:
- Go to http://go.atlassian.com/cloud-dev and create a site using the email address associated with your Atlassian account.
- Once your site is ready, log in and complete the setup wizard.
You can install your app to multiple Atlassian sites. However, app data won't be shared between separate Atlassian apps, sites, or Forge environments.
The limits on the numbers of users you can create are as follows:
- Confluence: 5 users
- Jira Service Management: 1 agent
- Jira Software and Jira Work Management: 5 users
Create your app
Create an app starting from the macro template.
-
Navigate to the directory where you want to create the app.
-
Create an app by running:
1 2
forge create- Enter a name for the app. For example, show-selected-text.
- Select the UI Kit category from the list.
- Select the Confluence app from the list.
- Select the confluence-context-menu template from the list.
-
Open the app directory to see the app files.
Check the manifest
This app uses a confluence:contextMenu module. All apps that use this module appear in the dropdown
in the context menu.
- In the app's top-level directory, open the
manifest.ymlfile.
Your manifest.yml should look like the following, with your value for the app ID:
1
2modules:
  confluence:contextMenu:
    - key: hello-world-context-menu
      resource: main
      render: native
      resolver:
        function: resolver
      title: Hello World!
  function:
    - key: resolver
      handler: index.handler
resources:
  - key: main
    path: src/frontend/index.jsx
app:
  runtime:
    name: nodejs24.x
  id:
See Manifest to learn more about the manifest file.
Build, deploy, and install
Build, deploy, and install the app to see it in your Confluence site.
-
Navigate to the app's top-level directory and deploy your app by running:
1 2
forge deploy -
Install your app by running:
1 2
forge install -
Select your Atlassian context using the arrow keys and press the enter key.
-
Enter the URL for your development site. For example, example.atlassian.net. View a list of your active sites at Atlassian administration.
Once the successful installation message appears, your app is installed and ready
to use on the specified site.
You can always delete your app from the site by running the forge uninstall command.
View the app
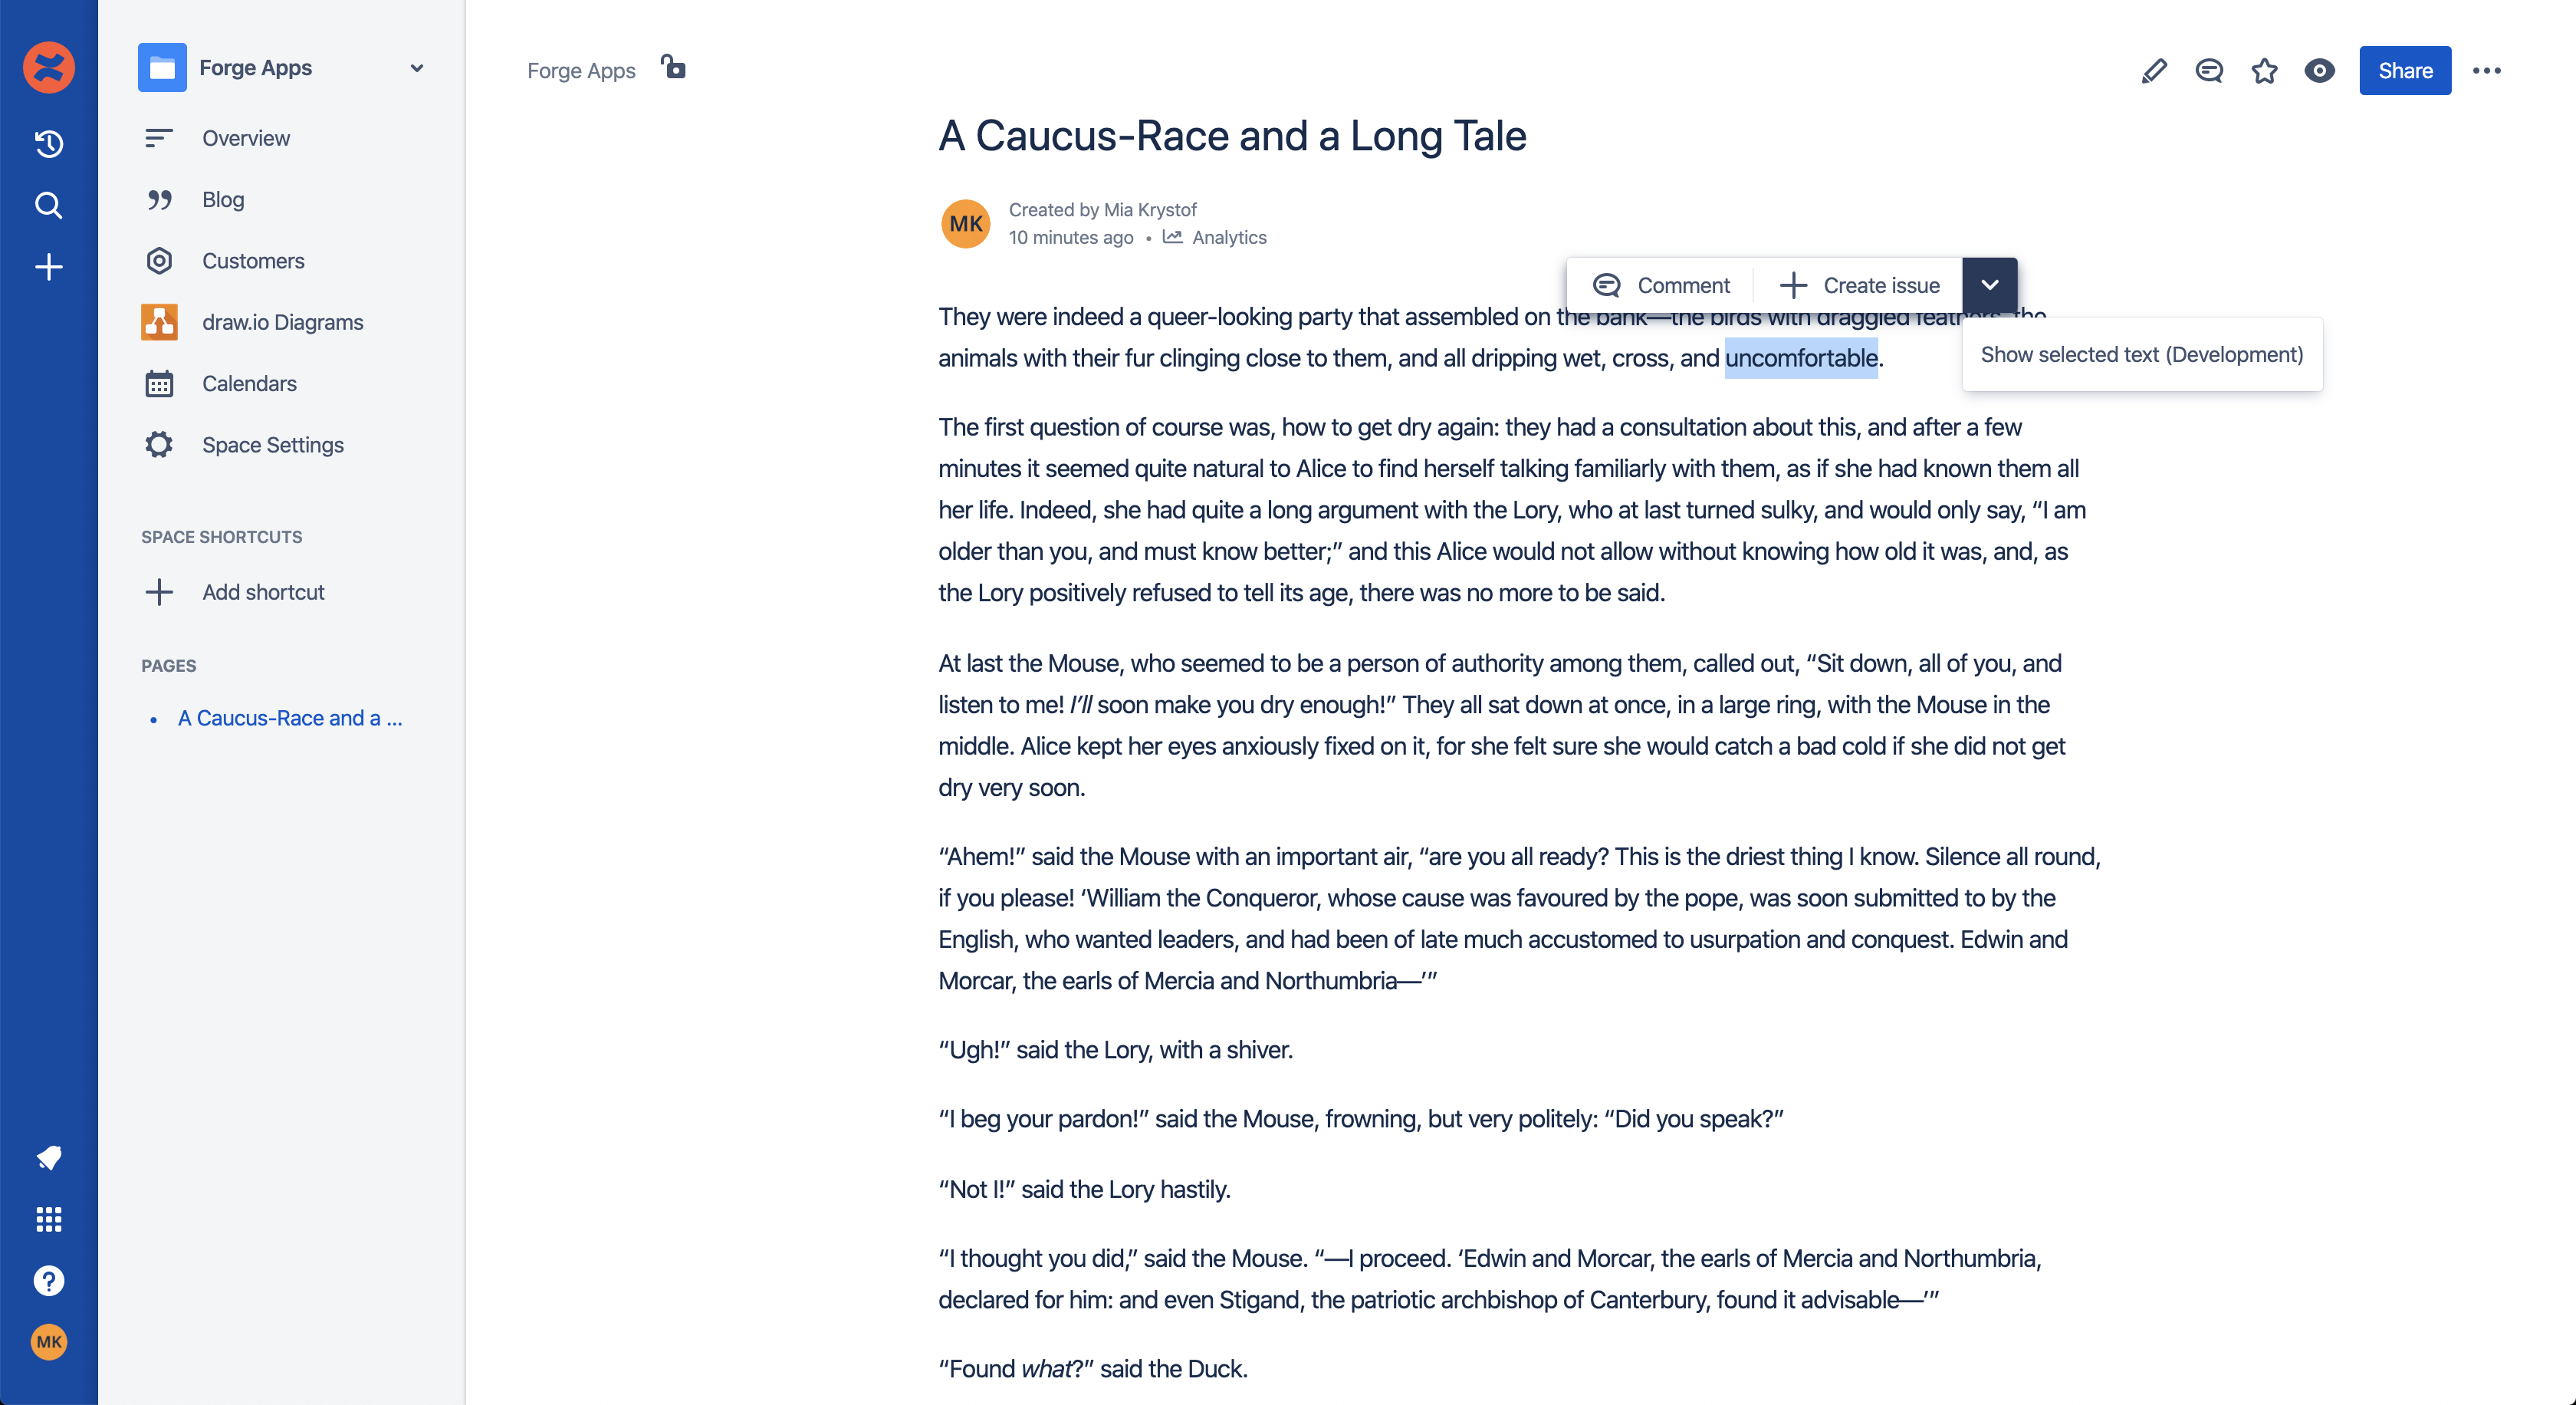
With the app installed, you can see the new entry in the context menu.
- Navigate to a page on your Confluence Cloud site.
- Select any text on the page, and then hover over it. A menu should appear with the dropdown button on the right.
- Click on the dropdwon button.
You'll see your app appear there.
Implement the front end
Add UI elements that render when the app is called (when the user clicks on the menu item). You'll use the useProductContext UI Kit hook to get information about the selected text.
-
In terminal, navigate to the app's top-level directory and start tunneling to view your local changes by running:
1 2
forge tunnel -
Open the
src/frontend/index.jsxfile. -
Replace the content of the file with:
1 2
import React from 'react'; import ForgeReconciler, { Text, Strong, useProductContext } from '@forge/react'; const App = () => { const context = useProductContext(); const selectedText = context?.extension.selectedText; return ( <> <Text><Strong>Selected text</Strong></Text> <Text>{selectedText}</Text> </> ); }; ForgeReconciler.render( <React.StrictMode> <App /> </React.StrictMode> ); -
Open a Confluence page and select some text. When the menu appears, click the dropdown button and select your app.

In the code from this step:
- The import statement lists the components and hooks that are used in the app. See UI Kit components and UI Kit hooks for more information.
- The
Appcomponent renders app with selected text.- The const
selectedTextis retrieved fromuseProductContext. - The
TextUI Kit component displays the selected text.
- The const
Close the tunnel and deploy the app
After confirming the app works locally, deploy the app so that it continues to work when you close the tunnel.
-
Close your tunnel by pressing Ctrl+C.
-
Deploy your app by running:
1 2
forge deploy
Now you know how to build a simple Forge app using the confluence:contextMenu module.
Next steps
Review other documentation for more on how Forge works:
- See the reference pages for more information on what you can do with Forge.
Rate this page: