Import Third Party data into Assets
This tutorial describes how to create a Forge app that imports third-party data into Assets. This app allows integrations with third parties by pulling data from external sources during an import. It also contains the triggers that are activated on the deletion, starting, and stopping of an import.
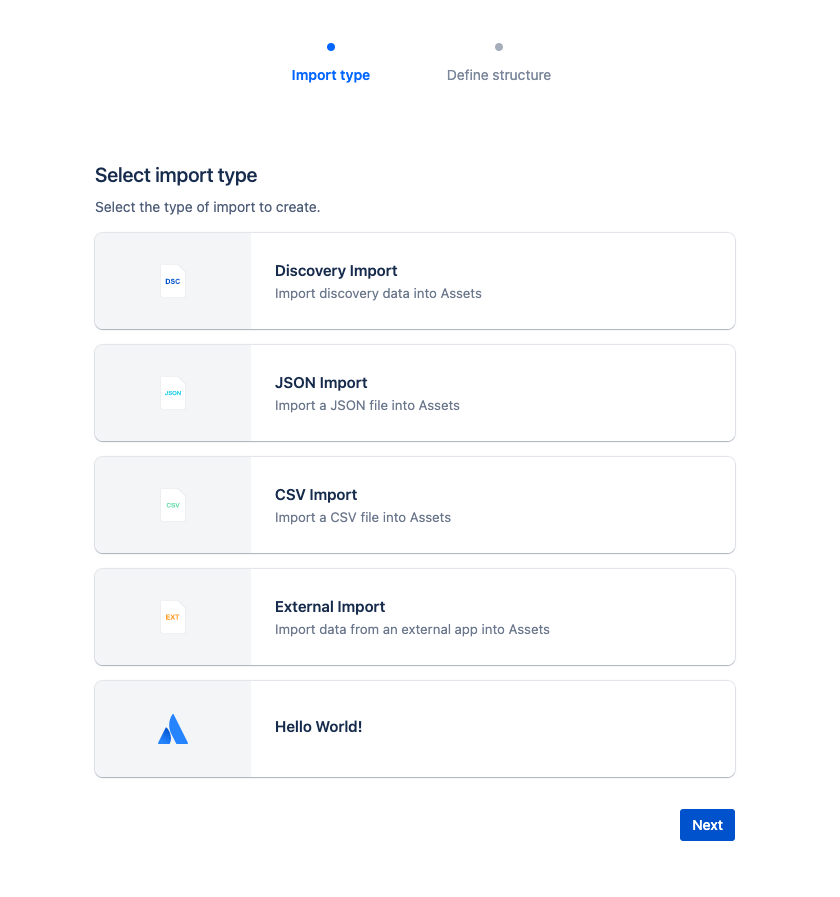
The final app looks like the following:
Before you begin
This tutorial assumes you're already familiar with the basics of Forge development. If this is your first time using Forge, see Getting started first.
To complete this tutorial, you need the following:
- The latest version of Forge CLI. To update your CLI version, run
npm install -g @forge/cli@lateston the command line. - The latest version of UI Kit. To update your version, navigate to the app's top-level
directory, and run
npm install @forge/react@latest --saveon the command line. - An Atlassian cloud site with Jira & Jira Service Management with Assets where you can install your app. You need to be an admin on the site to install the app.
Set up a cloud developer site
An Atlassian cloud developer site lets you install and test your app on Atlassian apps including Confluence and Jira. If you don't have one yet, set it up now:
- Go to http://go.atlassian.com/cloud-dev and create a site using the email address associated with your Atlassian account.
- Once your site is ready, log in and complete the setup wizard.
You can install your app to multiple Atlassian sites. However, app data won't be shared between separate Atlassian apps, sites, or Forge environments.
The limits on the numbers of users you can create are as follows:
- Confluence: 5 users
- Jira Service Management: 1 agent
- Jira Software and Jira Work Management: 5 users
This functionality of Assets is only available for Jira Service Management Cloud, PREMIUM and ENTERPRISE plans.
Create your app
The app allows integrations with third parties to allow data from external sources be imported into Assets via a Forge app.
- Navigate to the directory where you want to create the app.
- Create your app by running:
1 2
forge create - Enter a name for the app. For example, assets-import-app.
- Select the UI Kit category.
- Select the Jira Service Management app, then select the jira-service-management-assets-import-type template from the list.
- Open the app directory to see the app files.
Update the manifest
-
In the app's top-level directory, open the
manifest.ymlfile. You will see thejiraServiceManagement:assetsImportTypeandfunctionmodules in the manifest. ThejiraServiceManagement:assetsImportTypemodule adds entries to the Assets create import menu, with the value oftitleand icon oficon. Thefunctionmodule contains logic that triggers off the certain actions. -
Replace the
key,description,title&iconentry underjiraServiceManagement:assetsImportTypewith your values.1 2
jiraServiceManagement:assetsImportType: - key: '<your-module-key>' description: '<your-app-description>' title: '<your-import-type-name>' icon: '<your-icon-url>'
Build, deploy, and install
Build, deploy, and install the app to see it in your Jira Service Management site.
-
Navigate to the app's top-level directory and deploy your app by running:
1 2
forge deploy -
Install your app by running:
1 2
forge install -
Select your Atlassian context using the arrow keys and press the enter key.
-
Enter the URL for your development site. For example, example.atlassian.net. View a list of your active sites at Atlassian administration.
Once the successful installation message appears, your app is installed and ready
to use on the specified site.
You can always delete your app from the site by running the forge uninstall command.
View the app
With the app installed, it's time to see the entry in the create import menu.
Navigate to your Jira Service Management site, then click on Assets on the top tab.
- If you don't have an existing Object Schema, create one.
- In the Object schema you want to import into, select
Schema configurationat top left. - Select the
Importtab. - Click on the
Create Importbutton to open the create import menu
You'll see the Hello World! entry from the app with the Atlassian Logo. Follow the prompts to create your import configuration.
Implement the front end
Add UI Kit components that render when a user configures the import. This front-end is displayed in the Configure
app modal available from an import configuration. The configuration modal is configured in src/frontend/index.jsx.
-
Start tunneling to view your local changes by running:
1 2
forge tunnel -
Open the
src/frontend/index.jsxfile. -
Modify to the contents of the file with this or place components you desire inside
App. -
To see your changes, navigate to your Assets schema configuration, edit the import configuration associated with your app, and select Configure app.
A modal dialog displays with:
1 2
Hello World!, ImportId = {your-import-id}, WorkspaceId = {your-workspace-id}
In the code from this step:
- The import statement lists the components to use from UI Kit. See UI Kit components to learn more about these components.
extensionContextcontainsimportIdandworkspaceId- Update the
Formelements to render your desired configuration. - Exporting the
runconstant provides the mechanism that renders the app. onSubmitwill be run when theSave configurationbutton is clicked.
Extension Points
Navigate to src/resolvers/index.jsx. These are pieces of code you can implement which will be call executed the import flow.
-
onDeleteImport - Triggers on a deletion of an import structure
1 2
const onDeleteImport = async (context) => { console.log("import with id ", context.importId + " got deleted"); return { result: "on delete import", }; };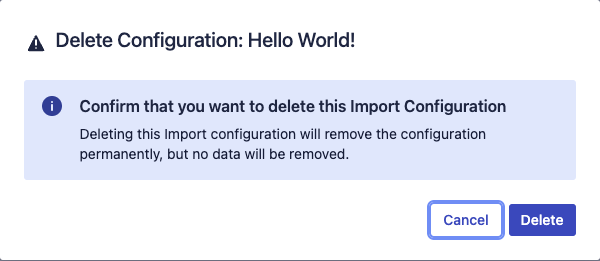
-
startImport - Triggers on the start of an import
1 2
const startImport = async (context) => { console.log("import with id ", context.importId + " got started"); return { result: "start import", }; };
-
stopImport - Triggers on the cancellation of an import
1 2
const stopImport = async (context) => { console.log("import with id ", context.importId + " got stopped"); return { result: "stop import", }; };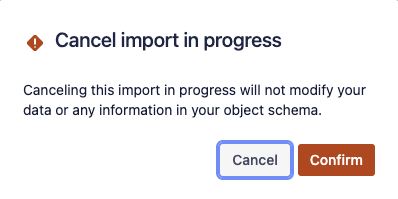
-
importStatus - Triggers to display the status of the import on the Imports UI
1 2
const importStatus = async (context) => { console.log("import with id ", context.importId + " sending import status"); return { status: "NOT_CONFIGURED" }; };

There are two status enums that can be returned.
status: "NOT_CONFIGURED" will return the NOT CONFIGURED status as the first image shown above.
status: "READY" will return with the Import data button active as the second image shown above.
Import data into Assets via Imports REST API
The imports will be powered by the Imports REST API through its
infrastructure.
However instead of calling GET https://api.atlassian.com/jsm/assets/v1/imports/info to fetch the initial links to
start the import process you will have to manually generate them.
The three links mentioned in the Imports REST API
in Step 3
can be found here where:
- "getStatus" refers to Get importsource {importSourceId} configstatus
- "start" refers to Post importsource {importSourceUuid} executions
- "mapping" refers to Put importsource {uuid} mapping
1
2{
  "links": {
    "getStatus": "https://api.atlassian.com/jsm/assets/workspace/{workspaceId}/v1/importsource/{importId}/configstatus",
    "start": "https://api.atlassian.com/jsm/assets/workspace/{workspaceId}/v1/importsource/{importId}/executions",
    "mapping": "https://api.atlassian.com/jsm/assets/workspace/{workspaceId}/v1/importsource/{importId}/mapping"
  }
}
With Forge, you do not need to use a container token to call these endpoints, you can use asUser() or asApp()
requests.
asUser()will perform the request on behalf of the userasApp()will perform the request with the permissions of the app
More information about this responsibility model can be
found here. Some examples of
using asUser() and asApp() are provided below.
1
2const asUserRequest = await api
    .asUser()
    .requestJira(
        route`/jsm/assets/workspace/${context.workspaceId}/v1/importsource/${context.importId}/executions`,
        {
            method: "POST",
        }
    );
1
2const asAppRequest = await api
    .asApp()
    .requestJira(
        route`/jsm/assets/workspace/${context.workspaceId}/v1/importsource/${context.importId}/executions`,
        {
            method: "POST",
        }
    );
The Import data button in the Imports UI will not be able to be interacted with until you submit a schema and mapping
to the "mapping" endpoint above.
So submit a schema and mapping during the startImport extension callback or in the Configure App Modal UI.
With the schema and mapping submitted, the next step would be to implement the startImport extension point that will
run when Import data button is clicked.
This code should fetch data from a third party source and push to the Import Asset APIs.
When this is all done you can set your status to Ready with the importStatus extension point, causing
the Import data button to be active, as shown below.
1
2const importStatus = async (context) => {
    console.log("import with id ", context.importId + " sending import status");

    return {
        status: "READY"
    };
};
We recommend following the guide here to be able to import data into Assets.
Async Events API
We have included an example of how to use Forge's Async Events API to import 3rd party data into Assets by setting up a controller and worker queue for data ingestion.
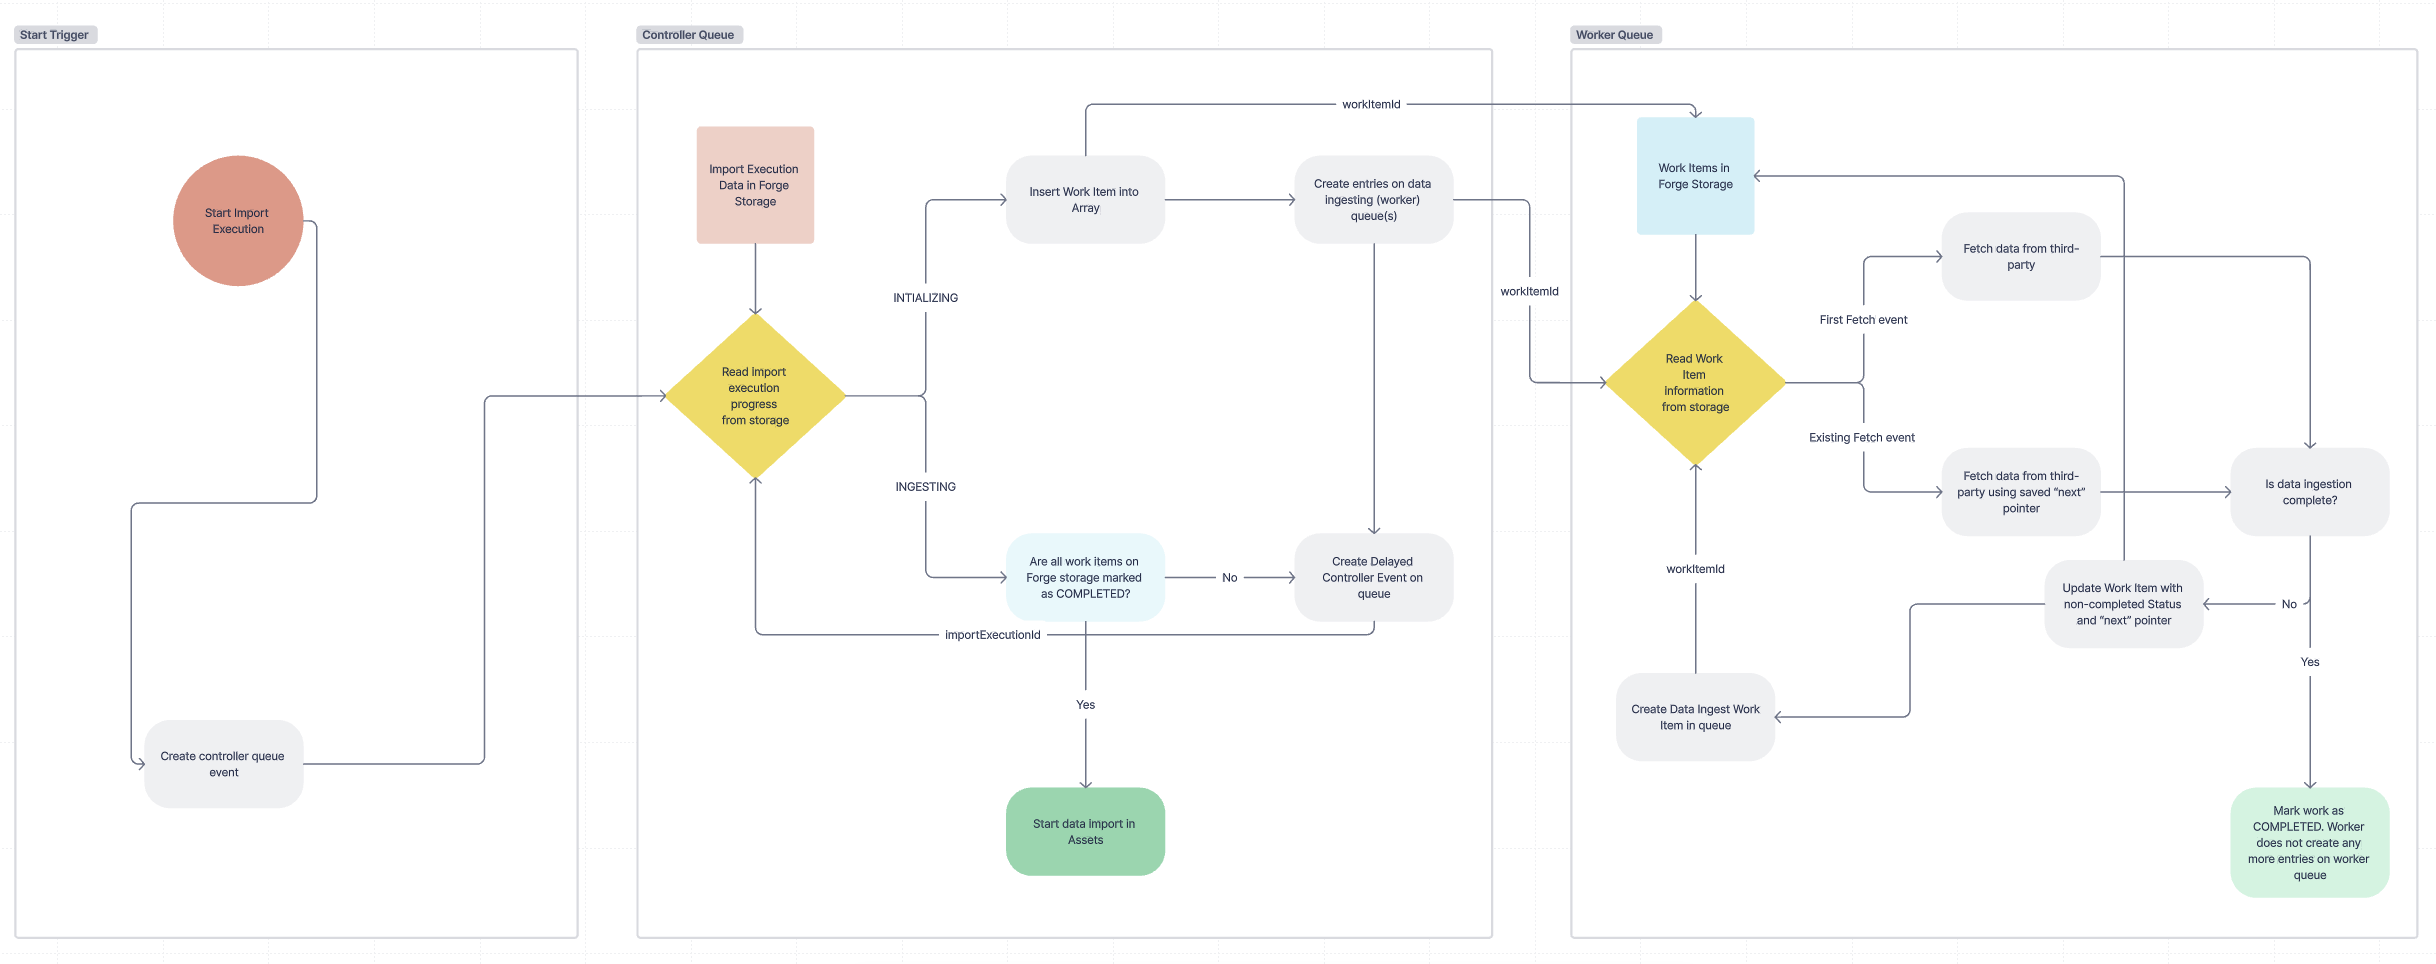
From the diagram above:
The Start Trigger is represented below with a code snippet in the template from src/resolvers/index.jsx
1
2// Call Assets API here to mark import as started
// Push event onto controller queue to start data ingestion process
const id = await controllerQueue.push({ body: {eventContext: {importConfigurationId: context.importId}} });
console.log(`Pushed queueControllerEvent with id ${id}`);
The Controller Queue is represented below with a code snippet in the template from src/resolvers/controller-resolver.js
1
2const handleControllerEvent = async (eventContext) => {
    // Push initial work item to worker queue here
    // e.g. await workerQueue.push({ body: { eventContext: workItem } });

    // Once the initial work item is pushed to the worker queue,
    // keep pushing events to the controller queue with a delay until the work items are all complete
    // e.g. await controllerQueue.push({ body: { eventContext: workItem } });

    // Once work items are all complete call the Assets API to signal the completion of data submission
};
The Generic Worker Queue is represented below with a code snippet in the template from src/resolvers/worker-resolver.js
1
2const handleWork = async (eventContext) => {
    // Fetch data from external system here
    // Update work items according to how much data is left to be fetched
    // And push to worker queue again if there is more data to be fetched
    // eg. await workerQueue.push({ body: { eventContext: updatedWorkItem } });
};
Close the tunnel and deploy the app
After confirming the app works locally, deploy the app so that it continues to work when you close the tunnel.
- Close your tunnel by pressing Ctrl+C.
- Deploy your app by running:
1 2
forge deploy
That’s it. You've built an app that retrieves the contents of a page, counts the number of macros, then displays the result in a modal dialog.
Next steps
Check out an example app, continue to one of the other tutorials, or read through the reference pages to learn more.
- See Example apps for a collection of apps we've built.
- See the reference pages to learn what else you can do with what you’ve learned.
Developing for Atlassian Government Cloud
This content is written with standard cloud development in mind. To learn about developing for Atlassian Government Cloud, go to our Atlassian Government Cloud developer portal.
Rate this page: