Add routing to a Custom UI full page app
This page describes how to add routing to a full page app created with Forge, using React and React Router. Routing enables your app to manipulate the current page URL. Routing may be used to enable users to link directly to certain parts of your app.
Before you begin
This guide also assumes you're familiar with developing Custom UI apps on Forge. If you're not, see Build a Custom UI app in Jira first for a detailed tutorial.
Create a Custom UI Jira admin page app
This guide will use the jira:adminPage module with Custom UI, but you can add routing to any of
the modules where the createHistory API
is available.
-
Navigate to the directory where you want to create the app. A new directory with the app's name will be created there.
-
Create your app by running:
1 2
forge create -
Enter a name for your app. For example, custom-ui-routing-tutorial.
-
Select the Custom UI category.
-
Select the Jira app.
-
Select the jira-admin-page template.
-
Change to the app subdirectory to see the app files.
1 2
cd custom-ui-routing-tutorial
Build the content for your Custom UI
You need to install and build these resources so your app can use them. Follow these steps to build the resources for your app:
-
Navigate to the
static/hello-worlddirectory. -
Install the needed dependencies:
1 2
npm install -
Build the assets:
1 2
npm run build -
Navigate back to the top-level directory of your app.
Deploy and install your app
Any time you make changes to your app code, rebuild the static frontend as prescribed above and then
run a deploy using the forge deploy command. This command compiles your FaaS code, and deploys
your functions and static assets to the Atlassian cloud.
To install your app on a new site, run the forge install command. Once the app is installed on a
site, it will automatically pick up all minor app deployments, which means you don't need to run
the install command again. A minor deployment includes any change that doesn't modify app permissions
in the manifest.
-
Navigate to the app's top-level directory and deploy your app by running:
1 2
forge deploy -
Install your app by running:
1 2
forge install -
Select Jira using the arrow keys and press the enter key.
-
Enter the URL for your development site. For example, example.atlassian.net.
View a list of your active sites at Atlassian administration.
Once the successful installation message appears, your app is installed and ready to use on the specified site.
You need to run forge deploy before running forge install in any of the Forge environments.
Visit https://<YOUR_SITE>.atlassian.net/plugins/servlet/upm and find your app in the list
of apps on the left side of the page.
Implement routing in your app
Follow these steps to use React Router in your Custom UI app:
-
Navigate to the
static/hello-worlddirectory. -
Install the React Router library:
1 2
npm install react-router@latest -
Ensure you have the latest
@forge/bridgeversion installed:1 2
npm install @forge/bridge@latest -
Open the
static/hello-world/src/App.jsfile. Use React Router to create an application with two screens on different routes by modifying the content of the file to:
1
2import React, { Fragment, useEffect, useState } from "react";
import { view } from "@forge/bridge";
import { Router, Route, Routes, useNavigate } from "react-router";

function Link({ to, children }) {
  const navigate = useNavigate();
  return (
    <a
      href={to}
      onClick={(event) => {
        event.preventDefault();
        navigate(to);
      }}
    >
      {children}
    </a>
  );
}

// Starting page
function Home() {
  return (
    <Fragment>
      <h2>Home</h2>
      <Link to="/page-with-path">Route to page with path</Link>
    </Fragment>
  );
}

// Page that will render with /page-with-path link
function PageWithPath() {
  return <h2>Page with path</h2>;
}

function App() {
  const [historyState, setHistoryState] = useState(null);
  const [navigator, setNavigator] = useState(null);
  const historyCleanupRef = React.useRef(null);

  useEffect(() => {
    // We're using an immediately invoked function expression (IIFE) to handle async code in useEffect
    (async () => {
      // When the app mounts, we use the view API to create a history "log"
      const history = await view.createHistory();
      setNavigator(history);

      // The initial values of action and location will be the app URL
      setHistoryState({
        action: history.action,
        location: history.location,
      });
      // Listen for changes in the history "log"
      const unsubscribe = await history.listen((location, action) => {
        setHistoryState({
          action,
          location,
        });
      });

      // Store a reference to the cleanup function for when the user navigates away
      historyCleanupRef.current = unsubscribe;
    })();
  }, []);

  const handleUnload = () => {
    if (historyCleanupRef.current) {
      historyCleanupRef.current();
    }
  };

  // When the user navigates away from the app and the iframe gets removed, we clean up the history listener
  useEffect(() => {
    window.addEventListener('unload', handleUnload);
    return () => {
      window.removeEventListener('unload', handleUnload);
    };
  }, []);

  if (!navigator || !historyState) {
    return <div>Loading...</div>;
  }

  return (
    <div>
      <Router
        navigator={navigator}
        navigationType={historyState.action}
        location={historyState.location}
      >
        <Routes>
          <Route path="/page-with-path" element={<PageWithPath />}></Route>
          <Route path="/" element={<Home />}></Route>
        </Routes>
      </Router>
    </div>
  );
}

export default App;
-
Rebuild the static assets for your Custom UI frontend by running the
npm run buildcommand from thestatic/hello-worlddirectory. -
Navigate to the app's top-level directory and start a tunnel for your app by running:
1 2
forge tunnelYou can see your changes by refreshing the page that your app is on.
-
Redeploy your app by running the
forge deploycommand.
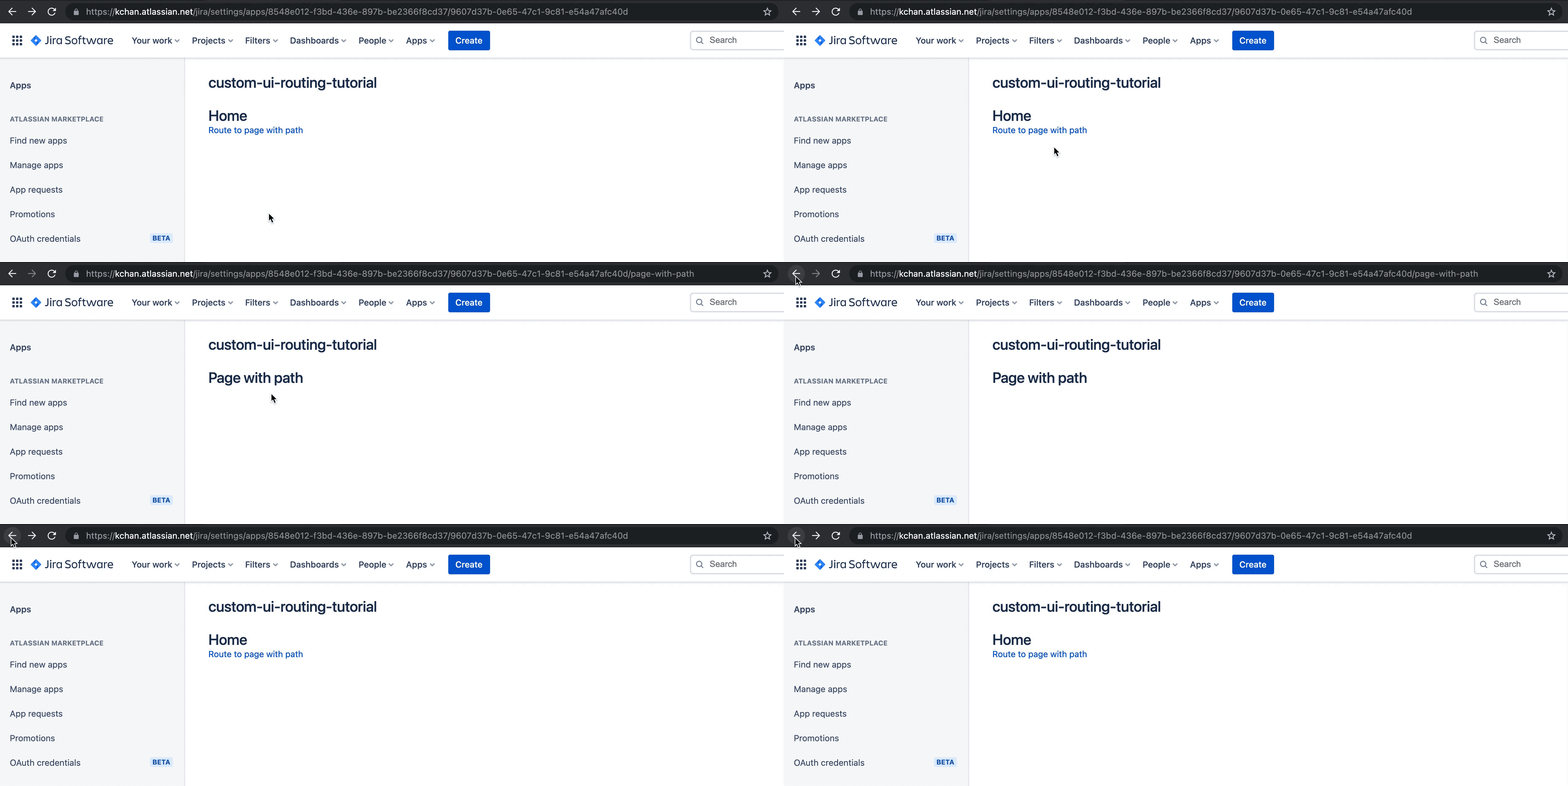
You now have a full page app with routing:

Rate this page: