Check whether Jira issues are assigned using a workflow validator
This tutorial describes how to create a Forge app that checks Jira issues are assigned when the issue transitions. You'll do this using a Jira workflow validator.
If you prefer learning by looking at code, see the [Open Pull Requests Validator] (https://bitbucket.org/atlassian/forge-open-pull-requests-validator/) example app for a more complex use of Jira workflow validators.
Before you begin
This tutorial assumes you're already familiar with the basics of Forge development. If this is your first time using Forge, see Getting started first.
To complete this tutorial, you need the following:
- The latest version of Forge CLI. To update your CLI version, run
npm install -g @forge/cli@lateston the command line. - A Jira Cloud company-managed project. You need to be an admin on the project to configure the workflow. We use a Jira Software Kanban project in this tutorial.
Set up a cloud developer site
An Atlassian cloud developer site lets you install and test your app on Atlassian apps including Confluence and Jira. If you don't have one yet, set it up now:
- Go to http://go.atlassian.com/cloud-dev and create a site using the email address associated with your Atlassian account.
- Once your site is ready, log in and complete the setup wizard.
You can install your app to multiple Atlassian sites. However, app data won't be shared between separate Atlassian apps, sites, or Forge environments.
The limits on the numbers of users you can create are as follows:
- Confluence: 5 users
- Jira Service Management: 1 agent
- Jira Software and Jira Work Management: 5 users
Create your app
The app contains the logic to check whether an issue is assigned to someone before they work on it.
- Navigate to the directory where you want to create the app.
- Create your app by running:
1 2
forge create - Enter a name for the app. For example, issue-is-assigned-validator.
- Select Show All and then the blank template from the list.
- Open the app directory to see the app files.
Add a workflow validator
The workflow validator runs when someone transitions an issue in Jira. Add a workflow validator by
declaring jira:workflowValidator and function modules in the manifest. The jira:workflowValidator
registers the details in Jira and the function contains the validation logic.
-
In the app's top-level directory, open the
manifest.ymlfile. -
Add a workflow validator entry under
modules.1 2
jira:workflowValidator: - key: issue-is-assigned-validator name: Issue is assigned validator description: Validates that the issue has an assignee before transitioning. function: validatorThe
nameanddescriptiondisplay in Jira when choosing a validator to add to a workflow -
Connect the
functionmodule by updating thefunctionmodulekeyto be:validator.
Your modules inside manifest.yml should look like the following:
1
2modules:
  jira:workflowValidator:
    - key: issue-is-assigned-validator
      name: Issue is assigned validator
      description: Validates that the issue has an assignee before transitioning.
      function: validator
  function:
    - key: validator
      handler: index.run
Implement validation logic
Implement the run function to check that an issue is assigned before it transitions. The
function returns true to allow the transition, or false to block the transition. When a
transition is blocked, Jira displays the value of errorMessage.
-
Open the
src/index.jsfile and delete the contents. -
Create a
runfunction to contain the issue validation logic by adding:1 2
export const run = async ({ issue }) => { // Function code }; -
Retrieve information about the issue from the Jira REST API, using the runtime API.
- In terminal, navigate to the app's top-level directory and install the runtime API package by running:
1 2
npm install @forge/api - In
index.js, import the runtime API at the top of the file by adding:1 2
import api, { route } from "@forge/api"; - Call the Jira REST API in the
runfunction to retrieve the issue details by adding:1 2
const { key: issueKey } = issue; const response = await api.asApp().requestJira(route`/rest/api/3/issue/${issueKey}`); const issueJson = await response.json();
- In terminal, navigate to the app's top-level directory and install the runtime API package by running:
-
Return an object containing the validation result and an error message by adding:
1 2
return { result: !!issueJson.fields.assignee, errorMessage: "The issue must have an assignee before transitioning." };The result is
trueif the issue has an assignee.
Your index.js file should look like the following:
1 2import api, { route } from "@forge/api"; export const run = async ({ issue }) => { const { key: issueKey } = issue; const response = await api.asApp().requestJira(route`/rest/api/3/issue/${issueKey}`); const issueJson = await response.json(); return { result: !!issueJson.fields.assignee, errorMessage: "The issue must have an assignee before transitioning." }; };
Requests here can be made with api.asUser() construct subject to conditions outlined in offline user impersonation.
Deploy and install your app
-
Navigate to the app's top-level directory and deploy your app by running:
1 2
forge deploy -
Install your app by running:
1 2
forge install -
Select your Atlassian context using the arrow keys and press the enter key.
-
Enter the URL for your development site. For example, example.atlassian.net. View a list of your active sites at Atlassian administration.
Once the successful installation message appears, your app is installed and ready
to use on the specified site.
You can always delete your app from the site by running the forge uninstall command.
Add the app to your workflow
Start using the app by adding it as a validator in the workflow of a Jira Software company-managed project.
- Open Advanced workflow
configuration and follow the instructions to add a
validator. Select the validator that matches the
nameyou defined in the manifest (1).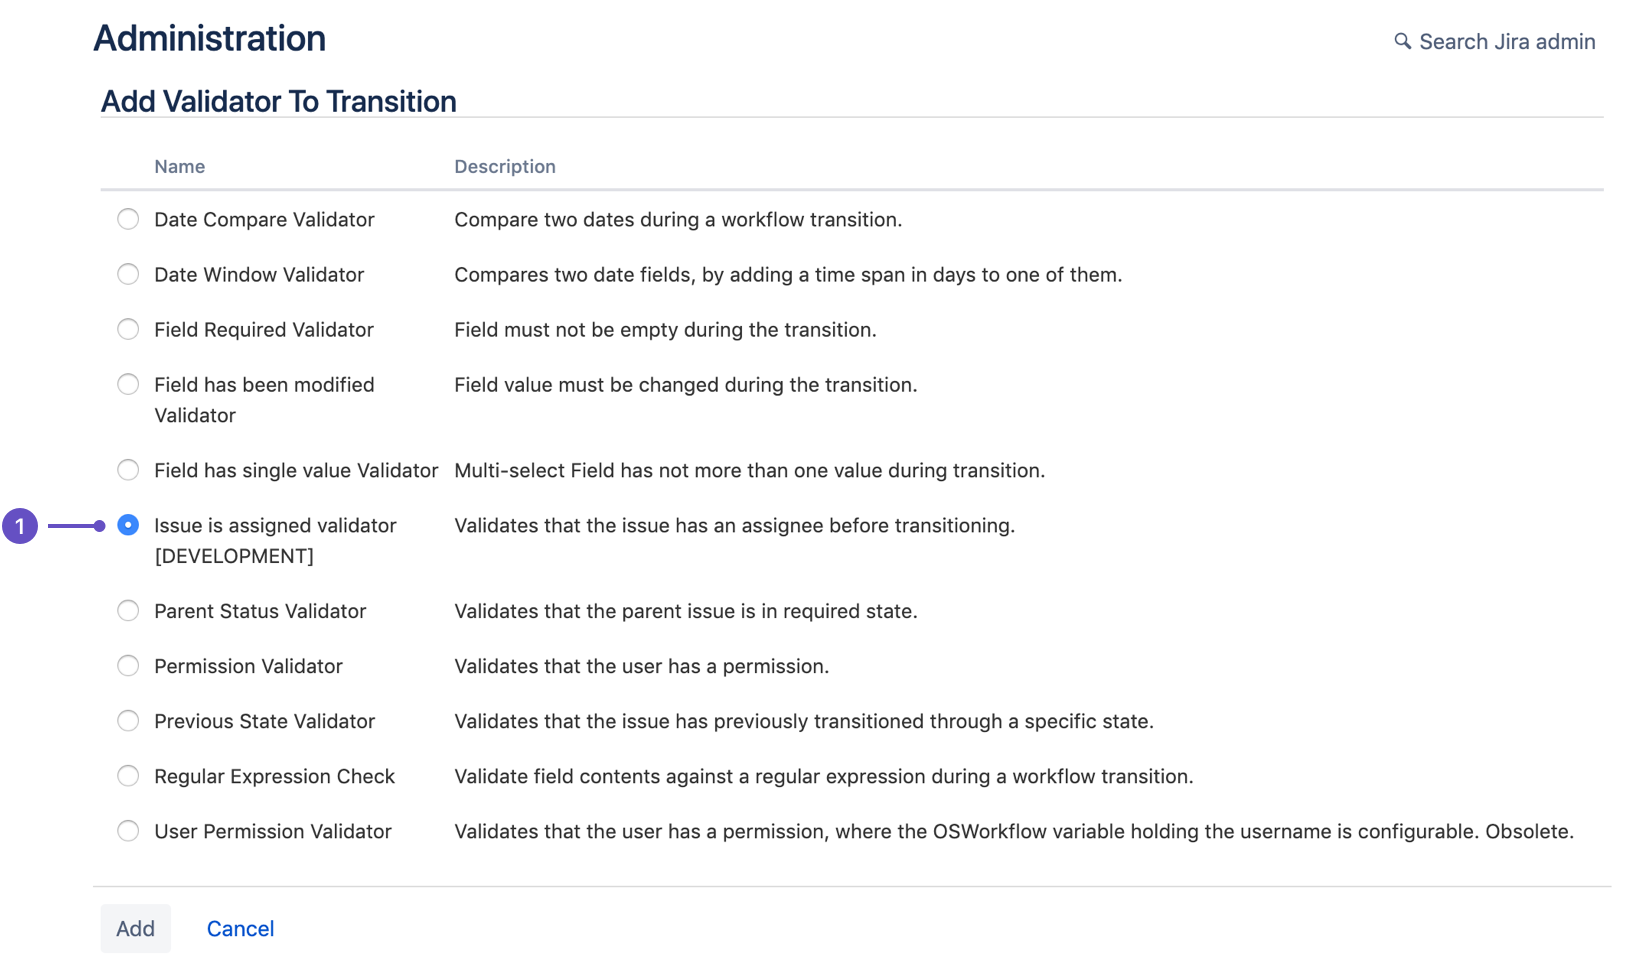
- Publish the workflow updates.
View your app
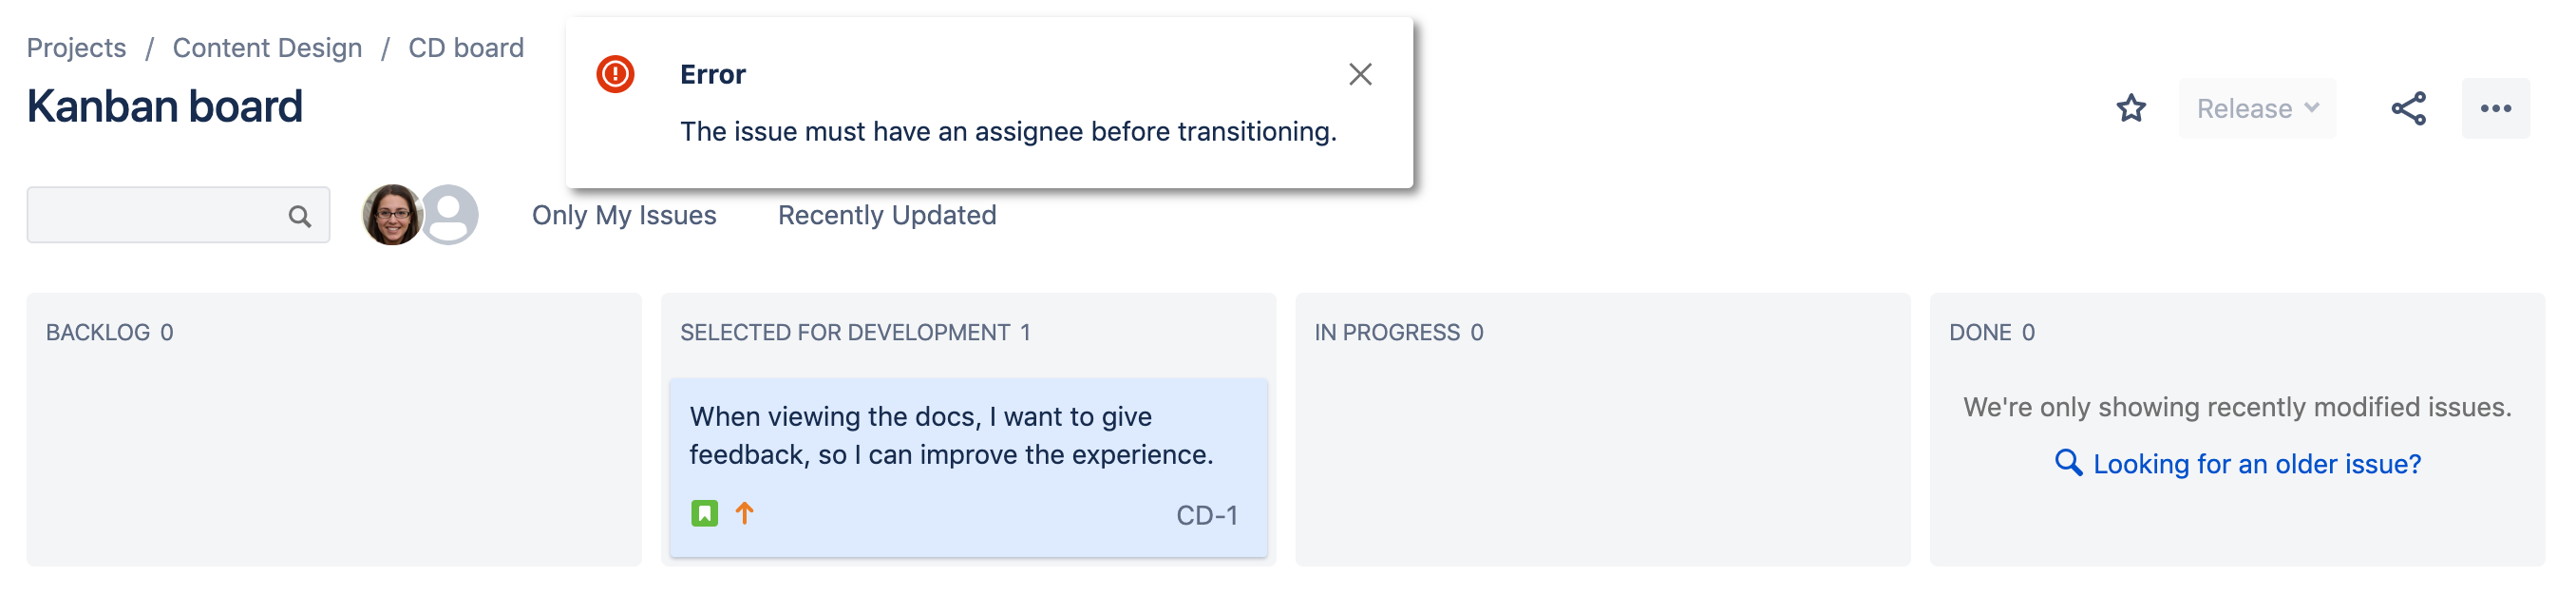
With your app installed and in your workflow, see it in action.
- Create an issue without an assignee in the project.
- Navigate to the board that displays the issue. If using a Scrum project, add the issue to the active sprint to make it visible on the board.
- Move the issue between columns.
You'll see the following error message display.
The location of the error depends on how you transition the issue. For example, when you transition the issue using the controls on the issue view, the error displays on the issue view.
Next steps
Check out an example app, continue to one of the other tutorials, or read through the reference pages to learn more.
- See the
jira-workflow-validator-custom-uitemplate from the Forge CLI for a more complex use of Jira workflow validators. This app uses Custom UI to display the user interface when creating, editing, or viewing validator configuration, and subscribes to Jira events for failed expressions. - See the Open Pull Requests Validator example app for a more complex use of Jira workflow validators. This app checks whether all pull requests are merged before an issue is resolved.
- See the Automate Jira using triggers tutorial for information on using triggers to respond to user actions in Jira.
- See the reference pages for more information on what you can do with Forge.
Rate this page: