Forge, Compass, and AWS CloudWatch
Developer Experience is something unique to every organization. It’s important that Internal Developer Platforms (IDP) are extensible so that they can be used to solve the unique friction points that organizations face. Atlassian’s Compass can be extended in many ways, one of which is through Atlassian’s Forge platform.
One way of using Forge to extend Compass is to pull relevant data from other Atlassian apps into Compass to reduce context switching and time spent searching for information. To help you get started, here is an example app using Forge that provides a step-by-step explanation of how to render CloudWatch metric and log data in Compass. You can use this as an example to build any Forge app to extend the functionality of Compass to suit your needs. There are a few things necessary to make this work so let’s tackle them in order.
Before you begin
This tutorial assumes you're already familiar with the basics of Forge development. If this is your first time using Forge, see Getting started first.
Make sure you have the following:
- A Compass site you can test your app on Get Compass
- An AWS account and sufficient permissions to read AWS CloudWatch log and metric data Get AWS
- AWS CloudWatch logs and metrics that you want to render in a Compass component
Create app using the Forge CLI
To create a new Forge app, run:
1
2forge create
Enter a name for your new Forge app.
For category, select “UI Kit”.
For Atlassian app, select “Compass”.
For template, select “compass-component-page”.
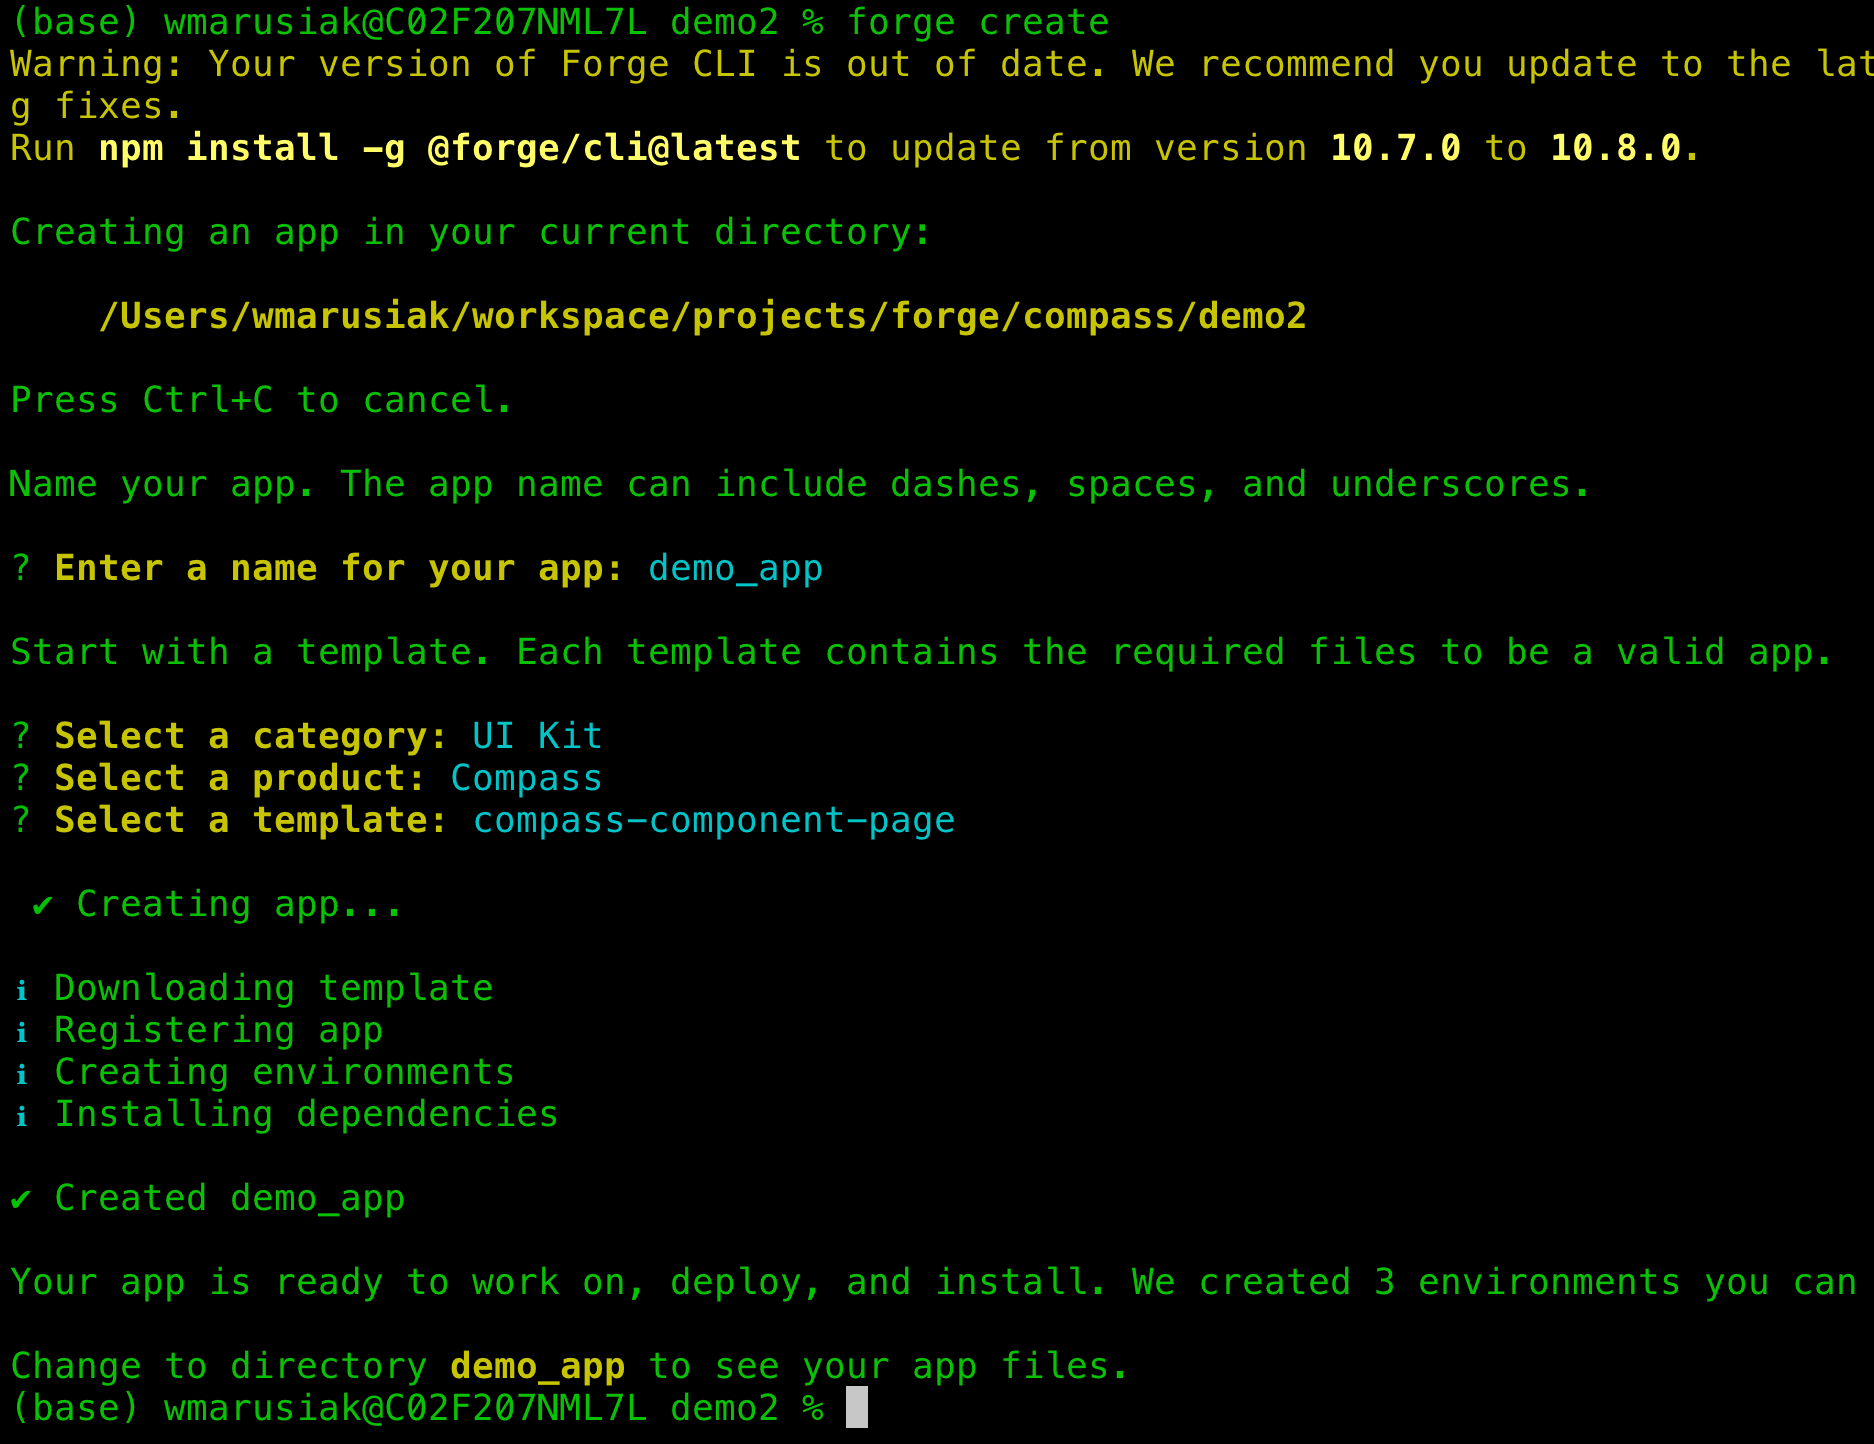
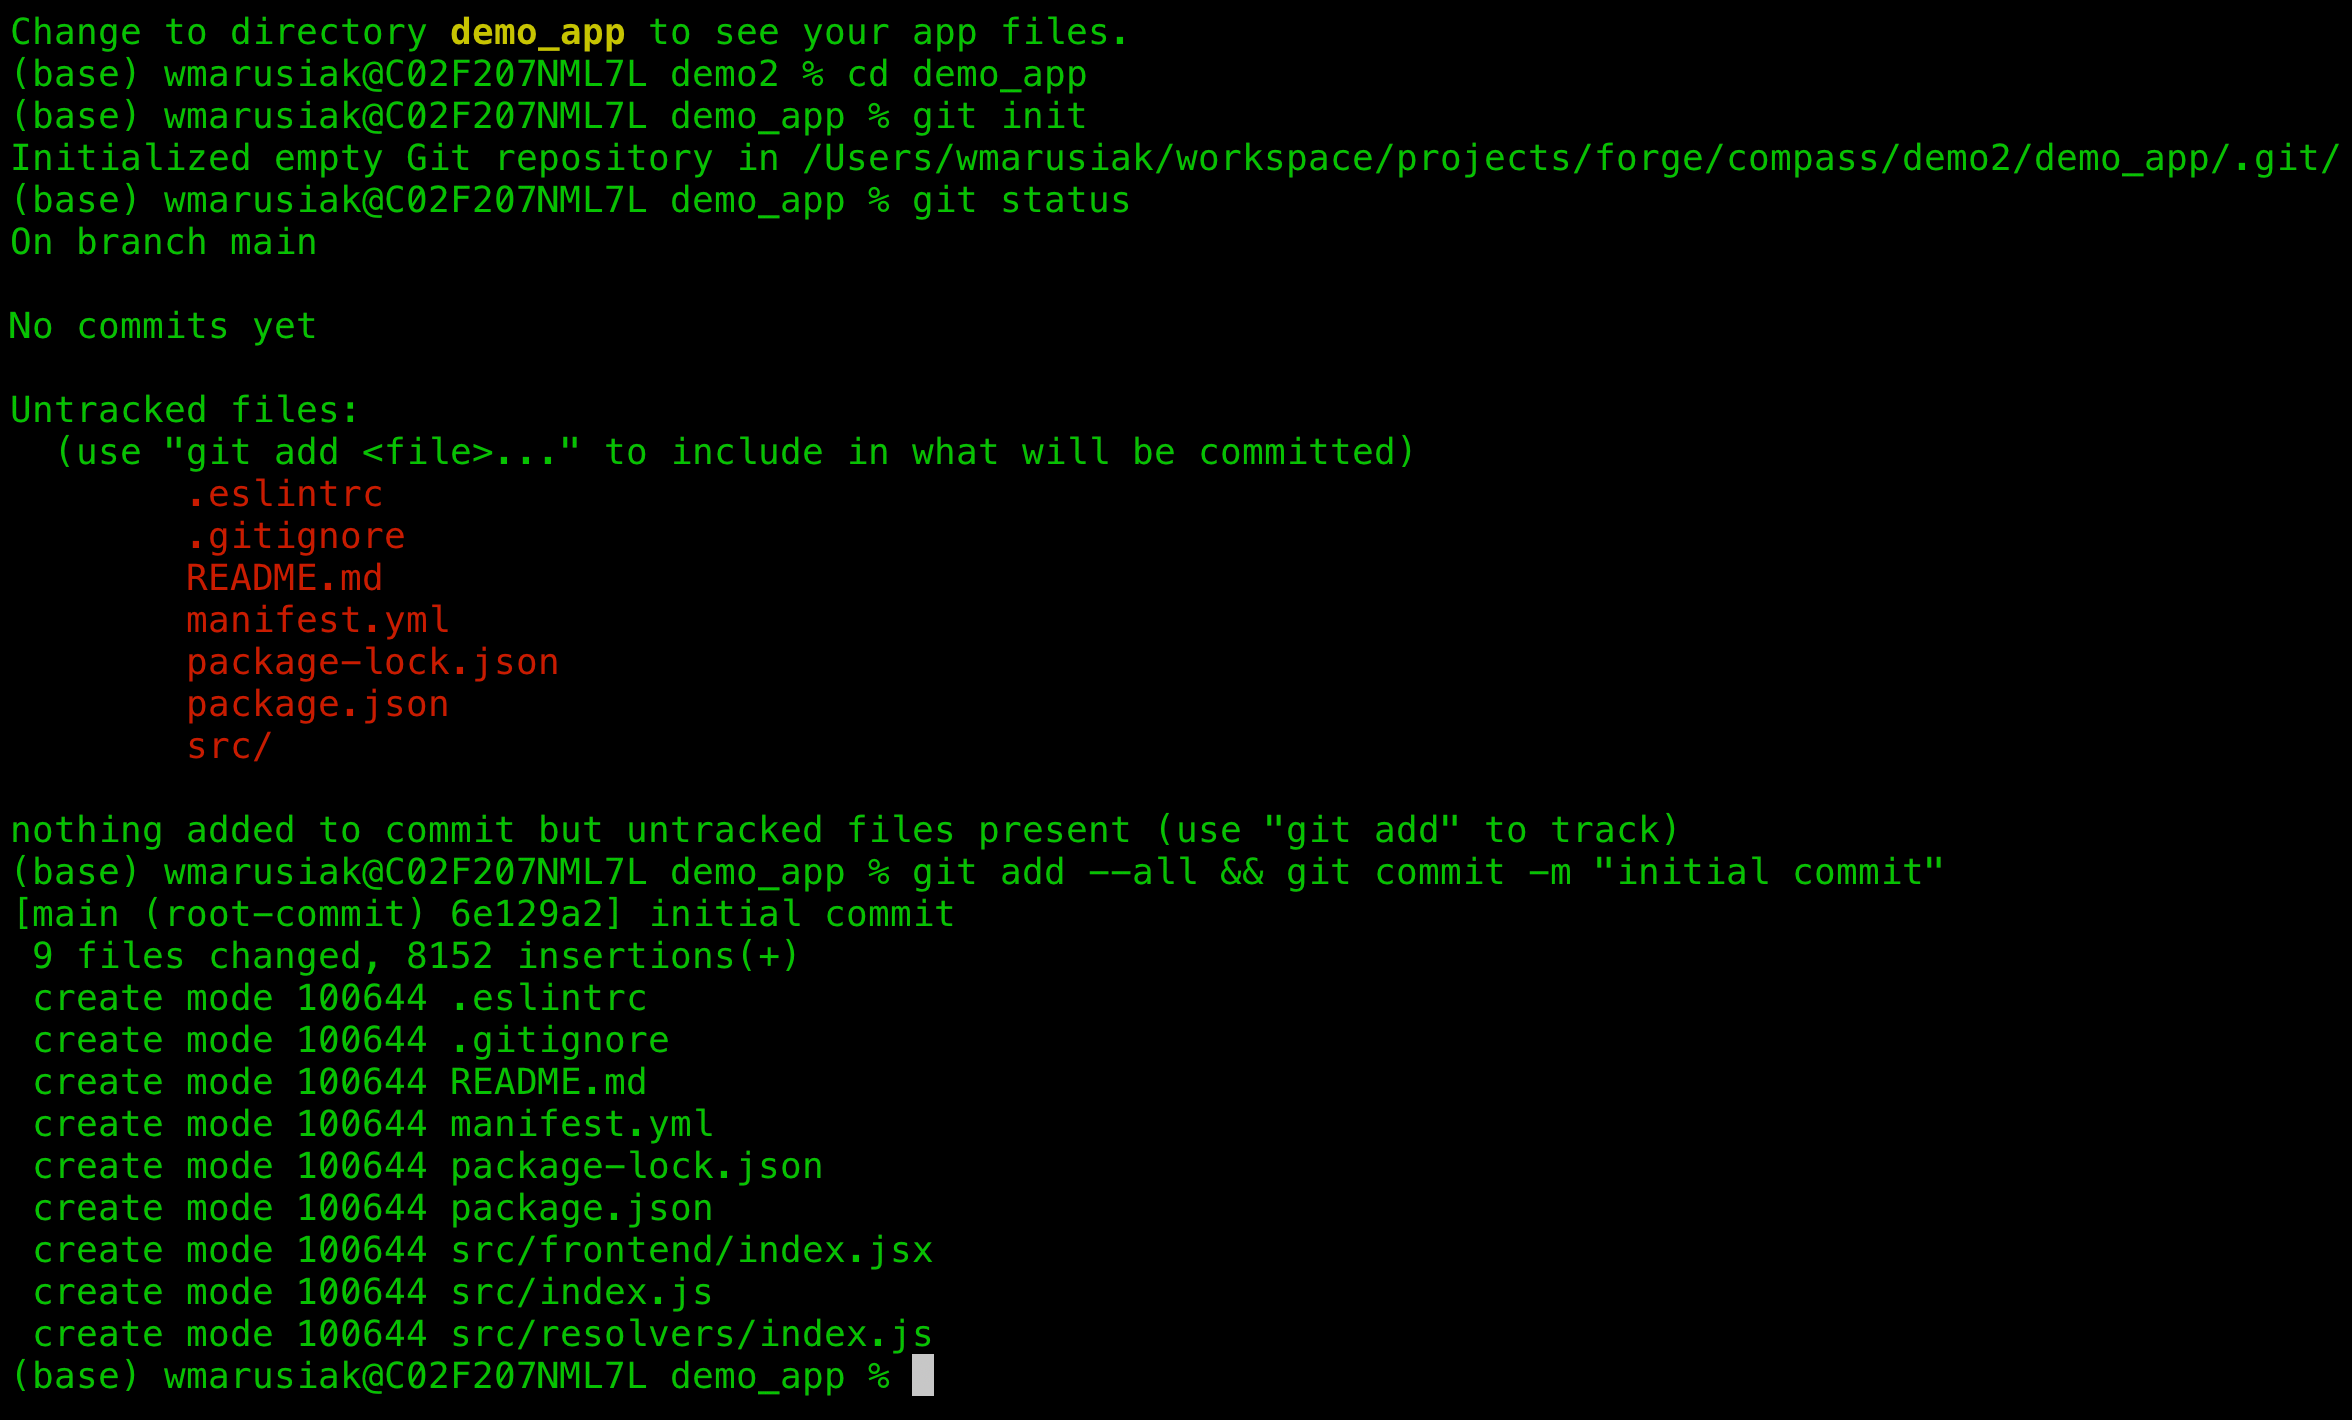
When the CLI finishes, you’ll have the skeleton of a new Forge app in a directory with the name you supplied. Change to this directory and use git to create a new repository so you can track changes.
1
2cd demo_app
git init
git add --all
git commit -m "initial commit"
Next, run forge deploy, forge install, and forge tunnel to be fully set up to build and debug the new app.
First:
1
2forge deploy
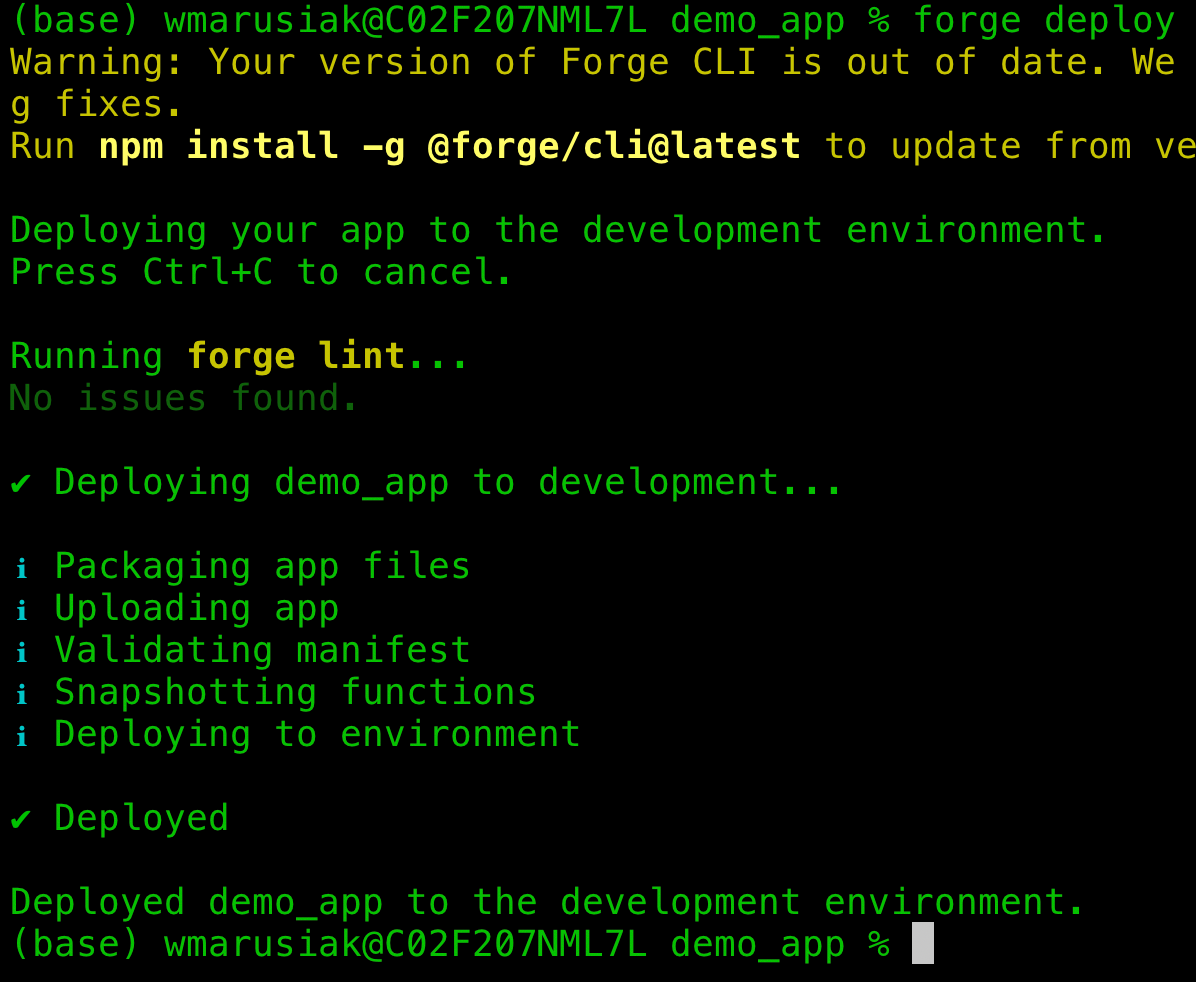
You’ll be asked to choose an Atlassian app to deploy to, and to provide your site URL. Choose Compass.
Then:
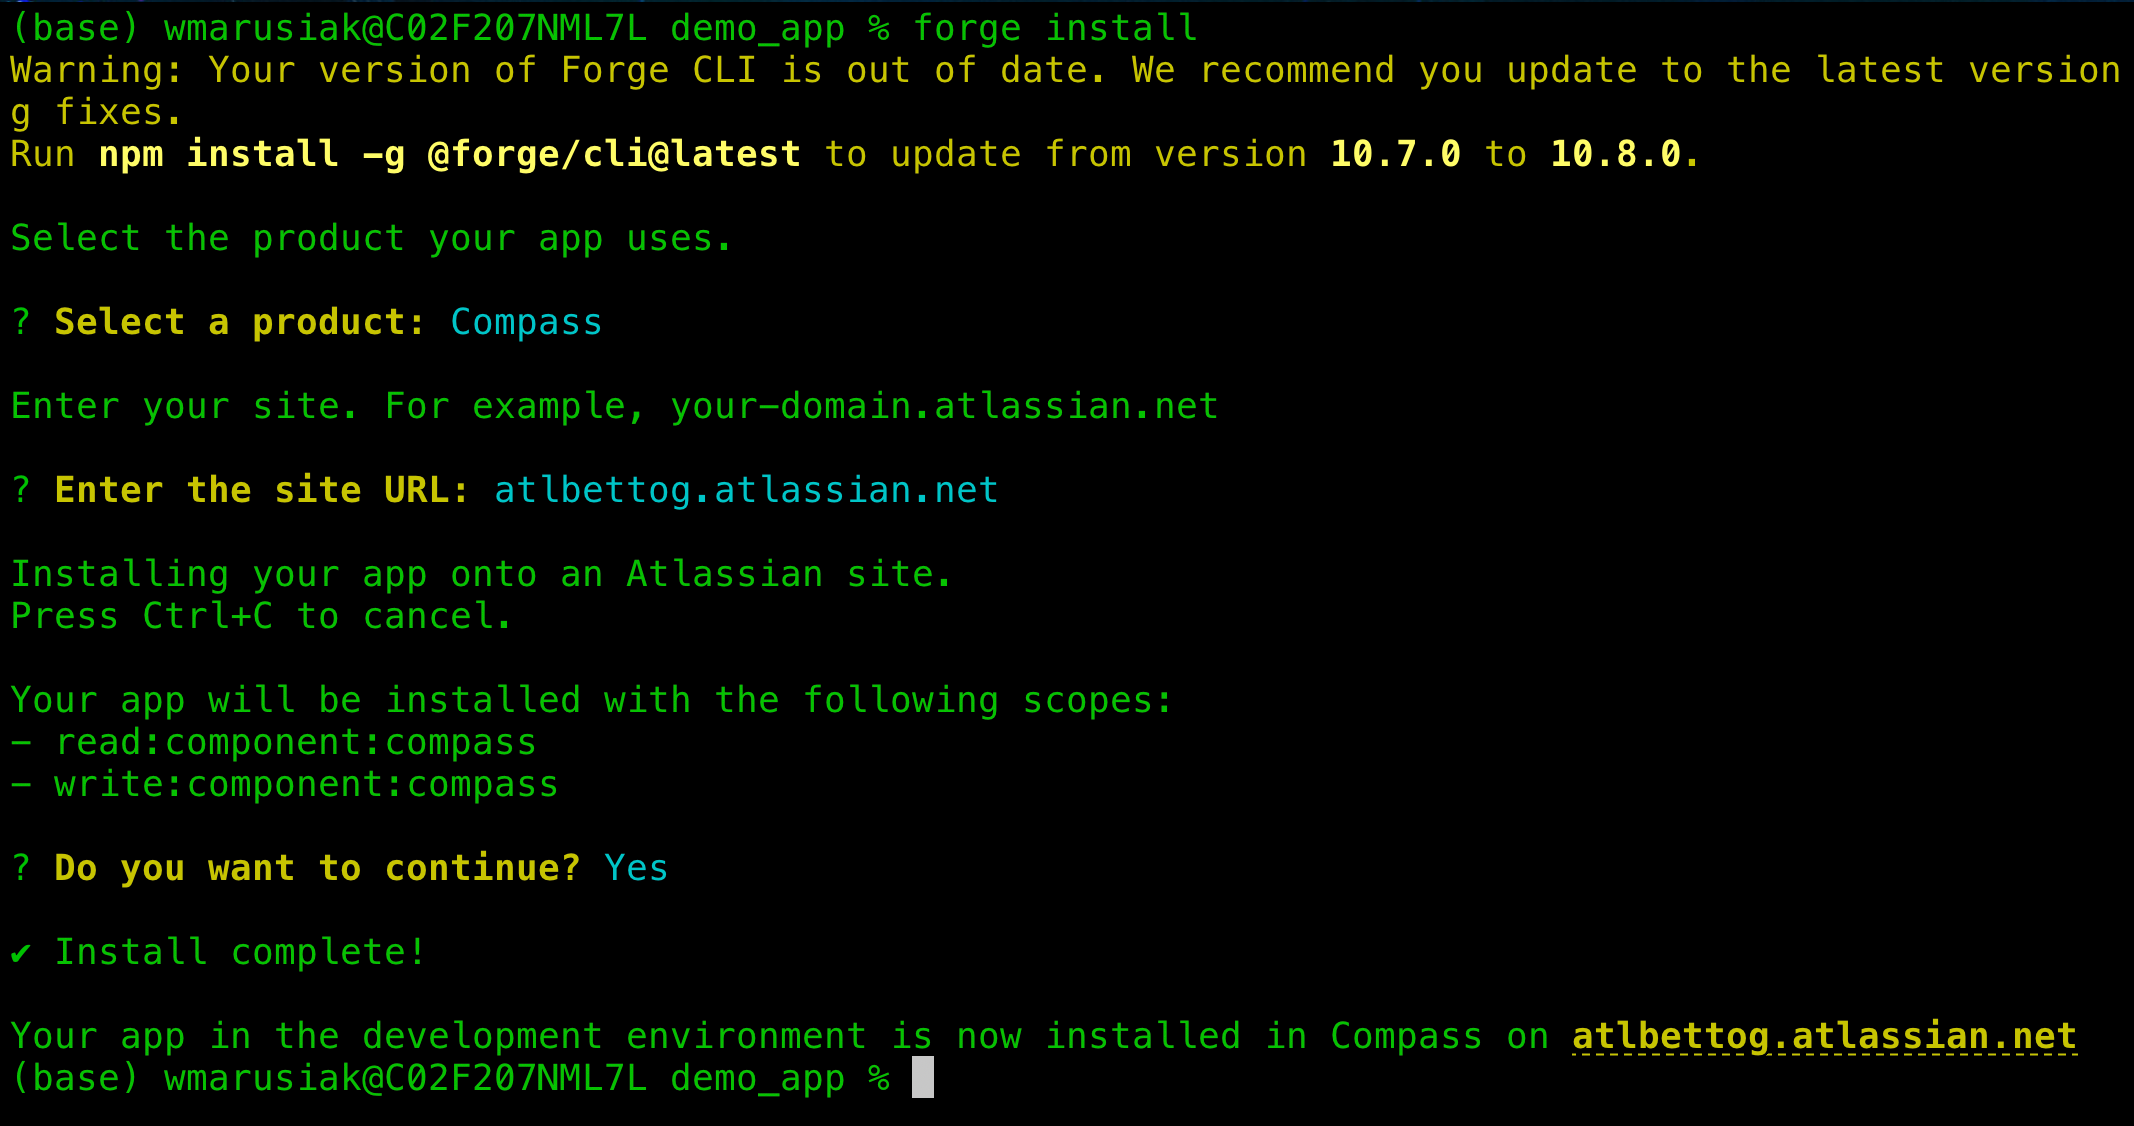
1
2forge install
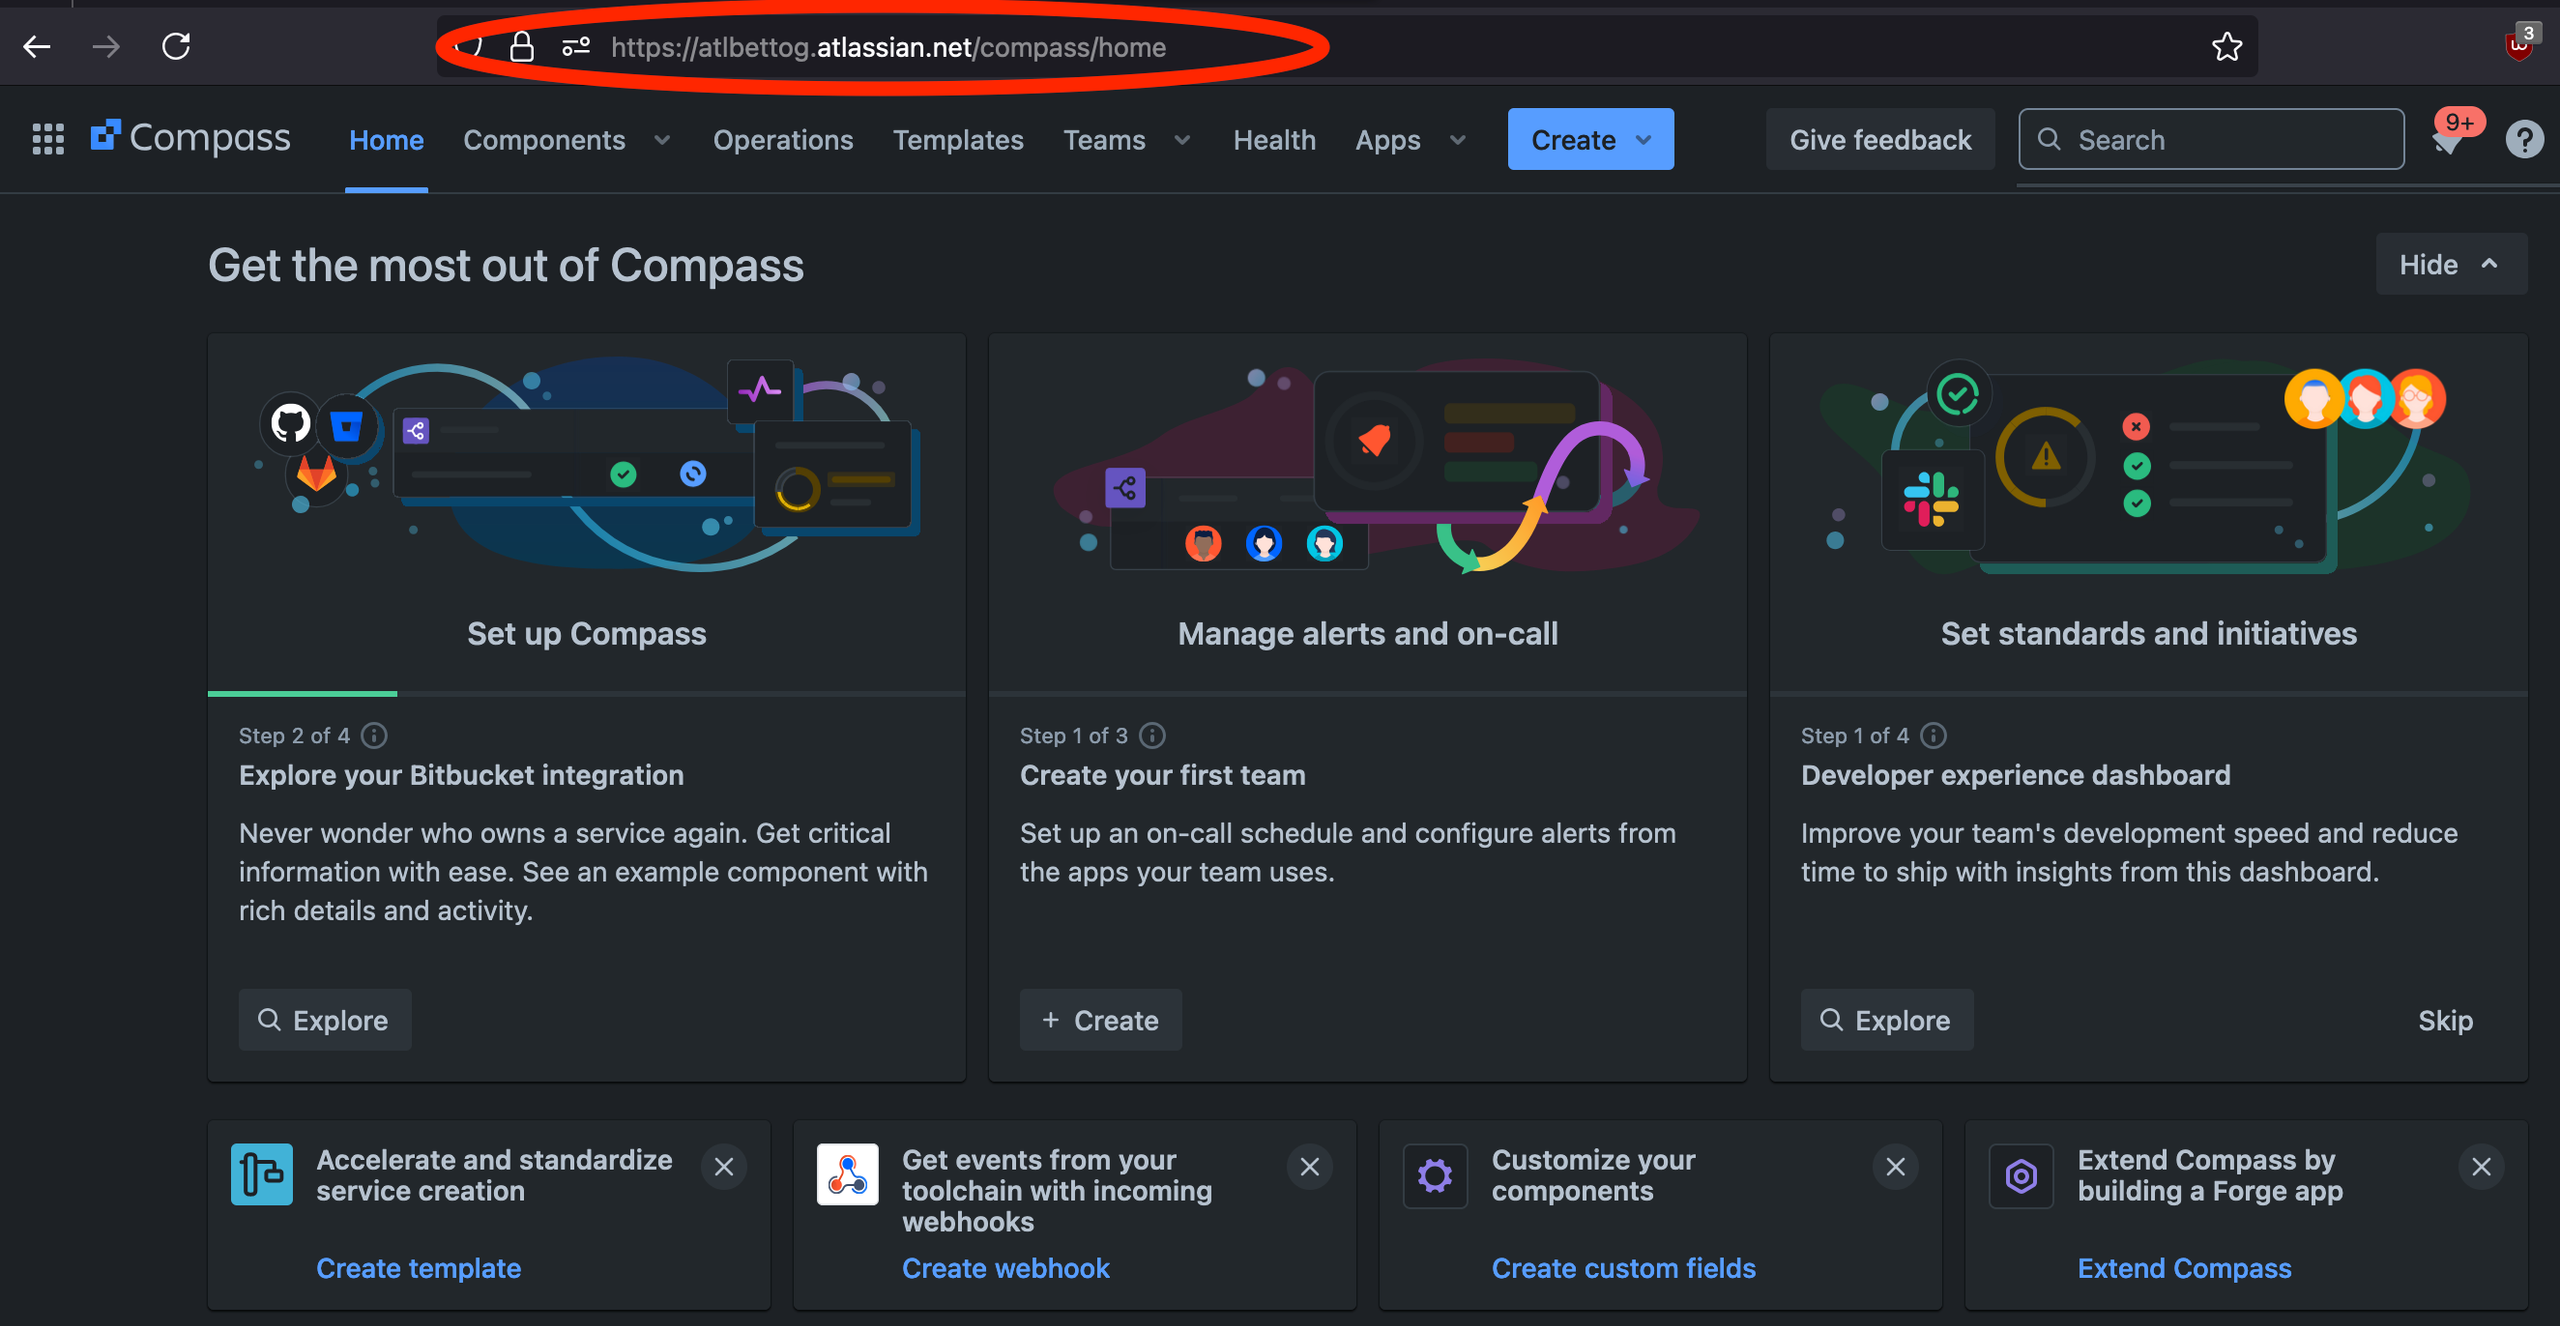
You will be asked for a site URL. The site URL is of the form <site_name>.atlassian.net. You can find it in the URL bar of your Compass instance as shown in the screenshot below.
Forge will ask you if you want to continue to install the app and the two scopes needed for the app. Say Yes to proceed. If forge install is successful, you’ll get an install complete message.
Finally:
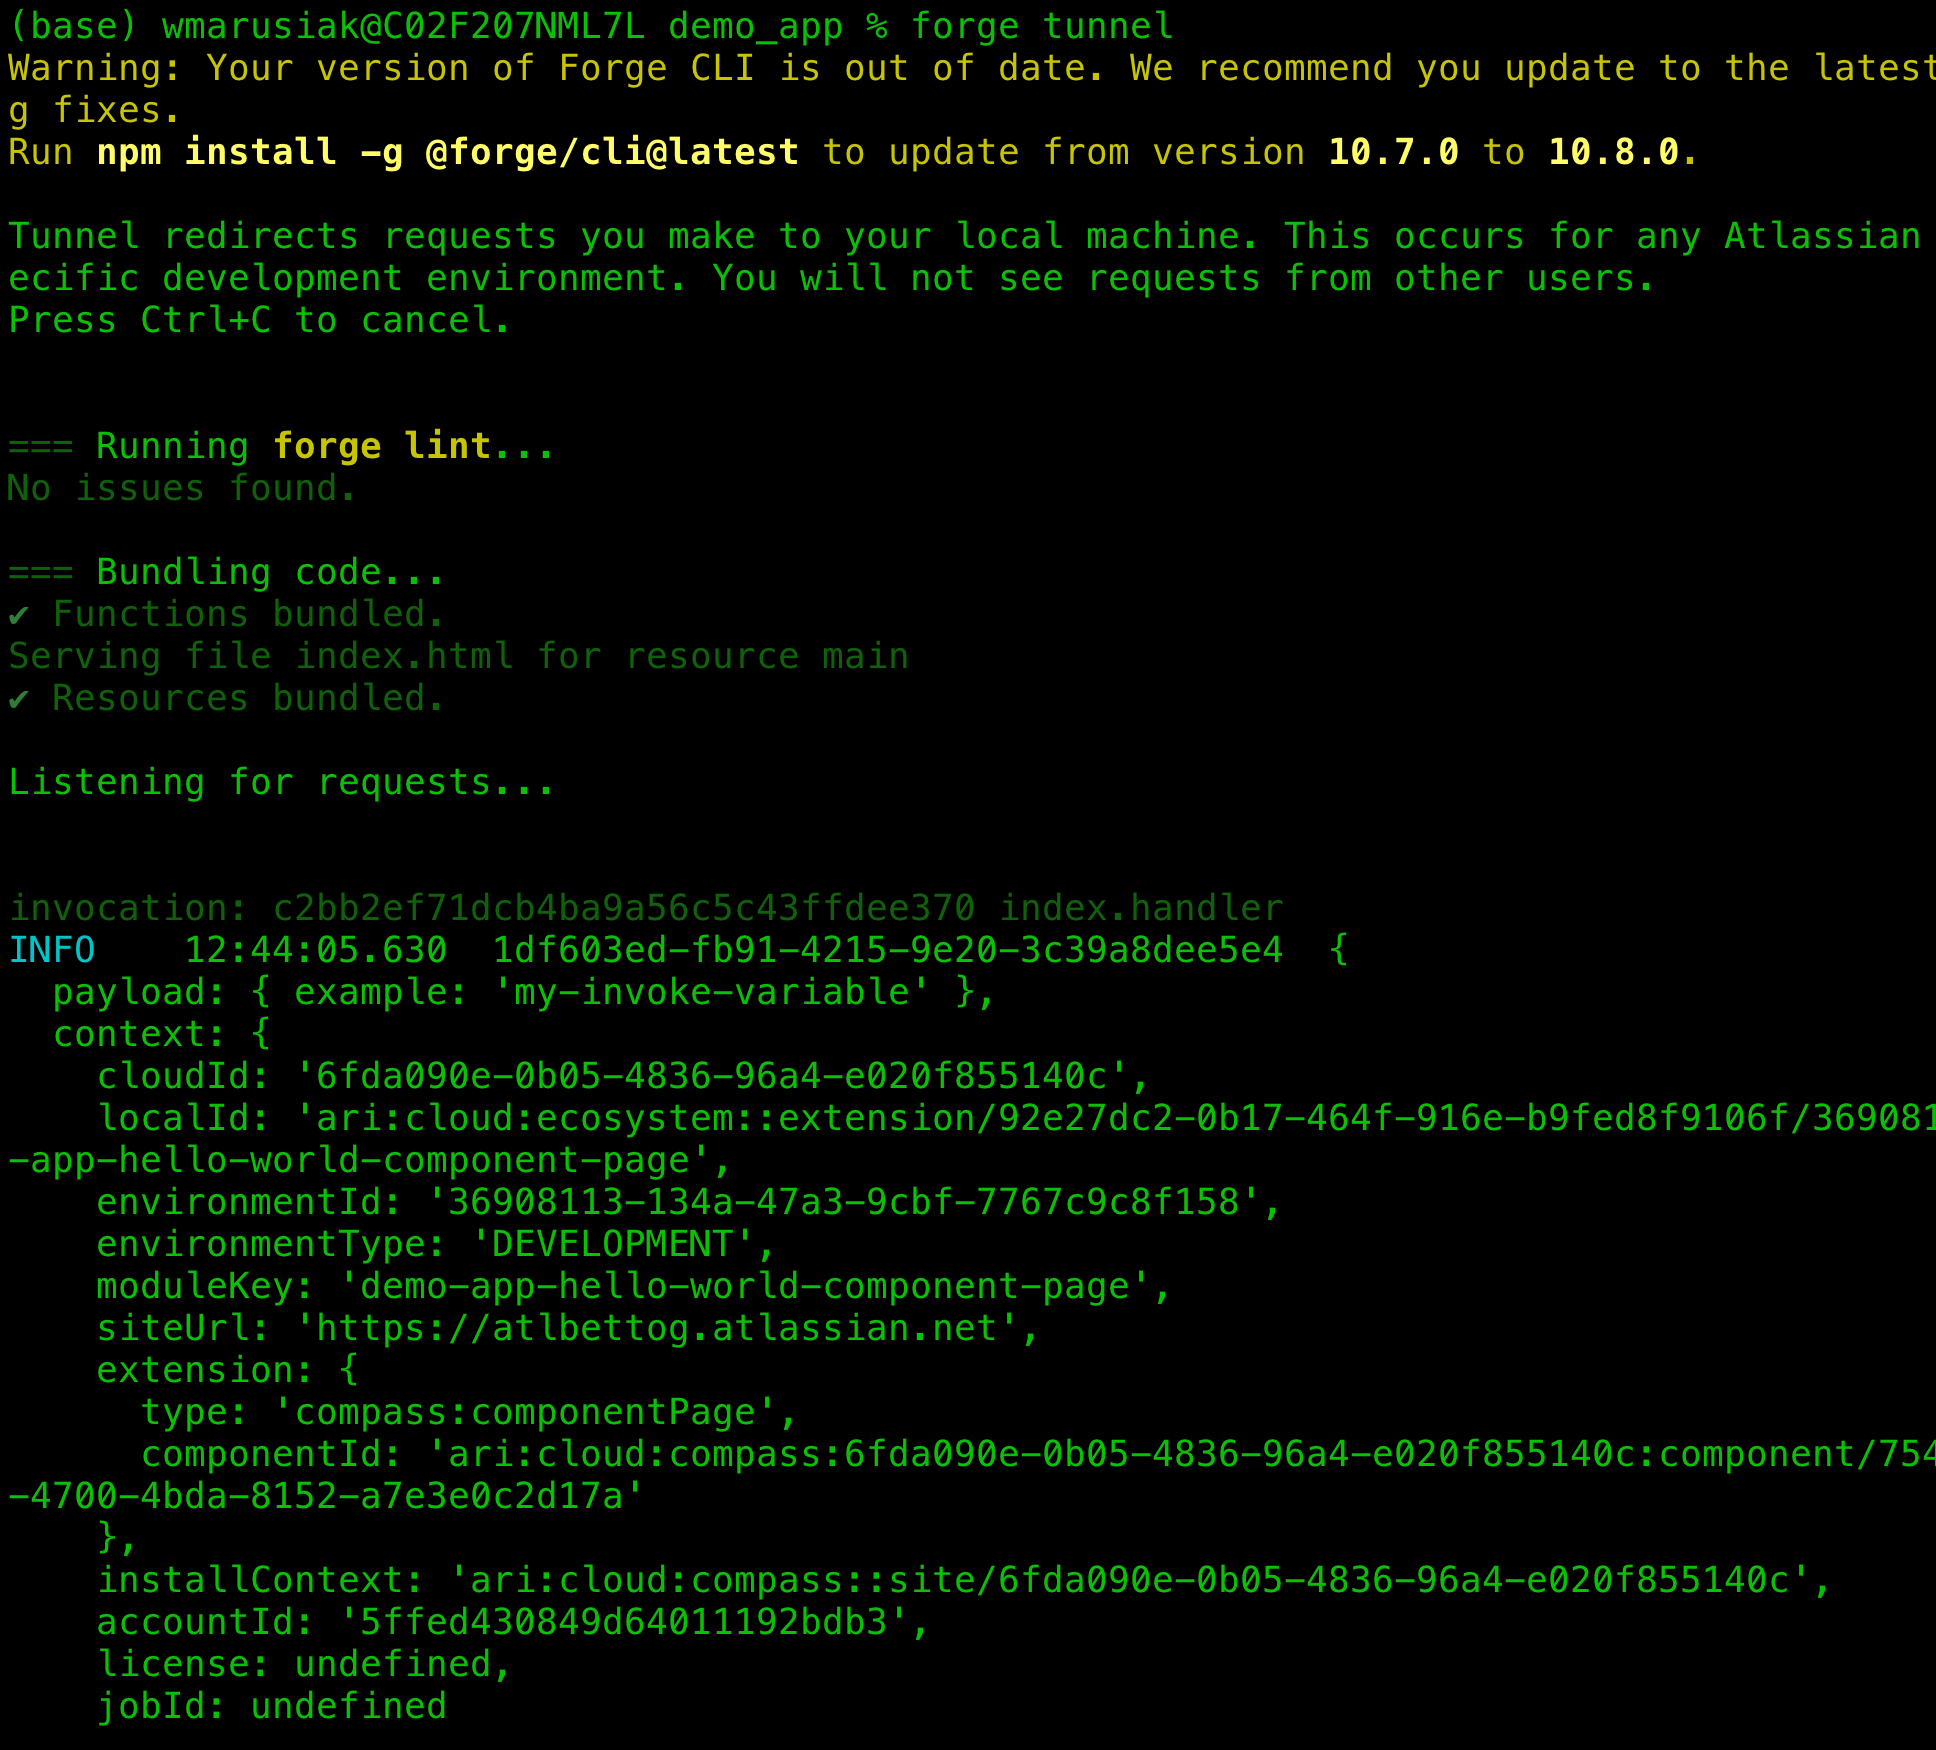
1
2forge tunnel
While the tunnel is running, the code on your computer will handle any requests to the app in Compass. This makes debugging and testing easier because you don't have to redeploy after every change. Note, you do need to redeploy and reinstall after changing the manifest.yml file.
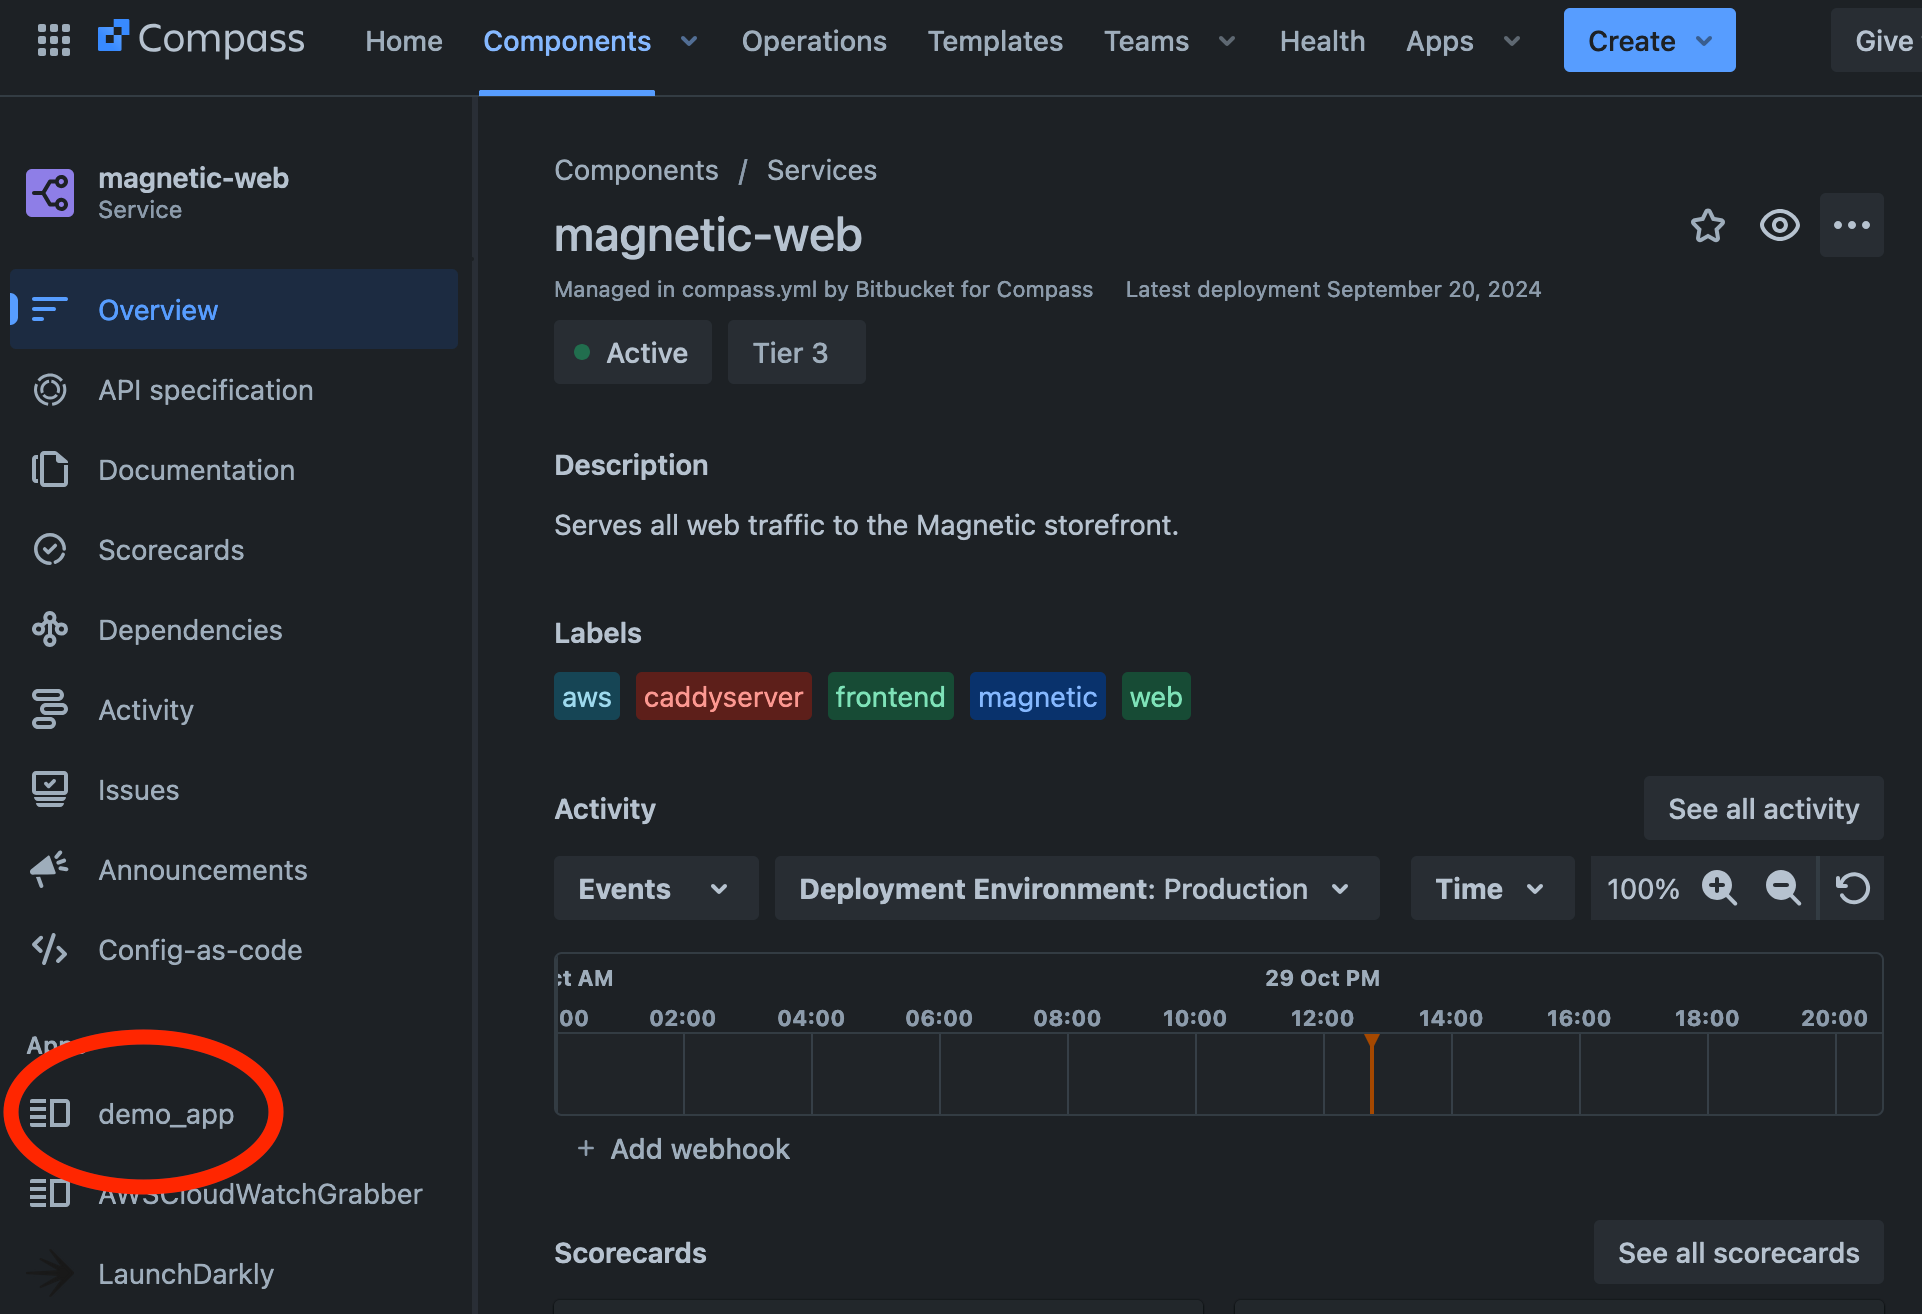
To test the new Forge app, navigate to Compass and click into any Compass component. A link to the new app should appear in the Apps section of the left nav bar.
The structure of a Forge app
For the purposes of this article, we’ll focus on the code in the /src directory and the manifest.yml file in the root directory. The manifest.yml file describes the structure of the app, the resources available, and the permissions it needs.
Here is an example of a basic manifest.yml file that Forge apps start with.
1
2modules:
  compass:componentPage:
    - key: demo-app-hello-world-component-page
      resource: main
      resolver:
        function: resolver
      render: native
      title: demo_app
  function:
    - key: resolver
      handler: index.handler
resources:
  - key: main
    path: src/frontend/index.jsx
permissions:
  scopes:
    - read:component:compass
    - write:component:compass
app:
  runtime:
    name: nodejs24.x
  id: <auto generated id token>
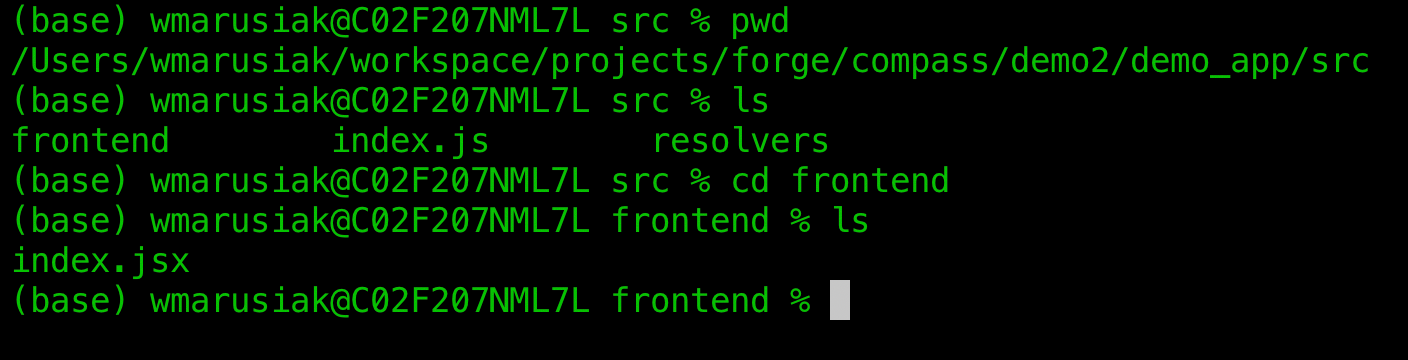
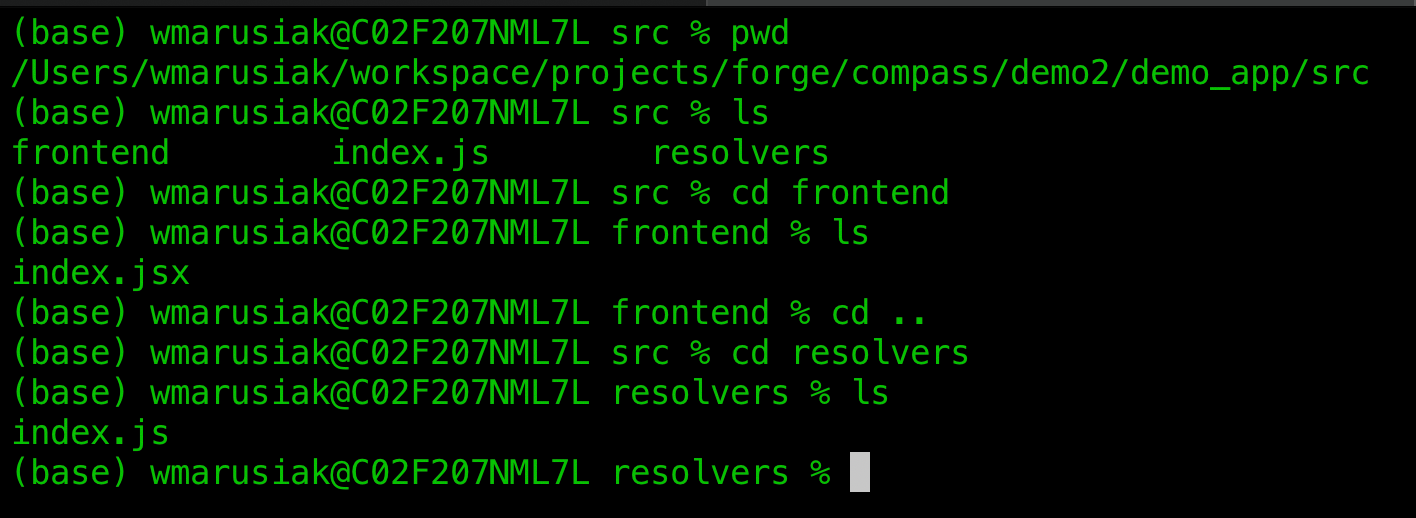
The app's root folder contains the /src directory, which contains the /frontend and /resolvers directories.

The /frontend directory contains the code that renders the app's UI.
The /frontend/index.jsx file the app starts with is very simple. It invokes a resolver to fetch data and renders some strings.
1
2import React, { useEffect, useState } from 'react';
import ForgeReconciler, { Text } from '@forge/react';
import { invoke } from '@forge/bridge';

const App = () => {
  const [data, setData] = useState(null);

  useEffect(() => {
    invoke('getText', { example: 'my-invoke-variable' }).then(setData);
  }, []);

  return (
    <>
      <Text>Hello world!</Text>
      <Text>{data ? data : 'Loading...'}</Text>
    </>
  );
};

ForgeReconciler.render(
  <React.StrictMode>
    <App />
  </React.StrictMode>
);
The /resolvers directory contains the bulk of the app's logic. Put code that fetches and manipulates data here.
The resolvers/index.js file the app starts with defines a simple resolver method that returns a string.
1
2import Resolver from '@forge/resolver';

const resolver = new Resolver();

resolver.define('getText', (req) => {
  console.log(req);

  return 'Hello, world!';
});

export const handler = resolver.getDefinitions();
Now that we have a working skeleton Forge app, we’re going to add some new functionality. We want to connect to AWS CloudWatch so we can pull metric and log data, and render it in our Compass components. To do that, we need to add an admin page to securely collect config information such as AWS access keys. Then we need to add new resolver functions that pull down AWS CloudWatch log and metric data. Finally, we need to modify the front end to render the log data in a table, and the metric data in a graph.
To pull AWS CloudWatch data, we’ll use the AWS Javascript SDK. Follow along to see all of the necessary steps. You can also learn more about the SDK here. We’ll need credentials to use the SDK. For simplicity, we’ll use an AWS access key. We can securely store the access key ID and secret access key using the Forge storage API. Follow along to see all of the necessary steps. More documentation about storage of secrets using Forge Storage is available here.
Adding an admin page to store configuration information
First, add an admin-index.jsx to the /frontend directory.

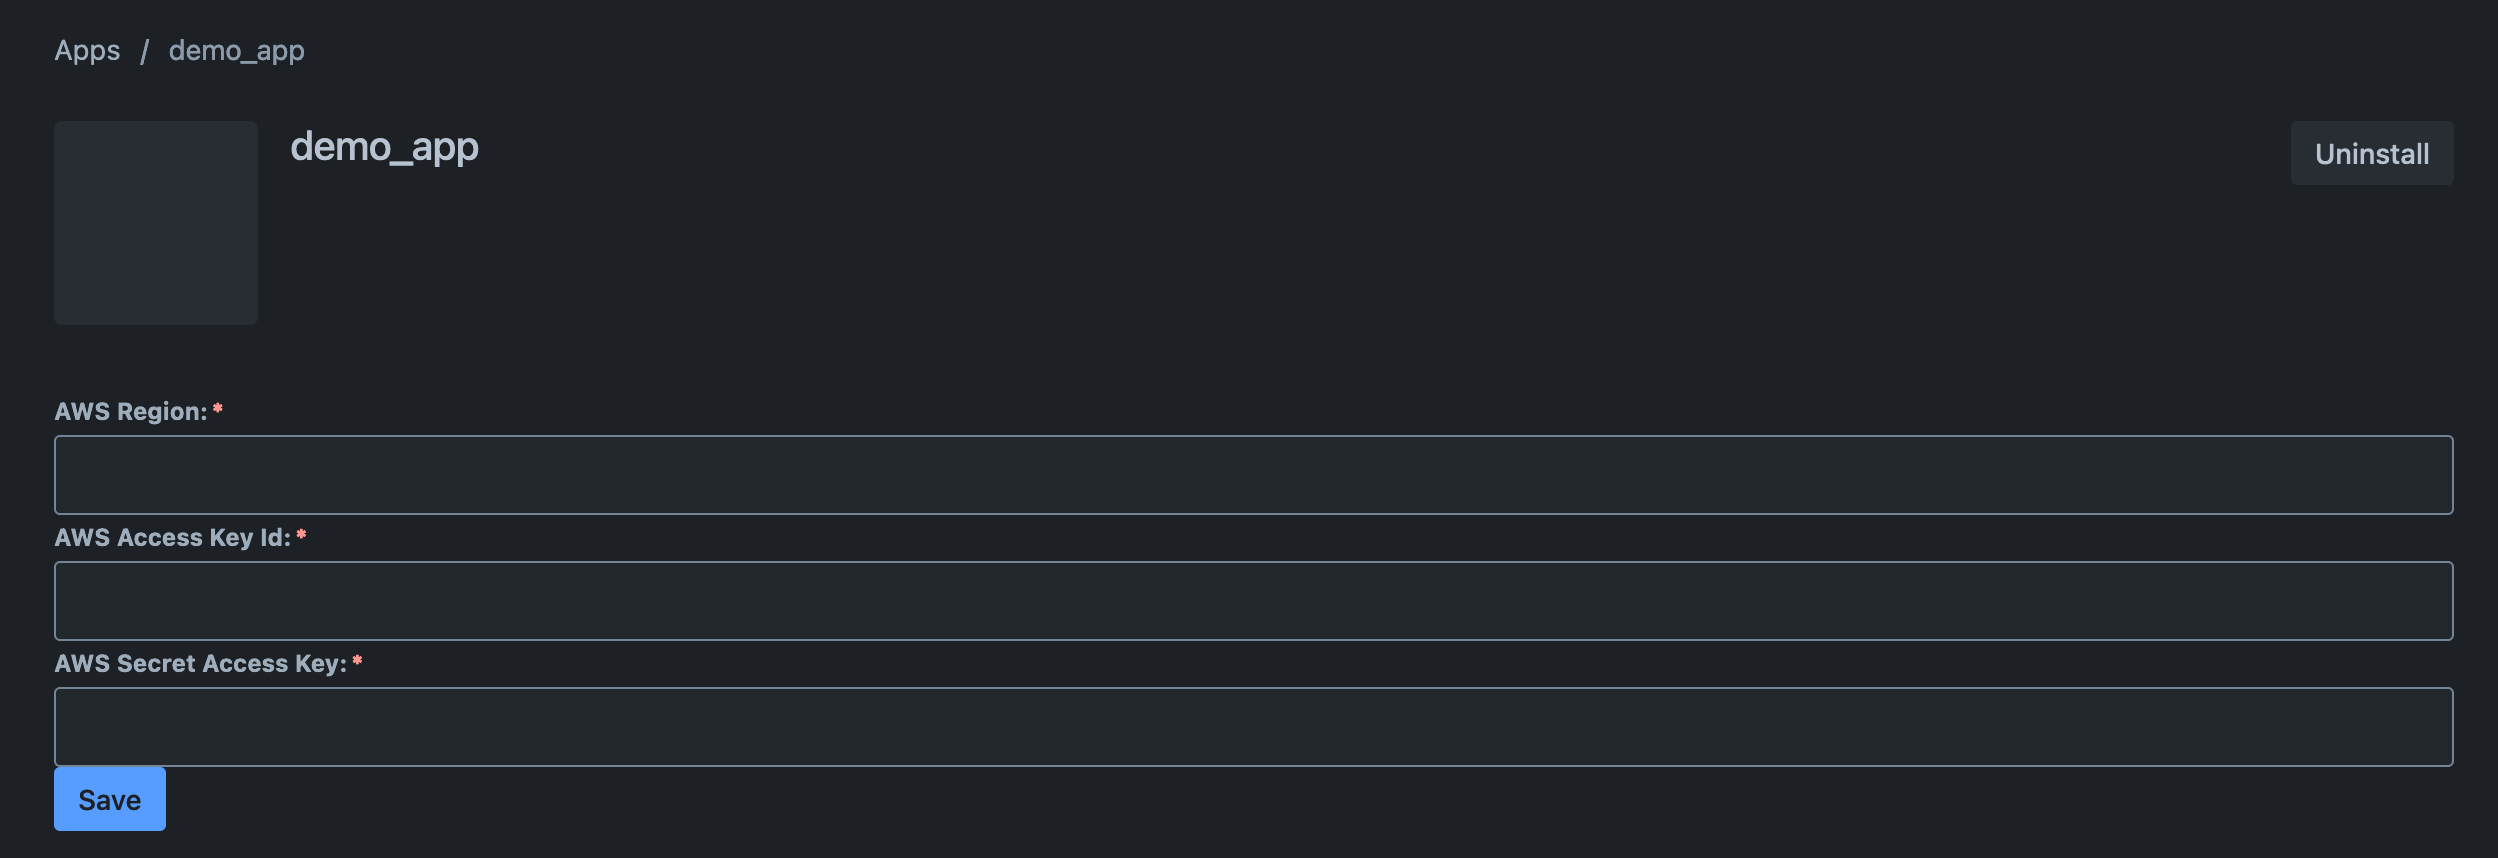
The /frontend/admin-index.jsx file provides 3 text fields for AWS region, AWS access key ID, and AWS secret access key as well as a button to save this information. The snippet below is the content of the new /frontend/admin-index.jsx.
1
2import React, { useEffect, useState } from 'react';
import { invoke } from '@forge/bridge';
import ForgeReconciler, {
  Button,
  Label,
  RequiredAsterisk,
  Textfield,
} from '@forge/react';

const App = () => {
  const [regionVal, setRegionVal] = useState();
  const [accessKeyIdVal, setAccessKeyIdVal] = useState();
  const [secretAccessKeyVal, setSecretAccessKeyVal] = useState();

  const change_aws_region = (event) => {
    setRegionVal(event.target.value);
  };

  const change_aws_access_key_id = (event) => {
    setAccessKeyIdVal(event.target.value);
  };

  const change_aws_secret_access_key = (event) => {
    setSecretAccessKeyVal(event.target.value);
  };

  const save = () => {
    invoke("save", {
      aws_region: regionVal,
      aws_access_key_id: accessKeyIdVal,
      aws_secret_access_key: secretAccessKeyVal,
    });
  };

  return (
    <>
      <Label labelFor="aws_region_text_field">
        AWS Region:
        <RequiredAsterisk />
      </Label>
      <Textfield
        appearance="standard"
        value={regionVal}
        onChange={change_aws_region}
      />
      <Label labelFor="aws_access_key_id_text_field">
        AWS Access Key Id:
        <RequiredAsterisk />
      </Label>
      <Textfield
        appearance="standard"
        value={accessKeyIdVal}
        onChange={change_aws_access_key_id}
      />
      <Label labelFor="aws_secret_access_key_text_field">
        AWS Secret Access Key:
        <RequiredAsterisk />
      </Label>
      <Textfield
        appearance="standard"
        value={secretAccessKeyVal}
        onChange={change_aws_secret_access_key}
      />
      <Button appearance="primary" type="submit" onClick={save}>
        Save
      </Button>
    </>
  );
};

ForgeReconciler.render(
  <React.StrictMode>
    <App />
  </React.StrictMode>
);
The button calls a local method called save that invokes the save resolver function. The save function uses the Forge API storage setSecret function.
Add the following code to /resolvers/index.js. First import kvs from the Forge KVS package.
1
2import { kvs } from '@forge/kvs';
The add the save function.
1
2resolver.define("save", (req) => {
  kvs.setSecret("aws_region", req.payload.aws_region);
  kvs.setSecret("aws_access_key_id", req.payload.aws_access_key_id);
  kvs.setSecret("aws_secret_access_key", req.payload.aws_secret_access_key);
});
Run the following command in the terminal to install the Forge API.
1
2npm install @forge/api
Finally, update the manifest.yml file with a new module, function handler, resource, and permission.
1
2modules:
  compass:componentPage:
    - key: demo-app-hello-world-component-page
      resource: main
      resolver:
        function: resolver
      render: native
      title: demo_app
  compass:adminPage:
    - key: admin-page-ui
      resource: admin-main
      resolver:
        function: admin-resolver
      render: native
      title: demo_app
  function:
    - key: resolver
      handler: index.handler
    - key: admin-resolver
      handler: index.handler
resources:
  - key: main
    path: src/frontend/index.jsx
  - key: admin-main
    path: src/frontend/admin-index.jsx
permissions:
  scopes:
    - read:component:compass
    - write:component:compass
    - storage:app
app:
  runtime:
    name: nodejs24.x
  id: <auto generated id token>
The module.
1 2compass:adminPage: - key: admin-page-ui resource: admin-main resolver: function: admin-resolver render: native title: demo_app
The function handler.
1 2- key: admin-resolver handler: index.handler
The resource.
1 2- key: admin-main path: src/frontend/admin-index.jsx
The permission.
1 2- storage:app
To deploy these changes run forge deploy and install as follows.
1
2forge deploy
forge install --upgrade
To test the new functionality go back to Compass, click the Apps button in the top nav bar, and then “Manage your apps”. The demo_app will have a new Configure option.
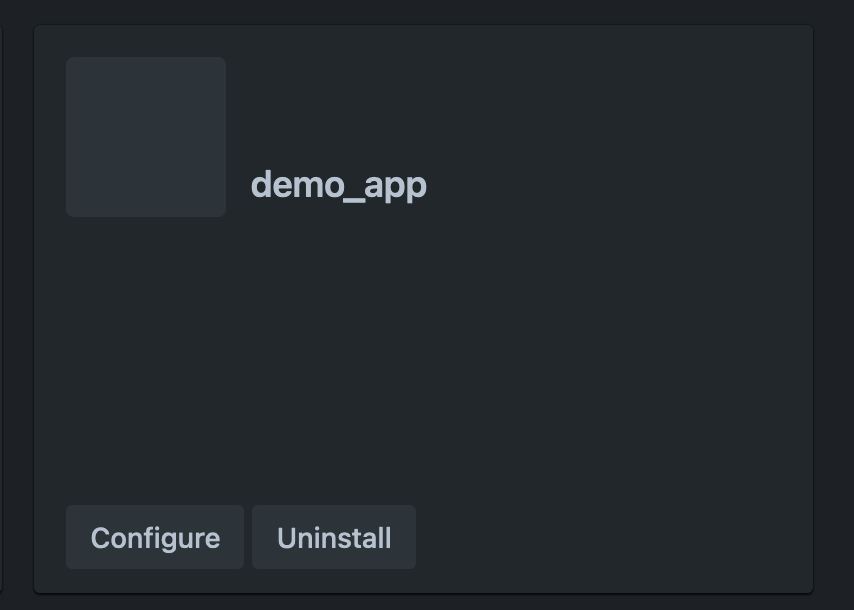
Click on Configure to go to the screen built in /frontend/admin-index.jsx. You can expand this configuration page to track a wide variety of additional information. For example, a list of metrics and logs to render to replace the hardcoded ones in this demo.
Saving the AWS credentials unblocks us and we can move on to getting data from AWS CloudWatch and rendering it. For simplicity sake, the demo code just saves the credentials. It does not have an on screen prompt to show it was successful.
Get data from AWS CloudWatch
Before you proceed with this section it is important to have some existing metric and log data to pull from AWS CloudWatch. You need to know the namespace, metric name, and metric dimensions to get metric information. You need to know the log group identifier and log stream name to get log information.
To use the AWS Javascript SDK, install some AWS dependencies.
1
2npm install @aws-sdk/client-cloudwatch-logs
npm install @aws-sdk/client-cloudwatch
Then, add two functions to the /resolvers/index.js file. The first function fetches AWS CloudWatch log data.
1
2resolver.define("get_logs", async (req) => {
  try {
    const aws_region = await kvs.getSecret("aws_region");
    const aws_access_key_id = await kvs.getSecret("aws_access_key_id");
    const aws_secret_access_key = await kvs.getSecret(
      "aws_secret_access_key"
    );

    const config = {
      region: `${aws_region}`.toString(),
      credentials: {
        accessKeyId: `${aws_access_key_id}`.toString(),
        secretAccessKey: `${aws_secret_access_key}`.toString(),
      },
    };

    const cwlClient = new CloudWatchLogsClient(config);
    const cwlInput = {
      logGroupIdentifier:
        "<log group identifier>",
      logStreamName: "<log stream name>",
      startFromHead: true,
      unmask: true,
    };

    var cwlResponse;
    const cwlCommand = new GetLogEventsCommand(cwlInput);
    try {
      cwlResponse = await cwlClient.send(cwlCommand);
    } catch (e) {
      console.log(e.$response);
    }
    const eventData = cwlResponse.events;

    const rows = eventData.map((event1, index) => ({
      key: `row-${index}-${event1.eventId}`,
      cells: [
        {
          key: event1.timestamp,
          content: event1.timestamp,
        },
        {
          key: event1.message,
          content: event1.message,
        },
      ],
    }));

    const head = {
      cells: [
        {
          key: "timestamp",
          content: "timestamp",
          isSortable: true,
        },
        {
          key: "message",
          content: "message",
          shouldTruncate: true,
          isSortable: true,
        },
      ],
    };

    return [head, rows];
  } catch (e) {
    console.log("get_logs error: " + e);
  }
});
The second function fetches AWS CloudWatch metric data.
1
2resolver.define("get_metrics", async (req) => {
  try {
    const aws_region = await kvs.getSecret("aws_region");
    const aws_access_key_id = await kvs.getSecret("aws_access_key_id");
    const aws_secret_access_key = await kvs.getSecret(
      "aws_secret_access_key"
    );

    const config = {
      region: `${aws_region}`.toString(),
      credentials: {
        accessKeyId: `${aws_access_key_id}`.toString(),
        secretAccessKey: `${aws_secret_access_key}`.toString(),
      },
    };

    const cwClient = new CloudWatchClient(config);
    const cwInput = {
      Namespace: "<namespace>",
      MetricName: "<metric name>",
      Dimensions: [
        {
          Name: "FunctionName",
          Value:
            "<function name>",
        },
      ],
      IncludeLinkedAccounts: false,
    };

    const cwCommand = new ListMetricsCommand(cwInput);
    var cwResponse;
    try {
      cwResponse = await cwClient.send(cwCommand);
    } catch (e) {
      console.log("cwResponse error: " + e);
    }

    const getMetricDataInput = {
      MetricDataQueries: [
        {
          Id: "asdf123",
          MetricStat: {
            Metric: {
              Namespace: "<namespace>",
              MetricName: "<metric name>",
              Dimensions: [
                {
                  Name: cwResponse.Metrics[1].Dimensions[0].Name,
                  Value: cwResponse.Metrics[1].Dimensions[0].Value,
                },
              ],
            },
            Period: 3600,
            Stat: "Sum",
            Unit: "Count",
          },
          ReturnData: true,
        },
      ],
      StartTime: new Date(2024, 0, 0),
      EndTime: new Date(2024, 10, 0),
    };

    const getMetricDataCommand = new GetMetricDataCommand(getMetricDataInput);
    var getMetricDataResponse;
    try {
      getMetricDataResponse = await cwClient.send(getMetricDataCommand);
    } catch (e) {
      console.log("getMetricDataResponse error: " + e);
    }

    var timestamps = getMetricDataResponse.MetricDataResults[0].Timestamps;
    var values = getMetricDataResponse.MetricDataResults[0].Values;

    const returnValue = [];
    timestamps.forEach(function (timestamp, i) {
      returnValue[i] = [
        timestamp,
        values[i],
        getMetricDataResponse.MetricDataResults[0].Label,
      ];
    });

    return returnValue;
  } catch (e) {
    console.log(e);
  }
});
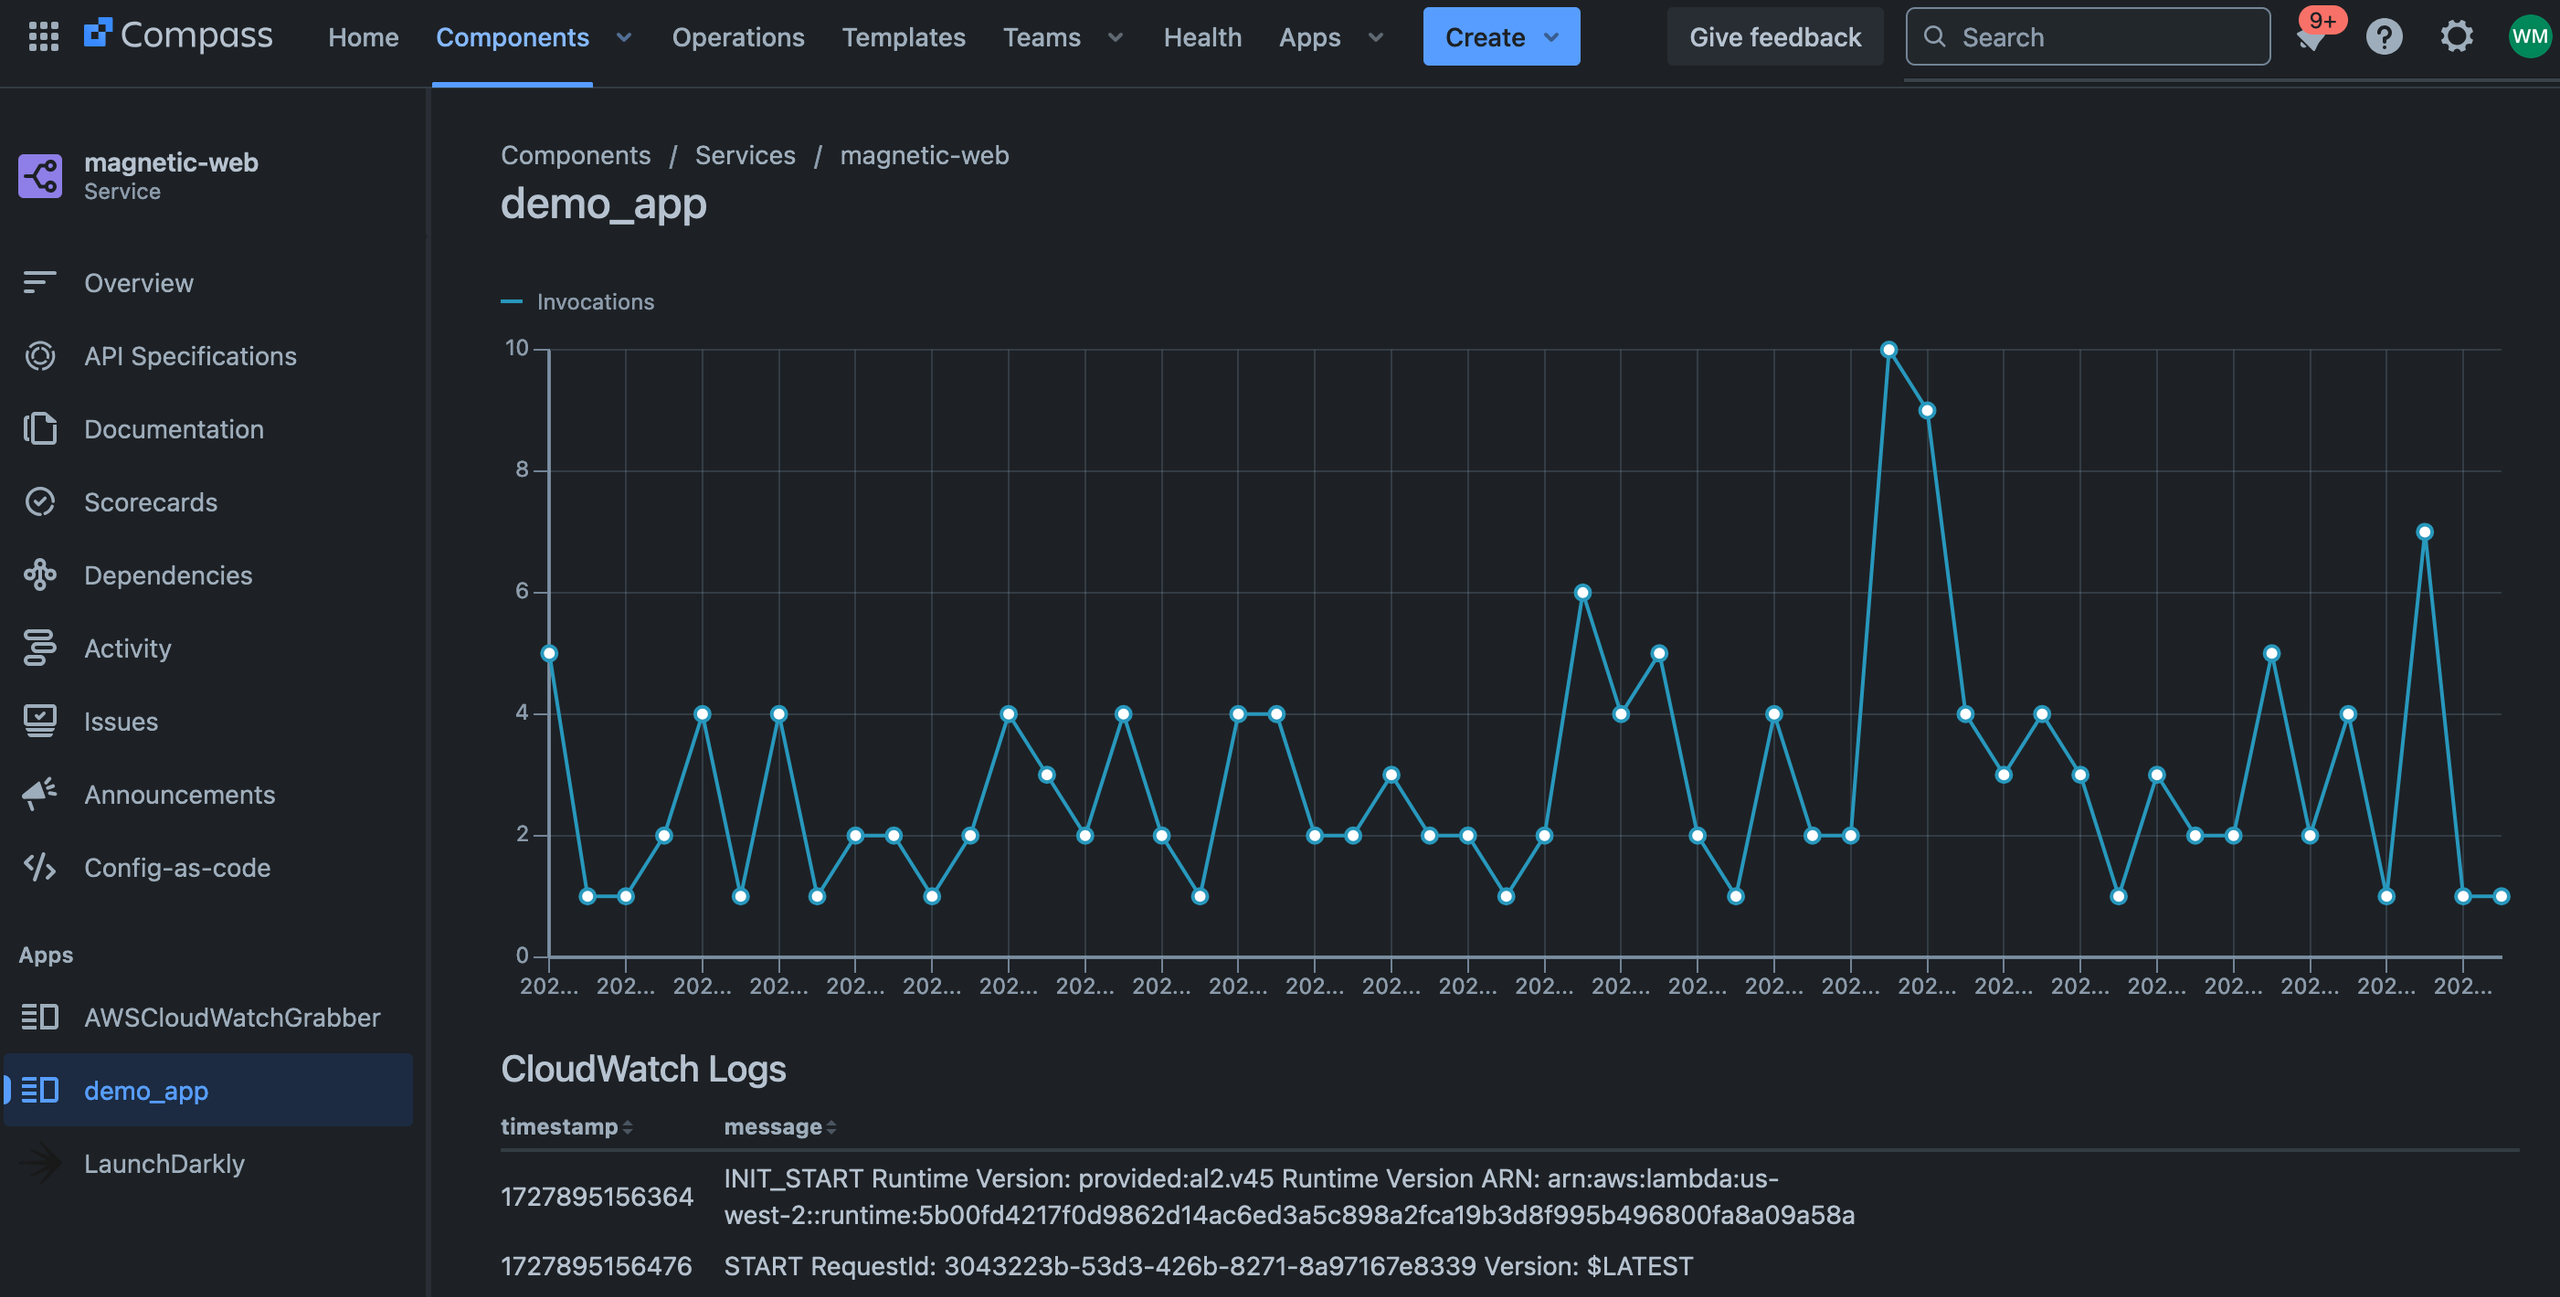
Next, modify /frontend/index.jsx to invoke the new resolver functions, and render the AWS CloudWatch log data in a table and the AWS CloudWatch metric data in a graph.
1
2import React, { useEffect, useState } from 'react';
import { invoke } from '@forge/bridge';
import ForgeReconciler, { DynamicTable, LineChart } from '@forge/react';

const App = () => {
  const [metric_data, set_metric_data] = useState(null);
  useEffect(() => {
    invoke("get_metrics", {}).then(set_metric_data);
  }, []);

  const [log_data, set_log_data] = useState(null);
  useEffect(() => {
    invoke("get_logs", {}).then(set_log_data);
  }, []);

  return (
    <>
      <>
        {metric_data ? (
          <LineChart
            data={metric_data}
            xAccessor={0}
            yAccessor={1}
            colorAccessor={2}
          />
        ) : (
          "Loading..."
        )}
      </>
      <>
        {log_data ? (
          <DynamicTable
            caption="CloudWatch Logs"
            head={log_data[0]}
            rows={log_data[1]}
          />
        ) : (
          "Loading..."
        )}
      </>
    </>
  );
};

ForgeReconciler.render(
  <React.StrictMode>
    <App />
  </React.StrictMode>
);
Add this to the permissions section of the manifest.yml file to give the Forge app permission to access the necessary AWS endpoints. In this example I am pointing to us-west-2 because that is where my app runs. You can change this to whatever region has the data you need.
1 2external: fetch: backend: - "*.us-west-2.amazonaws.com" client: - "*.us-west-2.amazonaws.com"
Your permissions should look like this after adding the external fetch permissions.
1
2permissions:
  scopes:
    - read:component:compass
    - write:component:compass
    - storage:app
  external:
    fetch:
      backend:
        - "*.us-west-2.amazonaws.com"
      client:
        - "*.us-west-2.amazonaws.com"
Then run forge deploy and forge install.
1
2forge deploy
forge install --upgrade
If everything has gone right, we can refresh the demo_app in one of our Compass components and we’ll have data.
Now that the app is working the final thing we need to do is give our app an icon.
Add an icon
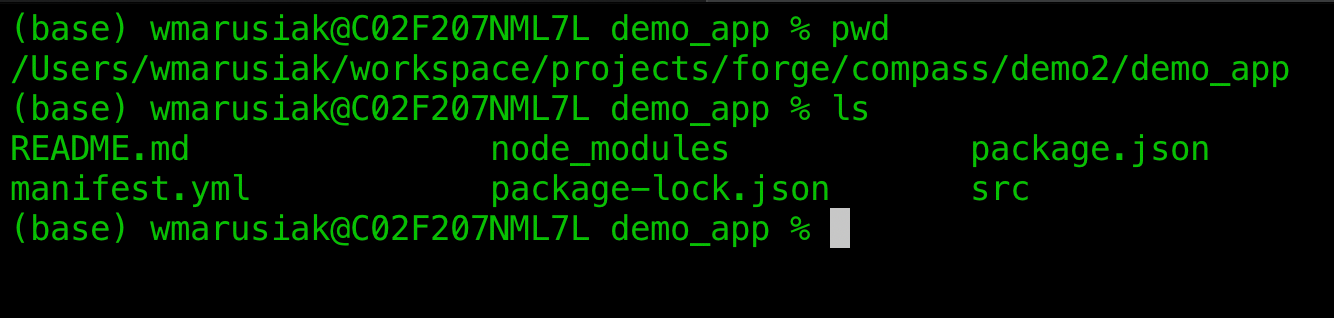
To add an icon, start by adding a /resources/icons directory to the root directory of the app. Then, add an image file you want to use as a logo.
1
2(base) wmarusiak@C02F207NML7L icons % pwd
/Users/wmarusiak/workspace/projects/forge/compass/demo2/demo_app/resources/icons
(base) wmarusiak@C02F207NML7L icons % ls
logo.png
(base) wmarusiak@C02F207NML7L icons %
Next, update the manifest.yml file by adding a resource for the new logo image.
1 2- key: icons path: resources
And tell the admin page component to use the logo image.
1 2compass:adminPage: - key: admin-page-ui resource: admin-main resolver: function: admin-resolver render: native title: AWSCloudWatchGrabber icon: resource:icons;icons/logo.png
After modifying the manifest.yml, deploy and install the app again.
1
2forge deploy
forge install --upgrade
Refresh the “Manage your apps” page and the demo app will have an icon.
![]()
If everything went well, you now have a working Forge app for Compass. The Forge app pulls data from AWS CloudWatch and renders it in Compass component pages. Following this model, you can augment your Atlassian apps with data from any application your team uses. Check out the links below for reference and additional information.
Next steps
To learn more about the technologies covered in this article please take a look at the following resources:
Rate this page: