Atlassian timeline for ending Connect support
Atlassian has announced the timeline for Connect's phased end-of-support.
From Sep 17, 2025, only Forge apps can be submitted to the Atlassian Marketplace. All new extensibility features will be delivered only on Forge.
Have an existing Connect app? Find out how to incrementally adopt Forge from Connect.
List a Connect app
If you built a Hello World Marketplace app, ran Jira Cloud in development mode, and installed your Marketplace app manually into the Atlassian app, the next step is to test a Marketplace installation of your Marketplace app.
This is important if you want to test your Marketplace app in a licensed state, or start along the path to listing your Marketplace app, either as a private or public, free or paid Marketplace app.
Before you begin
There are a couple of things you need to do before creating your Marketplace listing:
- Create or get access to a cloud-hosted Atlassian app instance
Get an environment for testing by signing up for a free development cloud Atlassian app. - Make sure your Marketplace app and your
atlassian-connect.jsondescriptor file are served over HTTPS
Your Marketplace app must have abaseUrlthat starts withhttps://. Note, your HTTPS certificate can't be self-signed. - Check you have an Atlassian user account associated with the Marketplace
You can create a new partner profile when you create your listing, or add your account to an existing profile by somebody already associated with it. Sign up for a Marketplace account. - Make sure you understand your legal obligations.
- Create a privacy policy.
End User Terms and Data Processing Addendums (DPA)
To transact with customers in cloud, you'll need End User Terms, also known as a customer agreement or Terms of Service (TOS). Also, if you are a Data Processor under GDPR, or process personal data under other personal data laws and/or regulations, you'll need a DPA.
If you don’t have a customer agreement yet, Atlassian offers a standard, customizable end-user agreement that may meet your needs.
Learn more about the standard, customizable end-user agreement.
Create your Marketplace listing
Once you've done the above, create your Connect listing:
- Log in to https://marketplace.atlassian.com/ with your vendor account.
- Click Publish a new app from the profile menu in the upper right.
- Choose a vendor. If you don't have a vendor profile yet, click Register your organization and contact details to configure a new vendor profile for your app.
- For apps you'd like to list on the Marketplace, choose Public. For internal-only apps, choose Private as the app visibility option. If you intend to use the app for internal-use only, it can remain private for the lifetime of the listing.
- Provide the URL to your app descriptor.
- Follow the instructions to configure the remaining fields and options on the form.
Many of the fields are optional and only apply to public listings. If you're listing privately, you can leave these
for later. There are a few fields that require a little more explanation for an app listing:
- Payment model: Choose only Free or Paid via Atlassian. Cloud apps can't be listed as paid via vendor.
- Availability: This field specifies the Atlassian application deployment model (Cloud or Server). Cloud apps are only available for cloud-hosted applications, so this field is pre-populated accordingly for you.
- Version visibility: While the listing has a visibility setting, so do individual versions of your app. This lets you beta test version updates privately before publishing them. While different versions of an app can have different visibility settings, note that if you make the listing itself private, all versions of the apps also become private, even if they were previously published as public versions.
- Beta release: Indicates that your app version is in the testing stage only. Choose this option if you intend to list the app publicly, but it isn't ready yet.
- Compatible application: For a cloud app, after you choose the product you are targeting and the minimum version, the Compatible to version is uneditable (that is, it defaults to Any). Because cloud apps use stable, forward-compatible web APIs and cloud versions are frequently updated, the notion of a latest-compatible version is absent for Atlassian cloud apps. It is applicable, however, to downloadable Java apps.
- Click Submit.
Now, you can generate test license tokens for your app and install it in cloud instances, either through MyAtlassian for live instances, or through the descriptor link of the listing view for locally-running instances. The next section provides more detail on how to do this.
Access tokens
If you created a private listing in the Marketplace, you can create and use access tokens. Access tokens are like licenses that you can generate and manage without going through the usual licensing process. They let you install and test apps under development in live cloud instances. You can also use them to install and use private apps if you only intend your app for internal use.
If your app is paid, after you install your app and apply a token, you can test your app against various license states like valid, expired, and unlicensed.
Access token restrictions
While access tokens are like licenses, a few restrictions apply.
- 50-token limit: Each app can only have 50 active tokens at a time.
- Token removal: You can delete or remove tokens at any time. If you have 50 active tokens, you can remove one to be able to create another. Apps in cloud instances with deleted tokens are treated as unlicensed.
- No reusability: A token is bound to a particular app and cloud instance. After a token is applied to an Atlassian product site, it is permanently associated with that instance, and can't be used with another.
Create tokens
You can create a token from your app's private listing on the Marketplace. If you've already installed the app, you can create tokens directly from the Manage listings page. If you're generating a token to share with an external tester, you need to create the token in the Marketplace.
Generate an access token from a Marketplace listing
After you create a private listing for an app, you can generate an access token from your listing:
- Log in to https://marketplace.atlassian.com/ with your partner account.
- Click Manage partner account from the profile menu in the upper right.
- On the Apps page, select the name of your private app.
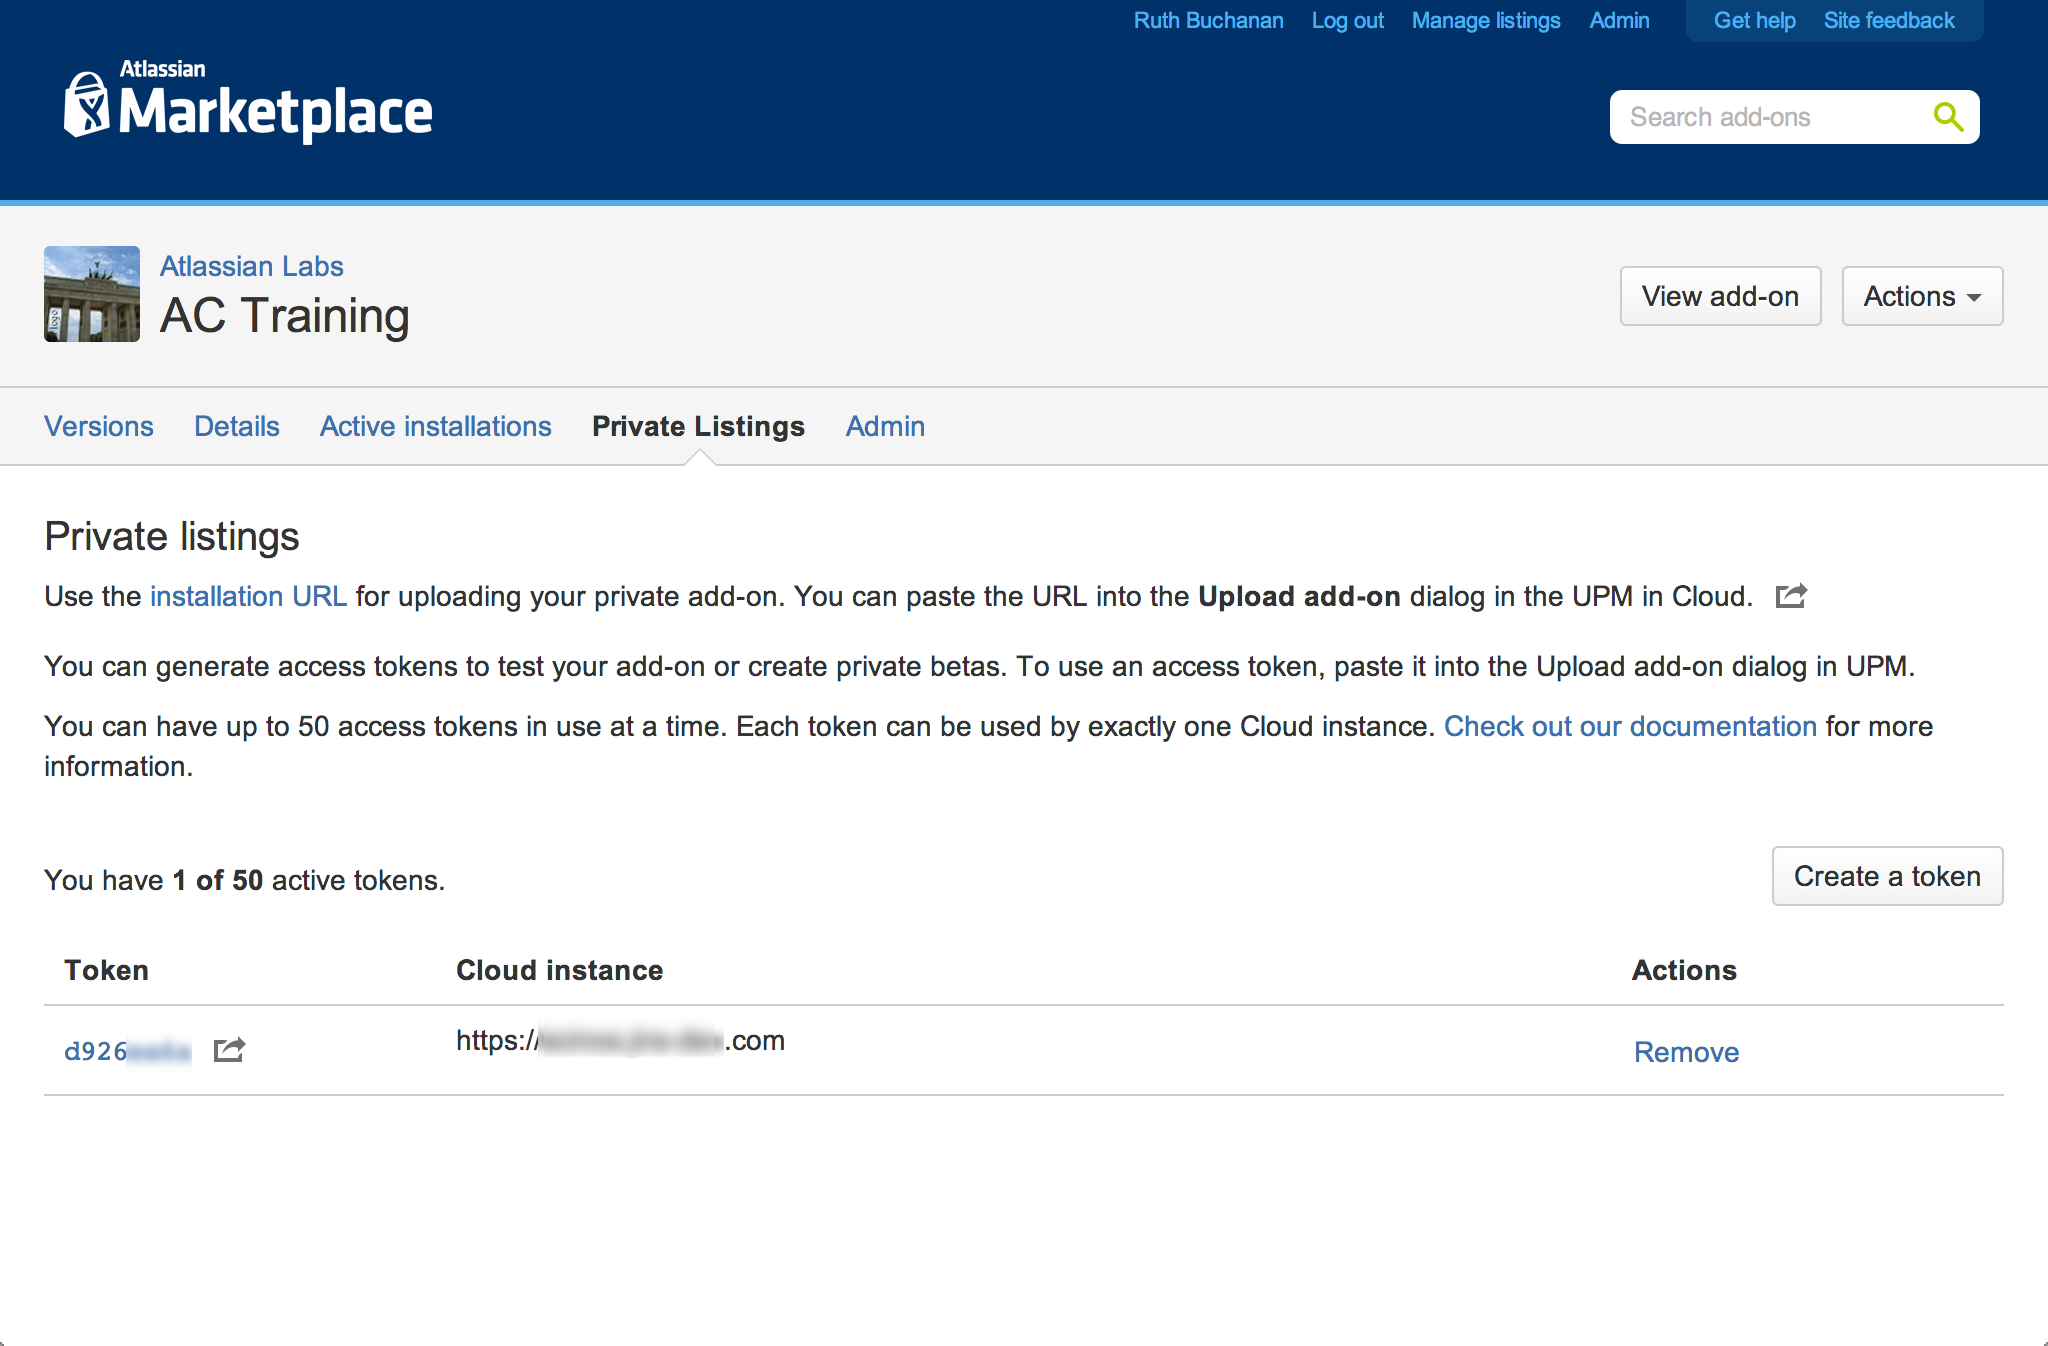
- Select the Private listings tab.
- Select Create a token. The Private listings tab appears only for private, cloud-hosted apps. If you don't see the button here, make sure your listing is private and cloud-hosted.
New tokens appear in the subsequent list. From here, you can either apply them manually to an app if it's already installed, or use the link for the token to install the app and install the app at one time. Delete tokens using the Remove button.
The Marketplace token links are installation URLs that include the token. You can share this link with external customers or partners for testing.
Install apps with access tokens
After generating the token, you can use the token URL to install the app and apply the token in the same process:
- Copy your token link from your Private listings page in Marketplace.
- Log in to the admin.atlassian.com and select the correct organization.
- Select
•••next to the product you want to install the app to, and select Manage apps. - On the Manage apps page, select Settings at the bottom of the page.
- Check the box to Enable private listings.
- Back in the Manage apps page, click Upload app.
- Paste the URL of your descriptor from the Marketplace, and click Upload.
Your descriptor is retrieved and installed, and your token is applied. You should see an "Installed and ready to go!" dialog.
Now you can test your app, modify its license states (if it's paid), or manage the token.
To test, set the license state to the one you want. From the License status menu, choose the state you'd like to test - active trial, subscription, inactive subscription, etc.
The usual options for managing the subscription for your app will be disabled in the user interface, since the token is the mechanism that serves this function for now.
Apply a token from admin.atlassian.com
You can also generate a token directly from a listing directly in the product like Jira or Confluence. You can do this from the Manage apps page in the admin.atlassian.com:
- Follow the instructions above to Enable private listings from the Settings dialog.
- Install the app using your HTTPS-hosted
atlassian-connect.jsondescriptor URL. Select Upload app and paste the URL into the corresponding field. - After installing the app, expand the details view for the app.
- Select the plus (+) symbol next to Access token.
- Log in using an account associated with your Marketplace partner profile.
- Follow the in-app directions to generate and apply the token.
If you need to delete a token from an app, click the edit icon next to the token in the app view, and clear the content and save. This deletes your token in the instance, although it still exists on the Marketplace listing. You can disable an app in the administration console after you have removed its token.
Rate this page: